12-4
Section
Outputting the Screen Image
457
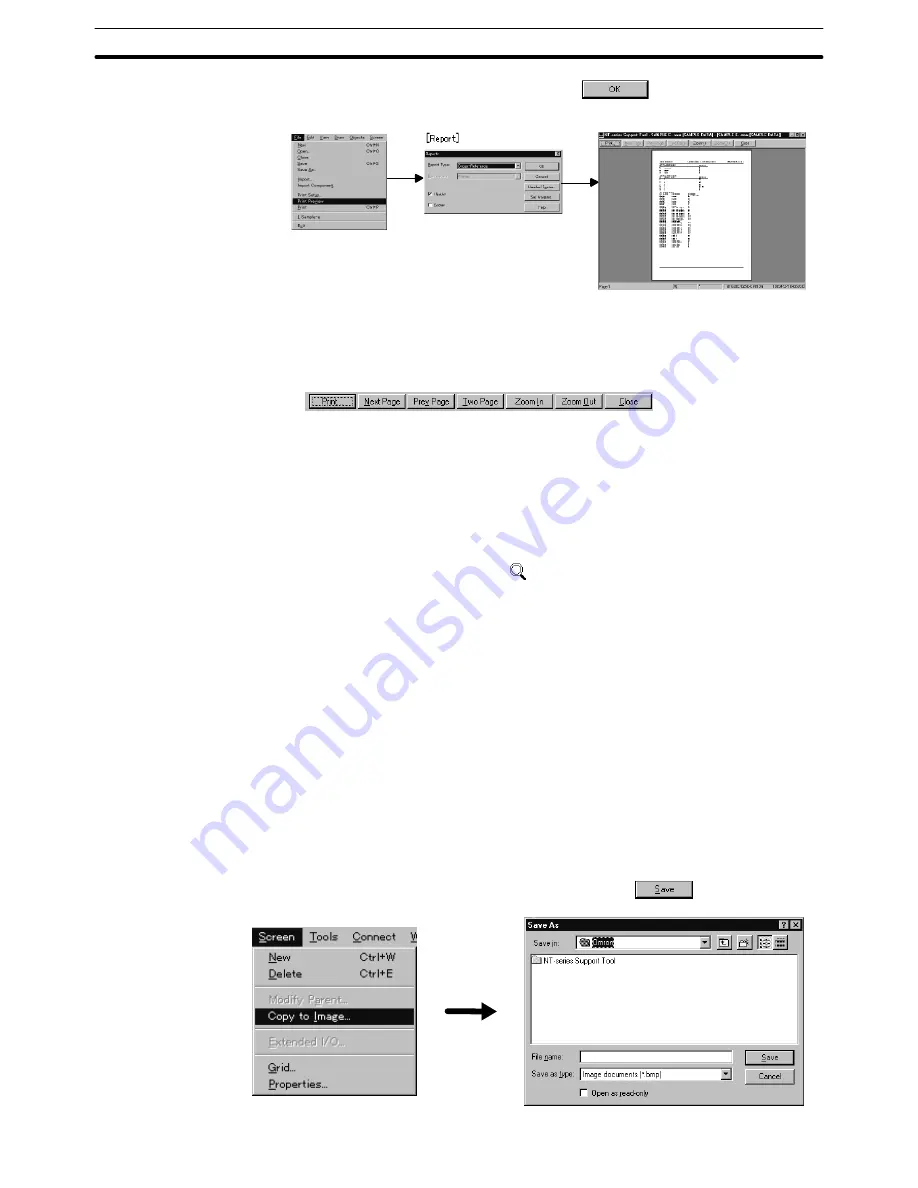
(4) After completing the setting, click on
in the Reports dialog box.
For details, Reports dialog box, the Set Margins dialog box, and the Header and
Footer dialog box, refer to 12-2-2 Output to a Printer.
The operation procedure at the preview screen is shown below.
Print:
Specify this item to output the data to the printer.
Next Page:
Specify this item to display the next page.
Prev Page:
Specify this item to display the previous page.
Two Page:
Specify this item to display two pages on the screen.
Zoom In:
Specify this item to enlarge the displayed image.
After moving the
cursor to the desired position, click the mouse
and the specified area is enlarged.
Zoom Out:
Cancels the enlarged display mode.
Close:
Closes the print preview screen.
12-4 Outputting the Screen Image
It is possible to output only the data creation screen in the bit map format.
The output data can be used in other applications to be displayed or printed.
The operation procedure for outputting the screen image is shown below.
(1) Display the screen to be output at the front.
(2) Select [Screen] (menu bar)
→
[Copy to Image].
The file name setting dialog box is displayed.
(3) Specify the folder and file name and click on
.


