6-5
Section
Lamps
196
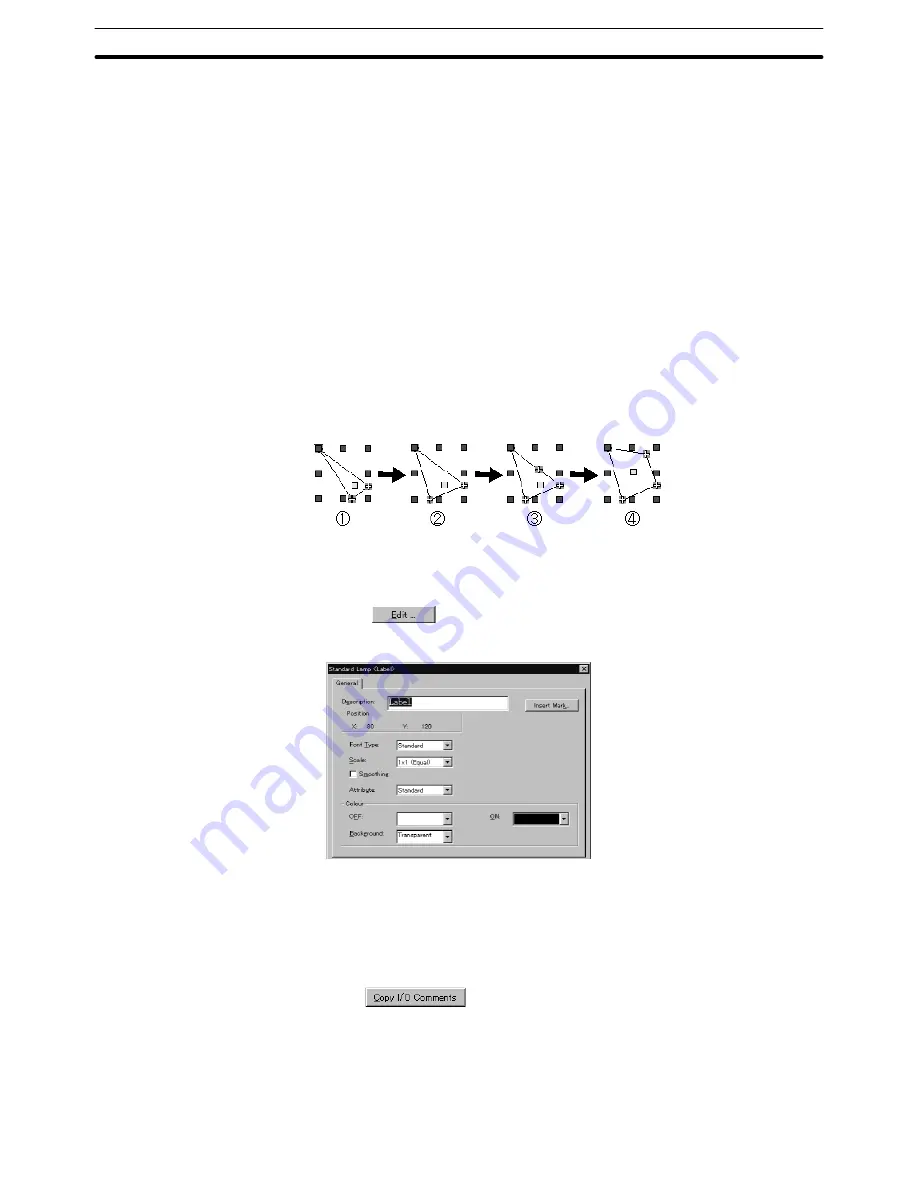
The shape of a lamp can be modified when you select polygon or sector.
Use the element edit function to modify the lamp shape. (For details, refer to
page 110.)
(1) Click on a line of a polygon or a sector while pressing the Shift key and Ctrl
key.
(2) Drag a green
mark to modify the graphic.
(3) To add a green
mark (addition of a vertex), position the mouse cursor on
the line in a graphic and execute the vertex addition operation (right click the
mouse
→
[Add Node]).
To delete a green
mark (deletion of a node), position the mouse cursor on
the green
mark to be deleted and execute the vertex deletion operation
(right click the mouse
→
[Remove Node]).
(4) Drag the added green
mark to modify the shape of the graphic.
Example: Modification of the shape of polygon
A standard lamp element can display a label (lamp name).
To display a label, set a check mark in the check box of the [Label] attribute and
click on
. The dialog box for setting a label is displayed. Set the prop-
erty for the label to be displayed.
For the procedure for setting the properties, refer to 6-2-7 Text. For the NT21,
NT31, NT31C, NT631, and NT631C, it is possible to set different colors for lamp
ON and lamp OFF by setting [Color – OFF] and [Color – ON] instead of setting
label color. However, background color is fixed to transparent for the NT21,
NT31, NT31C, NT631 and NT631C.
Use the
button in the property dialog to copy the I/O comment
set to the lamp bit as a label.
To edit the position of a label, use the element edit function. (For details, refer to
page 110.)
(1) Click on the label while pressing the Shift key and Ctrl key.


