


5.
Utilizing the Up/Down arrow pushbuttons, select "DNP3.0 or MODBUS®", then
press the ENT pushbutton. The selected protocol will be displayed.
6.
Follow the procedure above to enter the desired:
•
Baud Rate
•
Parity
•
Stop Bits
•
Sync Time
7.
If DNP3.0 was selected as the Protocol and Source Address Validation is desired,
proceed to enabling Source Address Validation.
5.11.2
Configuring RS-232 port from TCC600
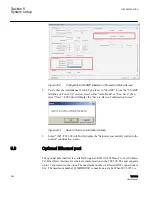
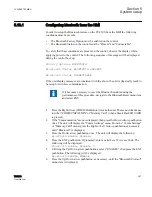
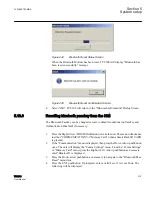
1.
Select Communication/Setup/RS232 Comm Port from the TCC600® toolbar.
TCC600 will then display the Setup RS-232 Comm Port dialog screen.
GUID-A989FBA4-22E9-46A4-8F03-7C399A6442F1 V1 EN
Figure 237:
Setup RS-232 Comm Port Dialog Screen
2.
Enter the desired settings for the following parameters:
•
Protocol
•
Baud Rate
•
Parity
•
Stop Bits
•
Sync Time
3.
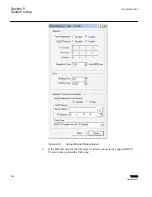
Select Save. TCC600 will display a "Confirm Writing to Device" confirmation
screen.
4.
Select OK. TCC600 will display a "Setpoints Successfully Written to Control"
confirmation screen.
5.
If DNP3.0 was selected in Step 2 and Source Address Validation is desired, proceed
to enabling Source Address Validation.
1VAC388793-MB A
Section 5
System setup
TCC300
301
User Manual
Summary of Contents for TCC300
Page 1: ...Digital Tapchanger Control TCC300 User Manual ...
Page 2: ......
Page 3: ...Document ID 1VAC388793 MB Issued 2016 08 10 Revision A Copyright 2016 ABB All rights reserved ...
Page 26: ...20 ...
Page 34: ...28 ...
Page 91: ...1VAC388793 MB A Section 3 Operation TCC300 85 User Manual ...
Page 126: ...120 ...
Page 176: ...Section 4 1VAC388793 MB A TCC600 170 TCC300 User Manual ...
Page 260: ...254 ...
Page 328: ...322 ...
Page 494: ...488 ...
Page 556: ...550 ...
Page 580: ...574 ...
Page 600: ...594 ...
Page 700: ...694 ...
Page 710: ...704 ...
Page 712: ...706 ...
Page 713: ...707 ...
Page 714: ......
Page 715: ......