


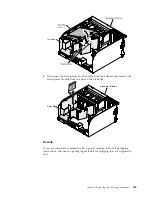


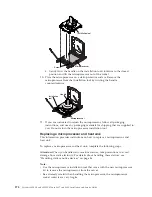


Note:
Make sure that cables are installed correctly by using the keys on the
connectors and the keys on the cables. Incorrect installation of the cables can
damage the storage book.
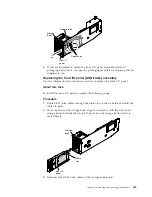
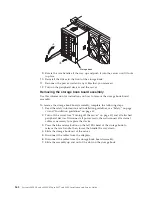
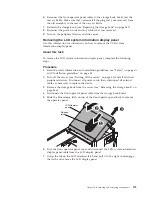
4.
Reinstall the storage book into the server.
5.
Reconnect the power cords and any cables that you removed.
6.
Turn on the peripheral devices and the server.
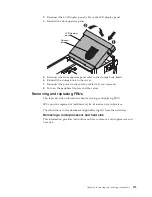
Removing and replacing Tier 2 CRUs
This topic provides information about removing and replacing tier 2 CRUs.
You may install a Tier 2 CRU yourself or request IBM to install it, at no additional
charge, under the type of warranty service that is designated for your server.
The illustrations in this document might differ slightly from your hardware.
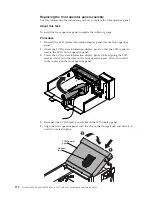
Removing the storage book
Use this information for instructions on how to remove the storage book.
To remove the storage book, complete the following steps:
1.
Read the safety information and installation guidelines, see “Safety” on page
vii and “Installation guidelines” on page 45.
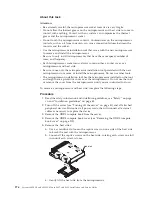
2.
Turn off the server (see “Turning off the server” on page 41) and all attached
peripheral devices. Disconnect all power cords; then, disconnect all external
cables as necessary to replace the device.
3.
Remove the drives in the front of the storage book.
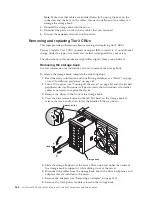
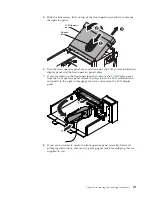
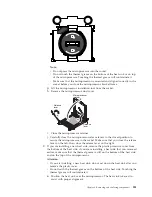
4.
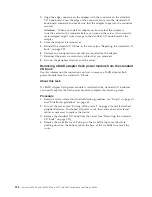
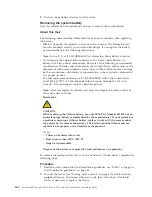
Press the blue release button on the left EIA bezel on the storage book to
release the cam handle; then, lower the handle all the way down.
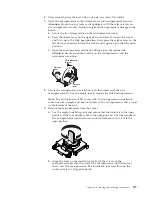
Storage book
Release button
Handle
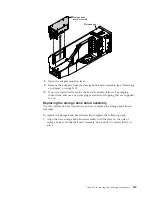
5.
Slide the storage book out of the server. Place one hand under the center of
the storage book to support it while sliding it out of the server.
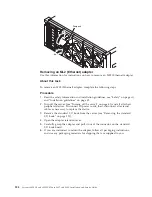
6.
Disconnect the cables from the storage book board, the drive backplanes, and
adapters that are installed in the server.
7.
Remove the adapters (see “Removing an adapter” on page 230).
8.
Remove any flash power modules stored in the storage book.
266
System x3850 X6 and x3950 X6 Types 3837 and 3839: Installation and Service Guide
Содержание X3850 X6
Страница 1: ...System x3850 X6 and x3950 X6 Types 3837 and 3839 Installation and Service Guide...
Страница 2: ......
Страница 3: ...System x3850 X6 and x3950 X6 Types 3837 and 3839 Installation and Service Guide...
Страница 138: ...120 System x3850 X6 and x3950 X6 Types 3837 and 3839 Installation and Service Guide...
Страница 225: ...25 26 27 Chapter 5 Parts listing System x3850 X6 and x3950 X6 Types 3837 and 3839 207...
Страница 1682: ...1664 System x3850 X6 and x3950 X6 Types 3837 and 3839 Installation and Service Guide...
Страница 1706: ...1688 System x3850 X6 and x3950 X6 Types 3837 and 3839 Installation and Service Guide...
Страница 1710: ...1692 System x3850 X6 and x3950 X6 Types 3837 and 3839 Installation and Service Guide...
Страница 1728: ...1710 System x3850 X6 and x3950 X6 Types 3837 and 3839 Installation and Service Guide...
Страница 1729: ......
Страница 1730: ...Part Number 00FH434 Printed in USA 1P P N 00FH434...


