


ES9160 MFP / ES9170 MFP
© 2012 OKI DATA CORPORATION All rights reserved
SETTING / ADJUSTMENT
6 - 116
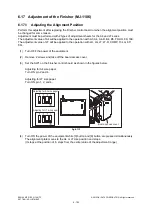
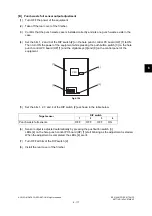
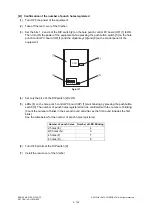
[A] Output adjustment for transport path and paper edge detection related sensors
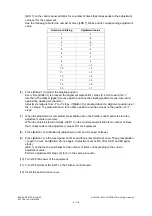
Target sensors: Trailing edge detection sensors (S38-1 and S38-2, 1 couple) and horizontal registration
detection sensors (S39-1 and S39-2, 4 couples)
(1)
Turn OFF the power of the equipment.
(2)
Take off the rear cover of the finisher.
(3)
Confirm that there is no paper or shielding object around the target sensor.
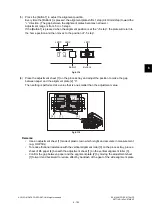
(4)
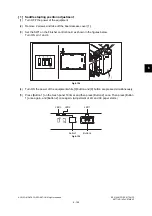
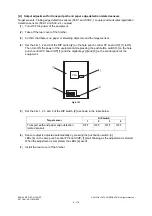
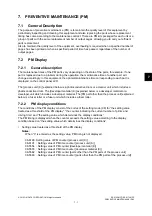
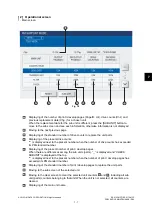
Set the bits 1, 2 and 3 of the DIP switch [2] on the hole punch control PC board (HP) [1] to ON.
Then turn ON the power of the equipment while pressing the pushbutton switch [3] on the hole
punch control PC board (HP) [1] and the digital keys [0] and [8] on the control panel of the
equipment.
Fig.6-133
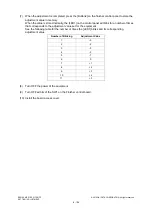
(5)
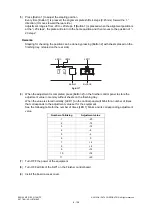
Set the bits 1, 2, 3 and 4 of the DIP switch [2] as shown in the table below.
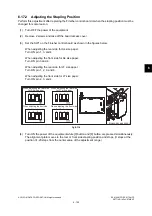
(6)
Sensor output is adjusted automatically by pressing the pushbutton switch [3].
LEDs [4] on the hole punch control PC board (HP) [1] start blinking as the adjustment is started.
When the adjustment is completed, the LEDs [4] are lit.
(7)
Install the rear cover of the finisher.
Target sensor
DIP switch
1
2
3
4
Transport path and paper edge detection
related sensors
OFF
OFF
OFF
OFF
[1]
[2]
[3]
1 2 3 4
ON
CPU
LED
[4]
Summary of Contents for ES9160
Page 12: ......
Page 24: ...ES9160 MFP ES9170 MFP 2012 OKI DATA CORPORATION All rights reserved FEATURES 1 2...
Page 308: ...ES9160 MFP ES9170 MFP 2012 OKI DATA CORPORATION All rights reserved SELF DIAGNOSIS MODES 5 56...
Page 832: ...ES9160 MFP ES9170 MFP 2012 OKI DATA CORPORATION All rights reserved REMOTE SERVICE 10 38...
Page 920: ...ES9160 MFP ES9170 MFP 2012 OKI DATA CORPORATION All rights reserved BACKUP FUNCTION 12 12...
Page 1086: ......
Page 1087: ......