


4
© 2012 OKI DATA CORPORATION All rights reserved
ES9160 MFP / ES9170 MFP
DISASSEMBLY AND REPLACEMENT
4 - 69
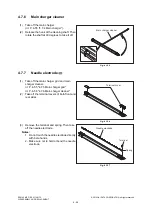
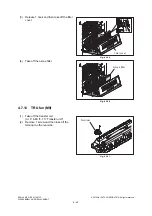
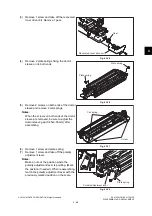
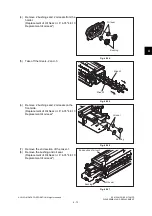
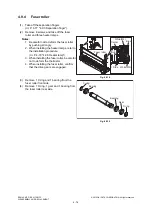
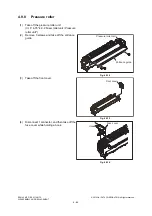
(3)
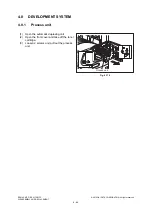
Remove 1 screw and take off the recovered
toner drive unit. Remove 1 gear.
Fig. 4-189
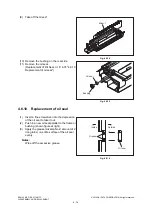
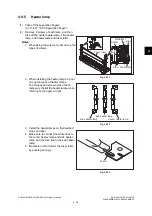
(4)
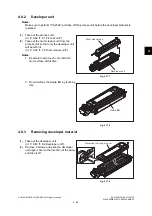
Remove 2 plate springs fixing the doctor
sleeve on its both ends.
Fig. 4-190
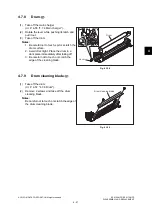
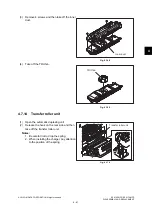
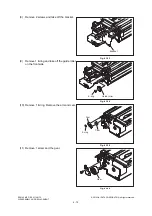
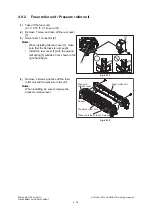
(5)
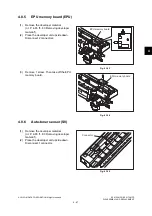
Remove 2 screws on both ends of the doctor
sleeve and remove 2 coil springs.
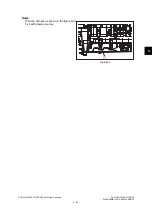
Notes:
When the screws on both ends of the doctor
sleeve are removed, be sure to adjust the
doctor sleeve gap (0.45±0.05 mm) after
assembling.
Fig. 4-191
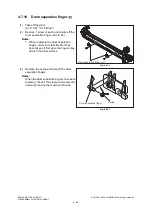
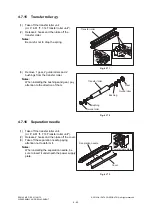
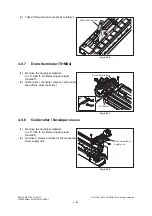
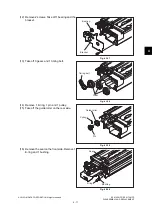
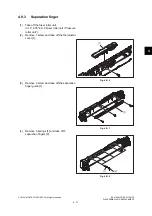
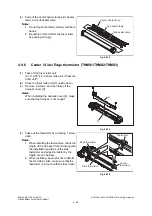
(6)
Remove 1 screw and plate spring.
(7)
Remove 1 screw and take off the polarity
adjustment lever.
Notes:
Make a note of the position where the
polarity adjustment lever is pointing. (Mark
the position if needed.) When reassembling,
match the polarity adjustment lever with the
previously marked position on the scale.
Fig. 4-192
Gear
Recovered toner drive unit
Plate spring
Plate spring
Screw
Coil spring
Plate spring
Polarity adjustment lever
Summary of Contents for ES9160
Page 12: ......
Page 24: ...ES9160 MFP ES9170 MFP 2012 OKI DATA CORPORATION All rights reserved FEATURES 1 2...
Page 308: ...ES9160 MFP ES9170 MFP 2012 OKI DATA CORPORATION All rights reserved SELF DIAGNOSIS MODES 5 56...
Page 832: ...ES9160 MFP ES9170 MFP 2012 OKI DATA CORPORATION All rights reserved REMOTE SERVICE 10 38...
Page 920: ...ES9160 MFP ES9170 MFP 2012 OKI DATA CORPORATION All rights reserved BACKUP FUNCTION 12 12...
Page 1086: ......
Page 1087: ......


