8-56
Setup and Registration (System Menu) > System Menu
Adjustment/Maintenance
[
System Menu
] key > [
Adjustment/Maintenance
]
Adjust printing quality and conduct machine maintenance.
Item
Description
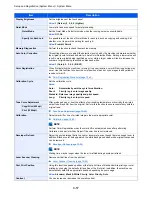
Density Adjustment
Adjust density.
Copy
Adjust copy density. Adjustment can be made in 7 levels.
Value
: -3 (Lighter), -2, -1, 0 (Normal), +1, +2, +3 (Darker)
Send/Box
Adjust scan density when sending or storing the data in Document Box. Adjustment can be
made in 7 levels.
Value
: -3 (Lighter), -2, -1, 0 (Normal), +1, +2, +3 (Darker)
FAX
*1
FAX System 10 Operation Guide
Background Density Adj.
Darkens or lightens overall background density adjustment.
Copy (Auto)
Darkens or lightens overall background density adjustment during copying. Adjustment can be
made in 7 levels.
Value
: -3 (Lighter), -2, -1, 0 (Normal), +1, +2, +3 (Darker)
Send/Box (Auto)
Darkens or lightens overall background density when sending images or storing them in the
Document Box. Adjustment can be made in 7 levels.
Value
: -3 (Lighter), -2, -1, 0 (Normal), +1, +2, +3 (Darker)
Sharpness Adjustment
Adjust the sharpness of the image outline.
Copy
All
Sharpen or blur overall image outlines during copying. Adjustment can be made in 7 levels.
Value
: -3 (Blur), -2, -1, 0, +1, +2, +3 (Sharpen)
Text/Fine
Line
Sharpen text/fine line during copying. Adjustment can be made in 4 levels.
Value
: 0 (Normal), 1, 2, 3 (Sharpen)
Send/Box
All
Sharpen or blur overall image outlines when sending or storing them in the Document Box.
Adjustment can be made in 7 levels.
Value
: -3 (Blur), -2, -1, 0, +1, +2, +3 (Sharpen)
Text/Fine
Line
Adjust sharpness of the text/fine line when during sending or storing them in the Document
Box. Adjustment can be made in 4 levels.
Value
: 0 (Normal), 1, 2, 3 (Sharpen)
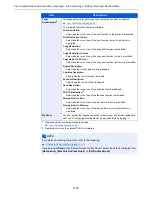
Drum Refresh
Remove image blur and white dots from the printout. It takes about 1 minute and 30 seconds.
The time required may vary depending on the operating environment.
Drum Refresh (page 10-49)
NOTE
Drum Refresh cannot be performed while printing. Execute Drum Refresh after the printing is
done.
Correcting Black Lines
Correct fine lines (streaks caused by contamination), which may appear on the image, when
the document processor is used.
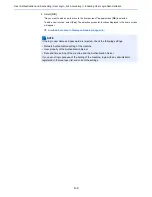
Value
Off: No correction performed.
On (Low): Correction performed. The reproduction of fine lines on the original may
become lighter than when using [Off].
On (High): Select this item if a streak remains after using [On (Low)]. The reproduction
of fine lines on the original may become lighter than when using [On (Low)].
System Initialization
Initialize the hard disk installed on the machine to return it to the factory defaults.
NOTE
This function will not be displayed when the optional Data Security Kit is activated.
Summary of Contents for TASKalfa 356ci
Page 1: ...OPERATION GUIDE q PRINT q COPY q SCAN q FAX TASKalfa 356ci TASKalfa 406ci ...
Page 463: ...10 22 Troubleshooting Regular Maintenance 4 Install the Punch Waste Box 5 Close the cover ...
Page 504: ...10 63 Troubleshooting Clearing Paper Jams 8 Remove any jammed paper 9 Push Right Cover 1 ...
Page 564: ......

