8-27
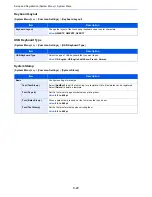
Setup and Registration (System Menu) > System Menu
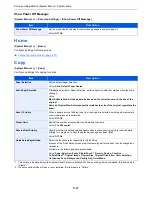
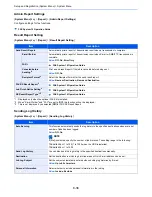
Show Power Off Message
[
System Menu
] key > [
Common Settings
] > [
Show Power Off Message
]
Home
[
System Menu
] key > [
Home
]
Configure settings for Home screen.
Editing the Home Screen (page 2-13)
Copy
[
System Menu
] key > [
Copy
]
Configures settings for copying functions.
Item
Description
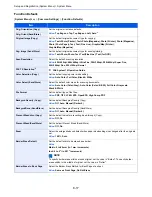
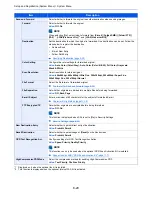
Show Power Off Message
Set the mode whether display a confirmation message in power supply off.
Value
: Off, On
Item
Description
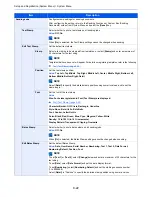
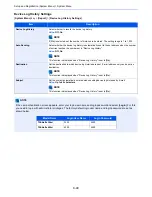
Paper Selection
Set the default paper selection.
Value
: Auto, Default Paper Source
Auto Paper Selection
If [
Auto
] is selected for Paper Selection, set the paper size selection method when the zoom
changes.
Value
Most Suitable Size: Selects paper size based on the current zoom and the size of the
original.
Same as Original Size: Selects paper that matches the size of the original, regardless the
zoom.
Auto % Priority
When a paper source of different size from the original is selected, select whether automatic
zoom (reduce/zoom) is performed.
Value
: Off, On
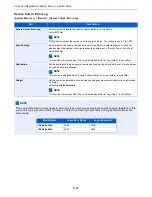
Preset Limit
Restrict the number of copies that can be made at one time.
Value
: 1 to 999 copies
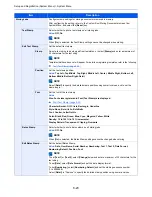
Reserve Next Priority
Specify whether the default screen appears when a subsequent copy job is reserved while
printing is in progress. To have the default screen appear, select [
On
].
Value
: Off, On
Quick Setup Registration
Select the functions to be registered for Quick Setup.
Six keys of the Quick Setup screen are allocated to typical functions but can be changed as
necessary.
Six items in the following options are available.
Value
: Paper Selection, Zoom, Staple/Punch
*1
, Density, Duplex, Combine,
Collate/Offset
*2
, Original Image, Original Size, Original Orientation, Color Selection,
Continuous Scan, Background Density Adj., Quiet Mode
*1 This setting is displayed when the optional Sheet Finisher is installed. When a punching unit is not installed, this item name is
"Staple".
*2 When the optional Sheet Finisher is not installed, this item name is "Collate"
Summary of Contents for TASKalfa 356ci
Page 1: ...OPERATION GUIDE q PRINT q COPY q SCAN q FAX TASKalfa 356ci TASKalfa 406ci ...
Page 463: ...10 22 Troubleshooting Regular Maintenance 4 Install the Punch Waste Box 5 Close the cover ...
Page 504: ...10 63 Troubleshooting Clearing Paper Jams 8 Remove any jammed paper 9 Push Right Cover 1 ...
Page 564: ......

