DiPro 1500 Installation
DiPro 1500 User Manual
37
Ch 2
1092000
NOTE: You may not have the Spectrum-style output enclosure if you purchased the
output board only (that is, without the enclosure). If so, mount the board in the enclosure
or equipment of your choice.
To mount and wire output enclosure:
1. Select a convenient location for running conduit from DiPro and to your
equipment. Once installed and wired, you will not have to work with the
enclosure again.
IMPORTANT:
Especially if you are mounting the output board only,
mount only in a clean area which is not contacting metal. The underside
of the board must not touch metal. This can cause shorting. Do not mount
the board in highly travelled areas where it could get damaged.
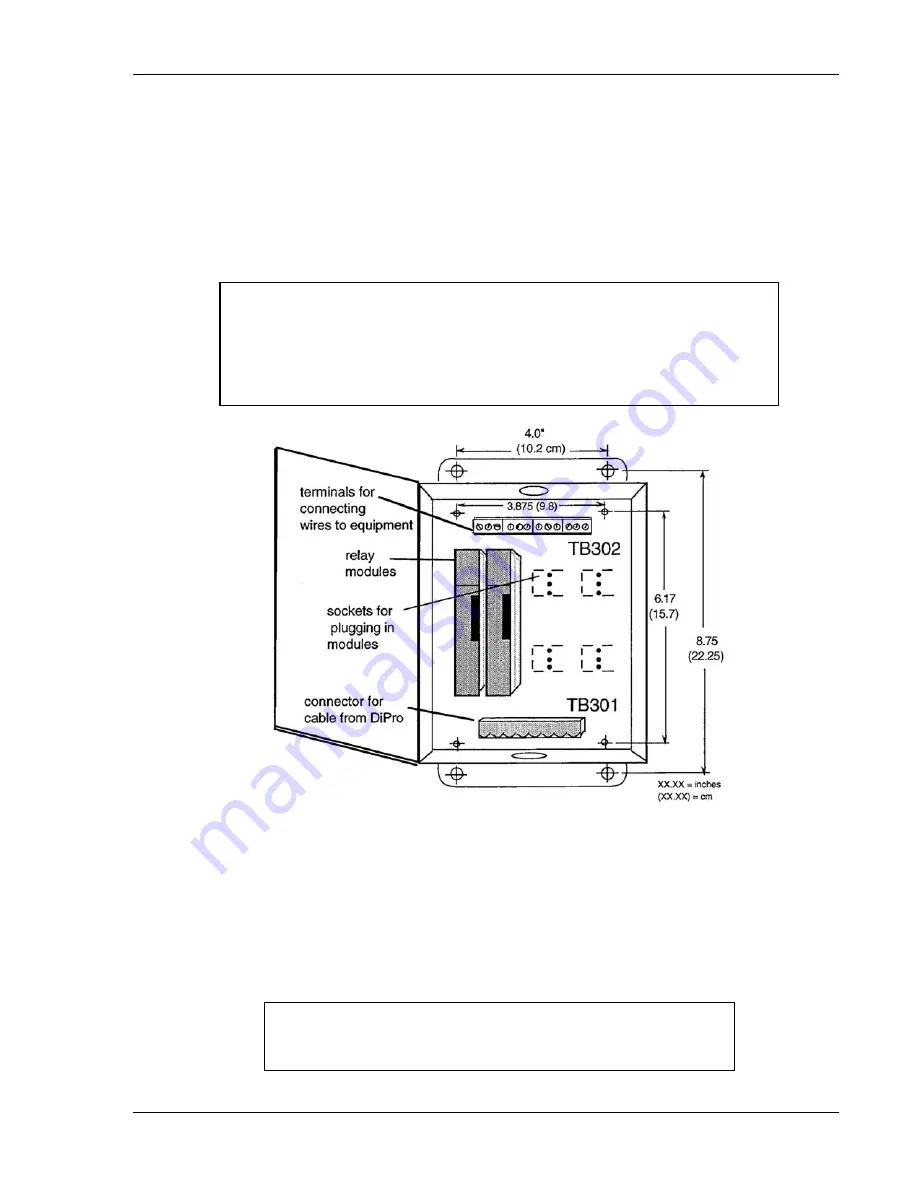
Figure 2-11B. Output enclosure for Spectrum-style relay relays
2. Mount the enclosure using mounting holes on flanges.
3. The relay relays that will control your equipment should already be plugged into
the enclosure. You should have up to four relay relays. The type of relays you
have is marked on the relay. Decide which relays will be used with which
channels and arrange them in the enclosure. The relays just pull out of their
sockets. When inserting, make sure all pins match the socket holes. This is
important so you do not bend the pins. Then press in firmly.
NOTE
See Table 2-4B and specifications in Chapter 1 for
additional data on the relay output relays.
Summary of Contents for dipro 1500
Page 9: ...Table of Contents DiPro 1500 User Manual vi TOC 1092000 ...
Page 59: ...DiPro 1500 Installation DiPro 1500 User Manual 50 Ch 2 1092000 ...
Page 77: ...Using DiPro 1500 in Initialization mode DiPro 1500 User Manual 68 Ch 4 1092000 ...
Page 125: ......
Page 126: ......
Page 127: ......
Page 128: ......
Page 129: ......


