476671/B
413
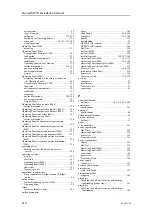
Checking the hull unit lowering and hoisting
functionality/Sonar room steps ..................... 317
Verifying system operation by means of the
Diagnostics functionality............................ 325
Checking the environmental conditions in the
sonar room ............................................ 198
Making sure that all MF90 system cables are
properly connected ................................... 199
Setting up the Operating Panel....................... 231
Adjusting the built-in motion sensor offset ........ 269
Adjusting the stabilization offsets for the
external motion sensor............................... 272
assigning custom user settings ....................... 306
Assigning functions to F1, F2 and F3 on the
Operating Panel (Mk2) .............................. 311
Assigning functions to the rotary switches on
the Operating Panel .................................. 308
assigning presentation modes ........................ 306
changing the environmental parameters ............ 302
Checking the 3-phase connection for correct
rotation................................................. 212
Checking the hosting motor’s 3-phase AC
connections............................................ 208
Checking the operation of the Hoisting and
Lowering contactors ................................. 214
Checking the transducer lowering and hoisting
functionality........................................... 216
Choosing the best location for the display............ 59
Choosing the best location for the Operating
Panel ..................................................... 60
Choosing the best location for the Processor
Unit....................................................... 59
configuring the Operating Panel ............... 235, 239
Configuring the Operating Panel (Mk2) ............ 231
configuring the sensor interface...................... 287
Connecting the 3-phase AC power to the Motor
Control Unit........................................... 210
Connecting the transducer cables to the
transceiver ............................................. 223
Connecting the transducer cables to the
Transceiver Unit ...................................... 223
Creating a backup image using the boot
application............................................. 336
Creating a backup image using the desktop
application............................................. 334
Creating a bootable USB flash drive ................ 343
defining athwartship location of the hull unit ........ 53
defining fore and aft location of the hull unit ........ 52
defining the Ethernet (LAN) port
parameters ............................................. 278
Defining the file and folder settings for data
recording............................................... 301
Defining the middle position of the
transducer.............................................. 229
defining the serial port parameters................... 278
Designing and mounting mechanical support
brackets to secure the hull unit ..................... 119
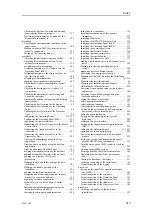
Finalizing the cable connections..................... 224
Initial safety check of the Motor Control
Unit..................................................... 207
Inserting the installation parameters for the
motion reference unit (MRU)....................... 266
Inserting the ship origin and dimensions ........... 260
Inspecting the transducer ............................. 122
installing navigation and other sensors
(summary) ............................................. 276
Installing the display .................................. 129
Installing the HT20470 Processor Unit ............. 130
Installing the Operating Panel (Mk2) ............... 133
Installing the Operating Panel (Mk3) ............... 135
Installing the operating software..................... 224
Installing the software license........................ 226
Installing the sonar room cables ..................... 157
Installing the topside cables .......................... 155
Installing the Transceiver Unit ....................... 137
making a noise/speed curve to determine vessel
noise.................................................... 329
Making sure that the operating power is
correct.................................................. 220
measuring noise at different speeds ................. 329
Measuring the noise in passive mode ............... 323
Mounting the hull unit on top of the installation
trunk.............................................. 113, 116
Mounting the installation trunk ........................ 93
Mounting the installation trunk adapter............... 92
Obtaining the software license ....................... 226
Restoring from a backup image using the boot
application............................................. 340
Restoring from a backup image using the
desktop application................................... 338
saving the current user settings ...................... 303
selecting measurement units.......................... 297
selecting menu language .............................. 303
selecting which operating panel to use.............. 305
Setting up input from buoys, fish aggregating
devices and other external objects ................. 294
setting up synchronization ............................ 291
Setting up the alarm limits for system
protection .............................................. 298
setting up the gyro interface .......................... 285
Setting up the input from a navigation system
(GPS)................................................... 279
setting up the Operating Panel ................. 235, 239
setting up the speed log interface .................... 282
Surveying the transducer and the navigation
sensors ................................................. 253
testing the receiver and transmitter channels
with the BITE B-Scan functionality ............... 319
Turning on the entire MF90 system for the first
time..................................................... 243
Turning on the MF90 system......................... 249
Turning on the MF90 system for normal use ........ 249
Unpacking the hull unit from its transport
box ..................................................... 111
Venting the transducer shaft sleeve.................. 211
Verifying the quality of the installation ............... 96
Visual inspection of the display...................... 189
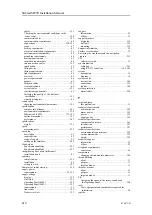
Setting up the input from a motion reference
unit (MRU)............................................ 289
Visual inspection of the computer ................... 191
Visual inspection of the Operating Panel ........... 193
Visual inspection of the Processor Unit............. 191
Visual inspection of the transceiver ................. 194
Visual inspection of the Transceiver Unit .......... 194
Verifying the quality of the hull unit
installation............................................. 123
Index
Summary of Contents for Simrad MF90
Page 1: ...kongsberg com simrad Simrad MF90 INSTALLATION MANUAL...
Page 2: ......
Page 21: ...476671 B 19 Related topics Simrad MF90 page 13 Simrad MF90...
Page 369: ...476671 B 367 Drawing file...
Page 372: ...370 476671 B Simrad MF90 Installation Manual...
Page 375: ...476671 B 373 Drawing file...
Page 378: ...376 476671 B Simrad MF90 Installation Manual...
Page 384: ...382 476671 B Simrad MF90 Installation Manual...
Page 387: ...476671 B 385 Drawing file...
Page 390: ...388 476671 B Simrad MF90 Installation Manual...
Page 393: ...476671 B 391 Drawing file...
Page 398: ...396 476671 B Simrad MF90 Installation Manual...
Page 421: ......
Page 422: ...2022 Kongsberg Maritime ISBN 978 82 8066 240 8...
Page 423: ......
Page 425: ......
Page 426: ...Installation Manual Simrad MF90...

