


1-55
BEFORE USING THE MACHINE
Contents
6
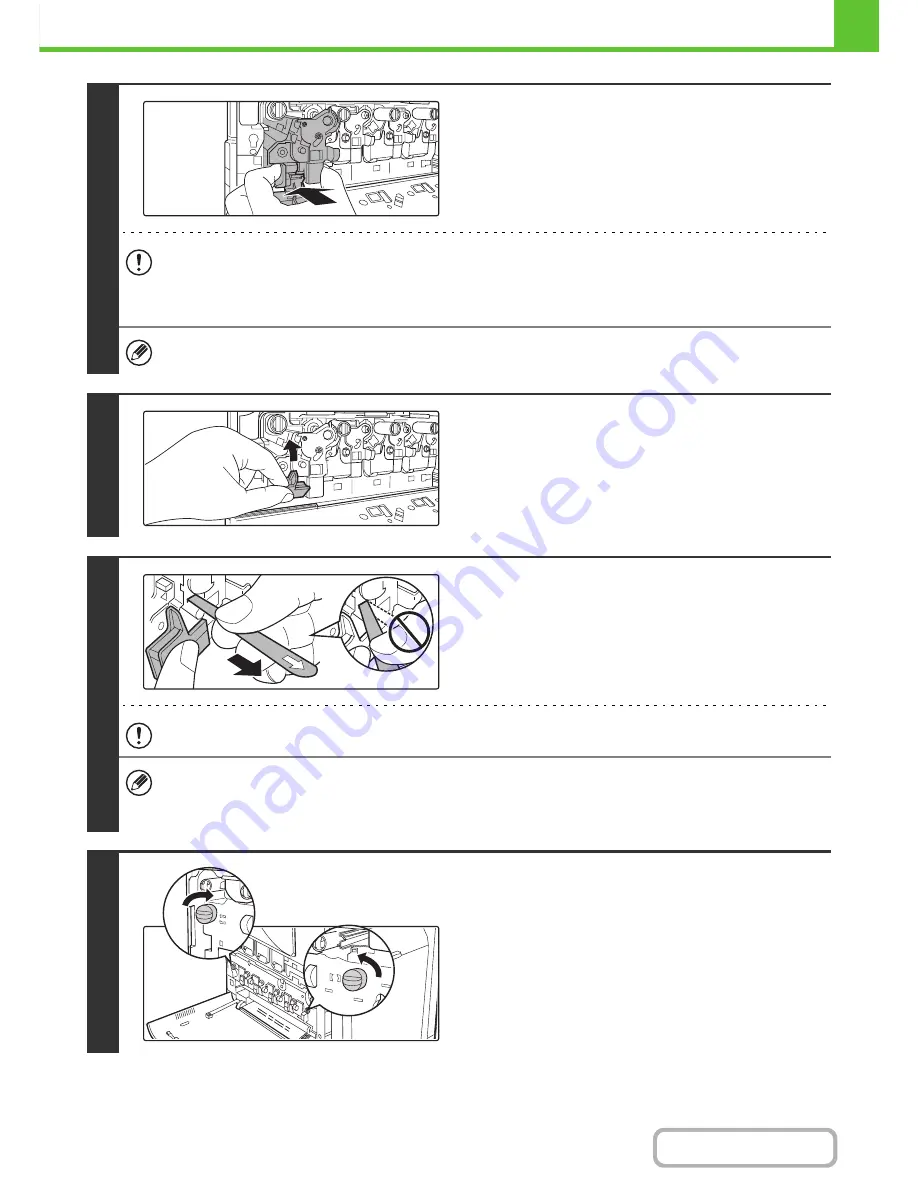
Insert the new developer cartridge
horizontally.
Insert the new developer cartridge in the same location as the
cartridge that was removed.
• Do not tilt the developer cartridge or insert it in the wrong direction or orientation. This may damage the developer
cartridge or drum cartridge and cause failure.
• When inserting the developer cartridge, grasp it with both hands at the middle.
• Do not remove the seal from the developer cartridge until the cartridge is installed in the machine. If the seal is
removed when the cartridge is not locked, the cartridge may fall out of the machine.
Insert with the arrow on the cartridge aligned with the arrow on the machine.
7
Grasp the developer cartridge lock and
replace it on the machine.
8
Hold the developer cartridge with one
hand and slowly remove the seal with
the other hand.
Slowly pull the seal straight and horizontally out.
If excessive force is used or the seal is pulled out diagonally, it may tear.
There is a mark (red belt) on the end of the seal. After removing the seal, be sure to verify that the mark (red belt) is on
the end of the seal.
If the seal has been cut on the developer cartridge, the cartridge cannot be used. Replace with a new developer
cartridge.
9
Close the main charger cover and rotate
the lock levers in the direction of the
arrows to lock the cover.
When the lock levers are vertical, the cover is locked.
Содержание MX-C402SC
Страница 4: ...Reduce copy mistakes Print one set of copies for proofing ...
Страница 6: ...Make a copy on this type of paper Envelopes and other special media Transparency film ...
Страница 11: ...Conserve Print on both sides of the paper Print multiple pages on one side of the paper ...
Страница 34: ...Search for a file abc Search for a file using a keyword Search by checking the contents of files ...
Страница 35: ...Organize my files Delete a file Delete all files Periodically delete files Change the folder ...
Страница 243: ...2 86 COPIER Contents To cancel an RGB adjust setting Touch the Cancel key in the screen of step 3 ...
Страница 245: ...2 88 COPIER Contents To cancel the sharpness setting Touch the Cancel key in the screen of step 3 ...
Страница 252: ...2 95 COPIER Contents To cancel an intensity setting Touch the Cancel key in the screen of step 3 ...
Страница 295: ...3 19 PRINTER Contents 4 Click the Print button Printing begins ...