


1-38
BEFORE USING THE MACHINE
Contents
3
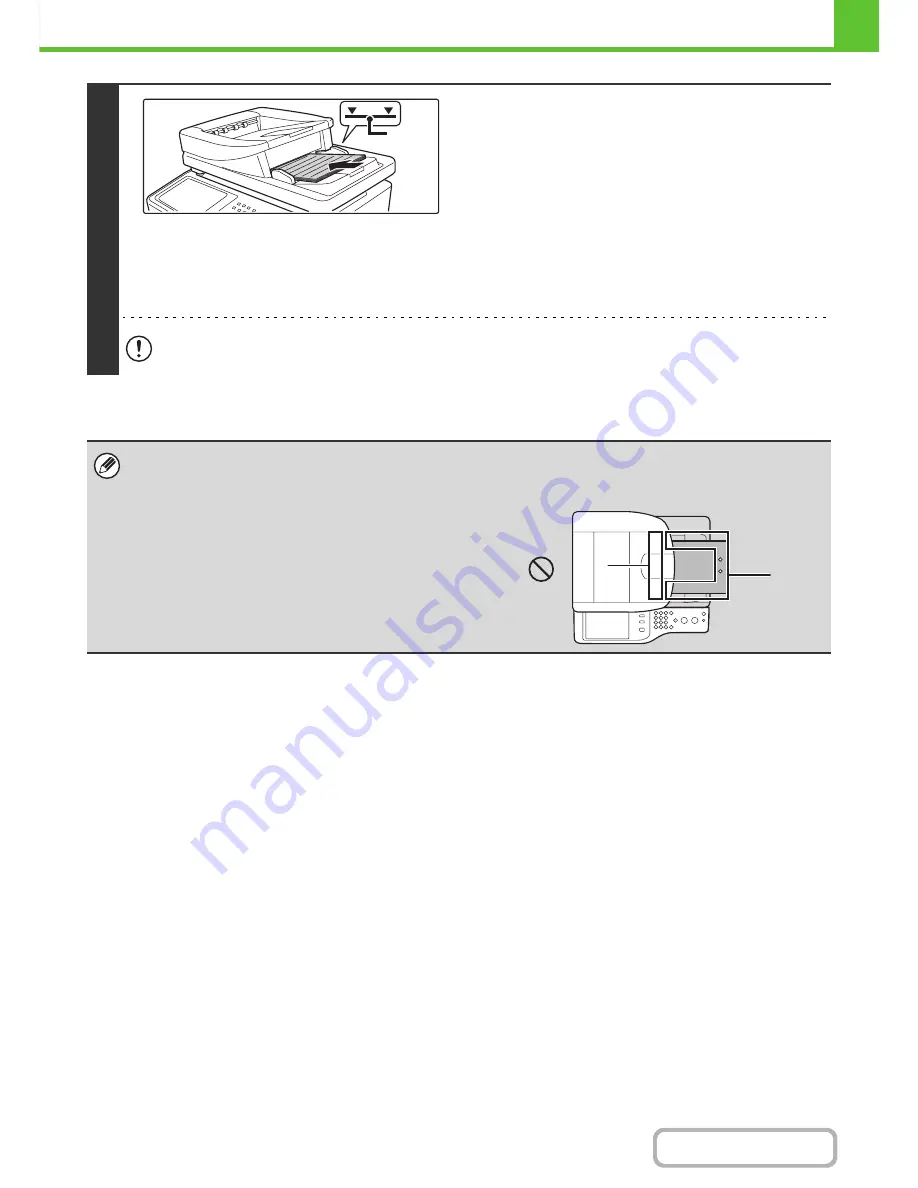
Place the originals.
Make sure the edges of the originals are even.
Insert the originals face up all the way into the document feeder
tray.
Insert a number of originals that does not exceed the indicator
line on the document feeder tray.
Up to 100 sheets can be inserted.
Please remove originals that have finished being read with the
automatic document feeder from the original output portion's
upper exit or heavy exit. Heavy paper (34 lbs. to 75 lbs.
(129
g
/m
2
to 280
g
/m
2
)) and plastic cards can be output only on
heavy exit.
• Do not insert your hand into the document insertion opening in the automatic document feeder.
• If originals are placed higher than the line, misfeeds may occur.
• Before inserting originals into the document feeder tray, be sure to remove any staples or paper clips.
• If originals have damp spots due to correction fluid, ink or pasteup glue, wait until the originals are dry before making
copies. Otherwise the interior of the document feeder or the document glass may be soiled.
• When using originals with two or three holes, place them so that
the punched edge is at a position away from the feed slot of the
document feeder tray.
Indicator
line
Hole
positions
Feed slot
Содержание MX-C402SC
Страница 4: ...Reduce copy mistakes Print one set of copies for proofing ...
Страница 6: ...Make a copy on this type of paper Envelopes and other special media Transparency film ...
Страница 11: ...Conserve Print on both sides of the paper Print multiple pages on one side of the paper ...
Страница 34: ...Search for a file abc Search for a file using a keyword Search by checking the contents of files ...
Страница 35: ...Organize my files Delete a file Delete all files Periodically delete files Change the folder ...
Страница 243: ...2 86 COPIER Contents To cancel an RGB adjust setting Touch the Cancel key in the screen of step 3 ...
Страница 245: ...2 88 COPIER Contents To cancel the sharpness setting Touch the Cancel key in the screen of step 3 ...
Страница 252: ...2 95 COPIER Contents To cancel an intensity setting Touch the Cancel key in the screen of step 3 ...
Страница 295: ...3 19 PRINTER Contents 4 Click the Print button Printing begins ...