


2-6
COPIER
Contents
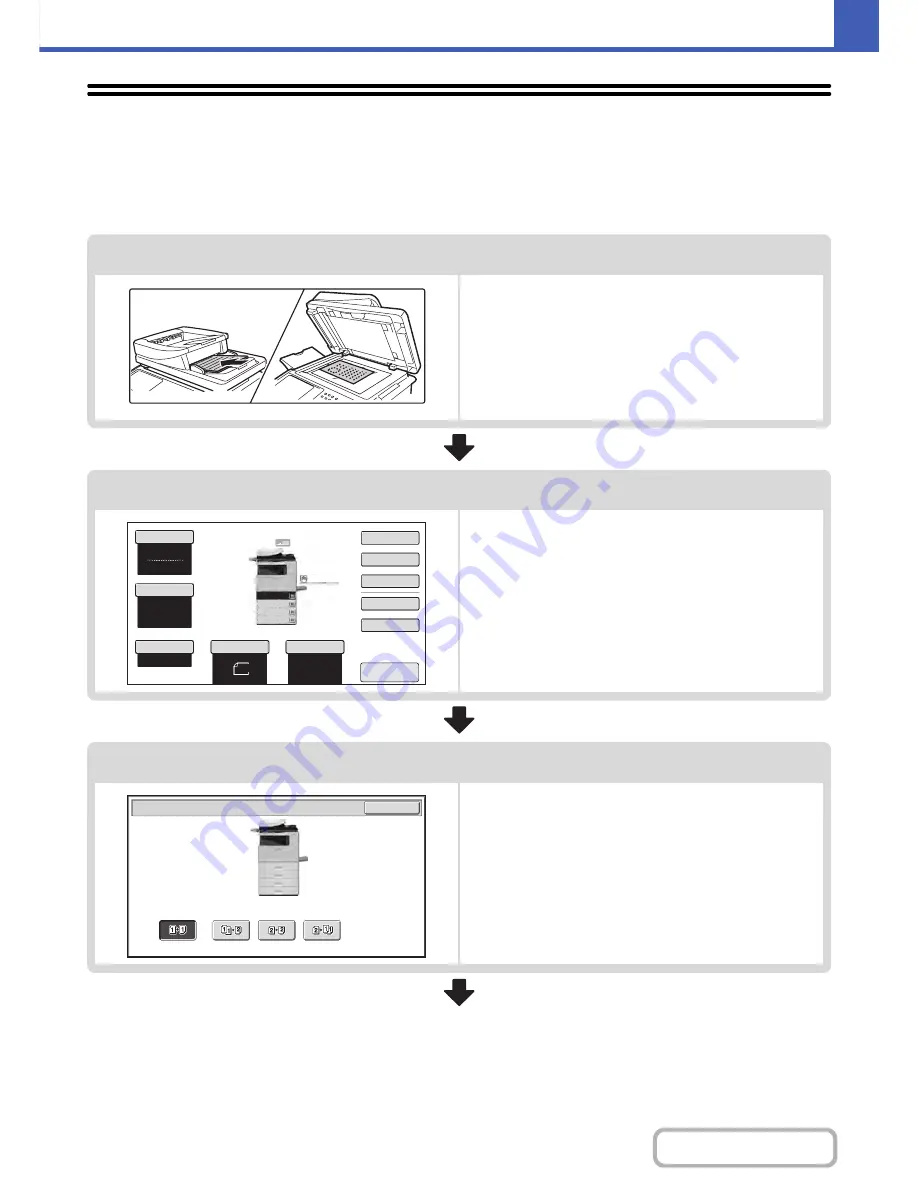
COPYING SEQUENCE
This section explains the basic procedure for copying. Select settings in the order shown below to ensure that the copy
operation takes place smoothly.
For detailed procedures for selecting the settings, see the explanation of each setting in this chapter.
Place the original.
Place the original in the automatic document feeder tray, or on
the document glass.
Place the original in the automatic document feeder.
☞
PLACING ORIGINALS IN THE AUTOMATIC
DOCUMENT FEEDER
(page 1-36)
* Depending on the copy functions used, there are also cases
where functions are selected before the original is placed.
Basic copy settings
Select the basic copy settings.
The main settings are as follows:
• Color mode
☞
COLOR COPY MODES
(page 2-22)
• Exposure and original type
☞
CHANGING THE
EXPOSURE AND ORIGINAL IMAGE TYPE
(page 2-24)
• Copy ratio
☞
REDUCTION/ENLARGEMENT/ZOOM
(page 2-26)
• Original size
☞
ORIGINAL SIZES
(page 2-30)
• Paper Settings
☞
PAPER TRAYS
(page 2-10)
2-sided copy settings
Select settings as needed for 2-sided copying and 2-sided
scanning of the original.
☞
AUTOMATIC 2-SIDED COPYING
(page 2-16)
8
½x11
8
½x11
5½x
8
½
Auto
8
½x11
Plain
8
½x14
8
½x11
Color Mode
Special Modes
Plain
2-Sided Copy
Output
File
Quick File
Copy Ratio
100%
3.
2.
1.
Original
Paper Select
Full Color
Exposure
Auto
4.
8
½x11
Upper Exit
Preview
OK
2-Sided Copy
Содержание MX-C402SC
Страница 4: ...Reduce copy mistakes Print one set of copies for proofing ...
Страница 6: ...Make a copy on this type of paper Envelopes and other special media Transparency film ...
Страница 11: ...Conserve Print on both sides of the paper Print multiple pages on one side of the paper ...
Страница 34: ...Search for a file abc Search for a file using a keyword Search by checking the contents of files ...
Страница 35: ...Organize my files Delete a file Delete all files Periodically delete files Change the folder ...
Страница 243: ...2 86 COPIER Contents To cancel an RGB adjust setting Touch the Cancel key in the screen of step 3 ...
Страница 245: ...2 88 COPIER Contents To cancel the sharpness setting Touch the Cancel key in the screen of step 3 ...
Страница 252: ...2 95 COPIER Contents To cancel an intensity setting Touch the Cancel key in the screen of step 3 ...
Страница 295: ...3 19 PRINTER Contents 4 Click the Print button Printing begins ...