


1-70
BEFORE USING THE MACHINE
Contents
CLEANING THE LASER UNIT
When the laser unit inside the machine becomes dirty, line patterns (colored lines) may form in the printed image. Follow
the steps below to clean the laser unit.
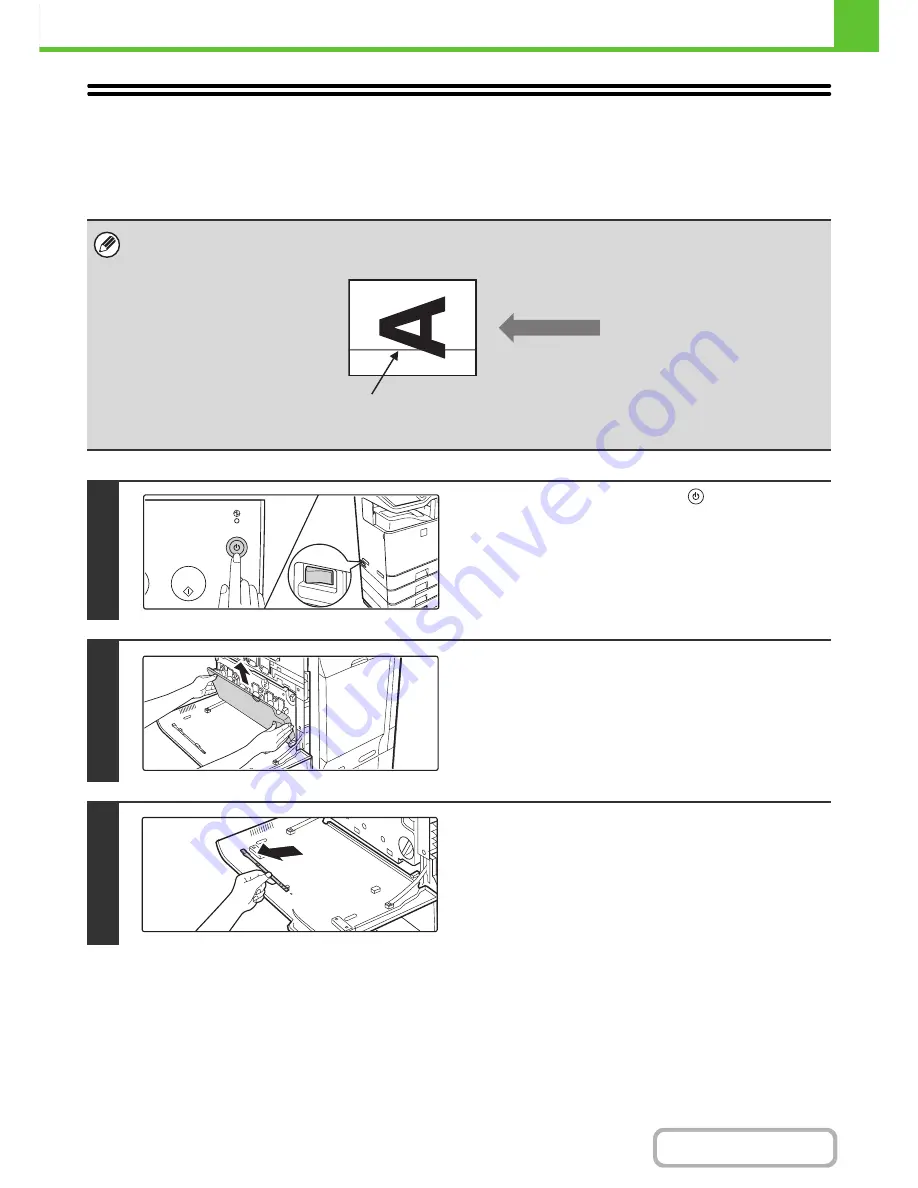
Identifying lines (colored lines) caused by a dirty laser unit
• Colored lines always appear in the same place. (The lines are never black.)
• The colored lines are parallel to the direction of paper feeding.
• Colored lines appear not only on copies but also on print jobs from a computer. (The same lines appear on both copies and
print jobs.)
Colored line
Direction of
paper feeding
1
Press the [POWER] key (
) on the
operation panel to turn off the panel
power, and then switch the main power
switch to the off position.
2
Open the front cover and remove the
toner collection container.
☞
REPLACING THE TONER COLLECTION
CONTAINER
(page 1-50)
3
Remove the cleaning tool for the writing
unit from the front cover.
Содержание MX-C402SC
Страница 4: ...Reduce copy mistakes Print one set of copies for proofing ...
Страница 6: ...Make a copy on this type of paper Envelopes and other special media Transparency film ...
Страница 11: ...Conserve Print on both sides of the paper Print multiple pages on one side of the paper ...
Страница 34: ...Search for a file abc Search for a file using a keyword Search by checking the contents of files ...
Страница 35: ...Organize my files Delete a file Delete all files Periodically delete files Change the folder ...
Страница 243: ...2 86 COPIER Contents To cancel an RGB adjust setting Touch the Cancel key in the screen of step 3 ...
Страница 245: ...2 88 COPIER Contents To cancel the sharpness setting Touch the Cancel key in the screen of step 3 ...
Страница 252: ...2 95 COPIER Contents To cancel an intensity setting Touch the Cancel key in the screen of step 3 ...
Страница 295: ...3 19 PRINTER Contents 4 Click the Print button Printing begins ...