


2-44
COPIER
Contents
ADDING MARGINS (Margin Shift)
This function is used to shift the copy image right, left, up or down to adjust the margin.
This is convenient when you wish to hole punch the copies.
Shifting the image to the right so the copies can be bound at the left edge with a string
1
1
Not using margin shift
Using margin shift
The punch holes cut off
part of the image
The image is moved to
allow space for the holes
so the image is not cut off.
1
1
1
Place the original.
Place the original face up in the document feeder tray, or face down on the document glass.
Place the original in the automatic document feeder.
☞
PLACING ORIGINALS IN THE AUTOMATIC DOCUMENT FEEDER
(page 1-36)
After placing the original, specify the original size.
☞
ORIGINAL SIZES
(page 2-30)
2
Select the special modes.
(1) Touch the [Special Modes] key.
(2) Touch the [Margin Shift] key.
☞
Special modes menu (1st screen)
(page 2-41)
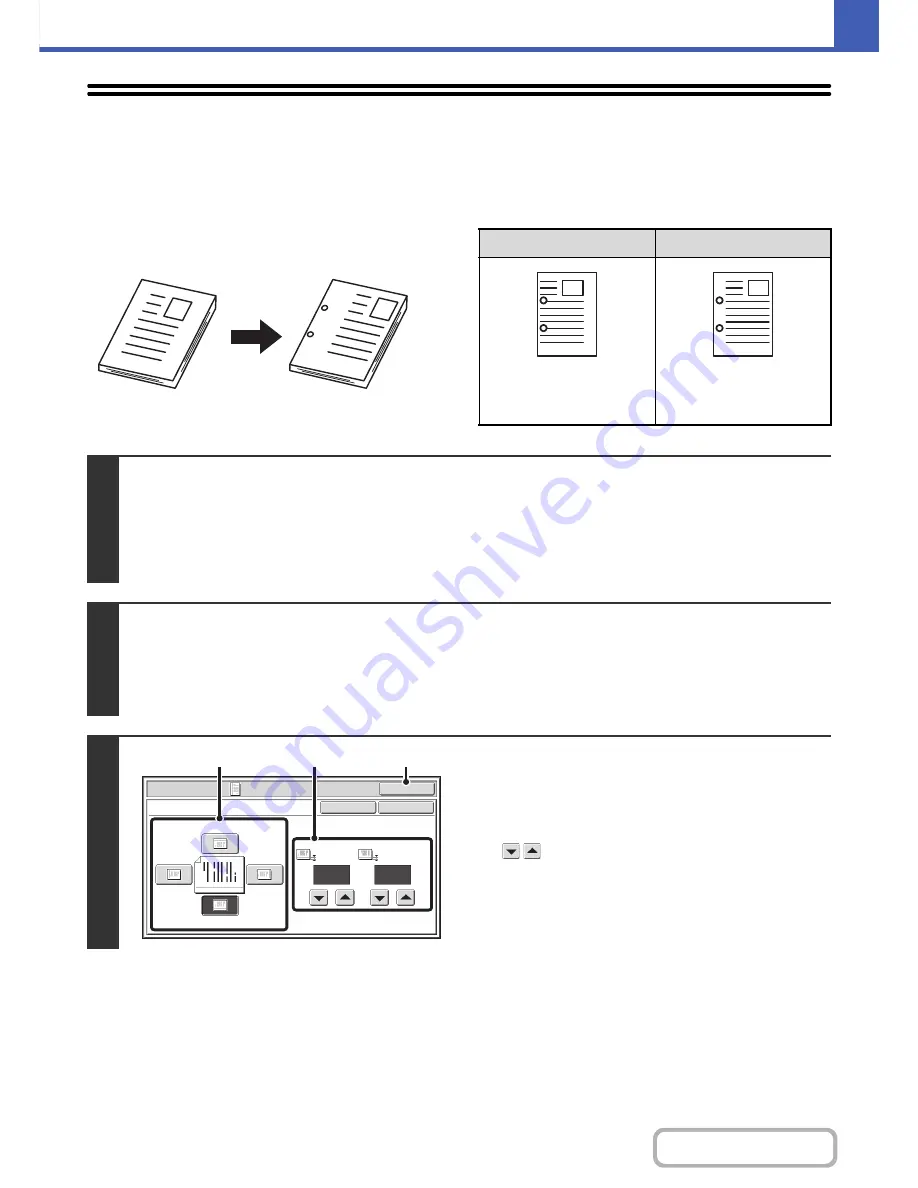
3
Set the margin shift.
(1) Touch the margin shift position.
Select one of the 4 positions.
(2) Set the amount of the margin shift with
.
0" to 1" (0 mm to 20 mm) can be entered.
(3) Touch the [OK] key.
You will return to the base screen of copy mode.
Special Modes
OK
1/2
Margin Shift
Right
Left
Up
Down
Side 1
(0~1)
inch
1/2
Side 2
(0~1)
inch
OK
Cancel
(1)
(2)
(3)
Содержание MX-C402SC
Страница 4: ...Reduce copy mistakes Print one set of copies for proofing ...
Страница 6: ...Make a copy on this type of paper Envelopes and other special media Transparency film ...
Страница 11: ...Conserve Print on both sides of the paper Print multiple pages on one side of the paper ...
Страница 34: ...Search for a file abc Search for a file using a keyword Search by checking the contents of files ...
Страница 35: ...Organize my files Delete a file Delete all files Periodically delete files Change the folder ...
Страница 243: ...2 86 COPIER Contents To cancel an RGB adjust setting Touch the Cancel key in the screen of step 3 ...
Страница 245: ...2 88 COPIER Contents To cancel the sharpness setting Touch the Cancel key in the screen of step 3 ...
Страница 252: ...2 95 COPIER Contents To cancel an intensity setting Touch the Cancel key in the screen of step 3 ...
Страница 295: ...3 19 PRINTER Contents 4 Click the Print button Printing begins ...