


1-109
BEFORE USING THE MACHINE
Contents
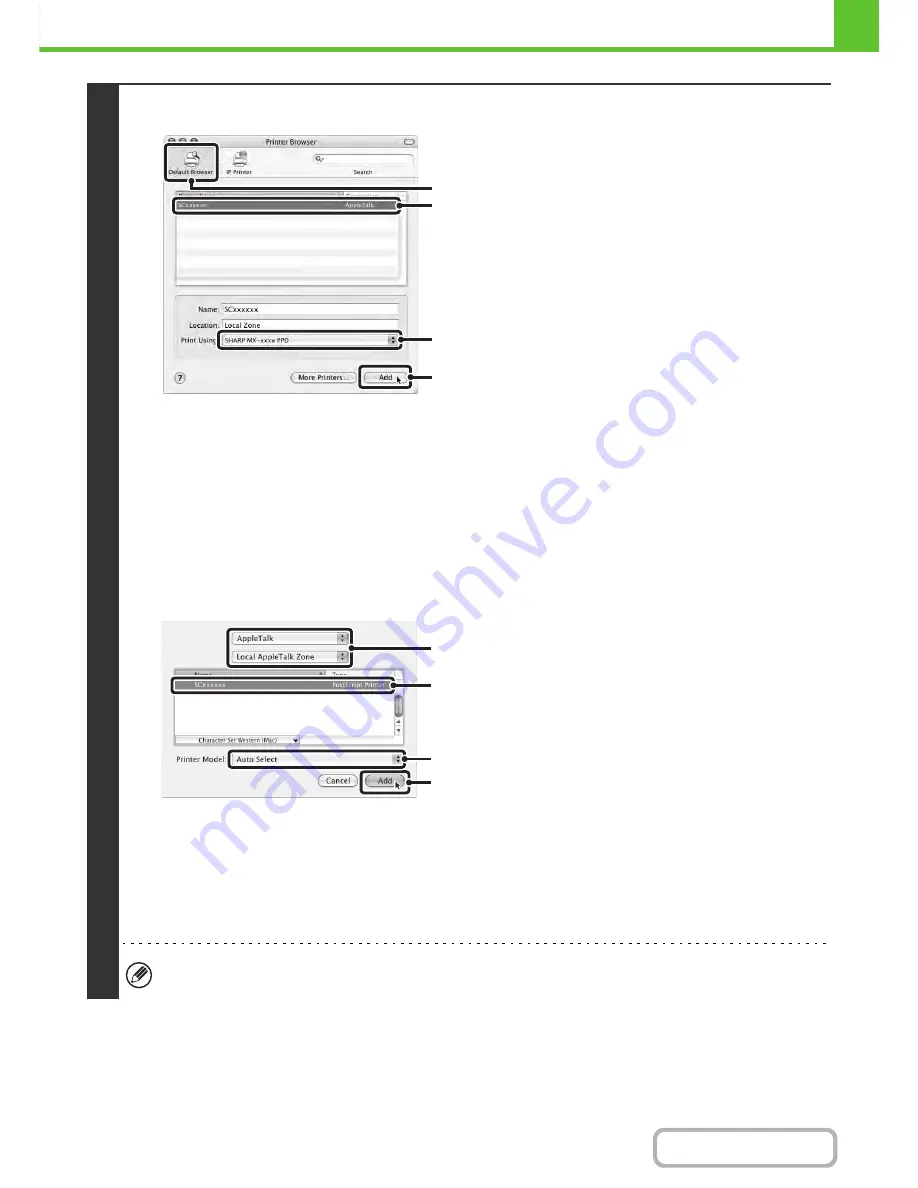
v10.4.11, v10.5 - 10.5.8, v10.6 - 10.6.2
(1) Click the [Default Browser] icon.
If you are using Mac OS X v10.5 to 10.5.8 or v10.6 -
10.6.2, click the [Default] icon.
(2) Click the machine's model name.
• Using with AppleTalk:
The machine's model name usually appears as
[SCxxxxxx]*.
• Using with Bonjour:
The machine's model name usually appears as
[RDVxxxxxx]*.
* "xxxxxx" is a sequence of characters that varies
depending on your model.
(3) Make sure that the PPD file of your model is
selected.
The PPD file of the machine is automatically selected.
(4) Click the [Add] button.
• Using with AppleTalk:
The PPD file of the machine is automatically selected
and the peripheral devices installed on the machine are
detected and automatically configured.
• Using with Bonjour:
The "Installable Options" screen appears. Select the
machine configuration and click the [Continue] button.
v10.2.8, v10.3.9
(1) Select [AppleTalk].
If multiple AppleTalk zones are displayed, select the zone
that includes the printer from the menu.
(2) Click the machine's model name.
The machine's model name usually appears as
[SCxxxxxx]. ("xxxxxx" is a sequence of characters that
varies depending on your model.)
(3) Select the PPD file of the machine.
• If you are using Mac OS X v10.3.9, select [Auto Select].
• If you are using Mac OS X v10.2.8, select [Sharp] and
click the PPD file of your model.
(4) Click the [Add] button.
If you are using Mac OS X v10.3.9, the PPD file of the
machine is automatically selected and the peripheral
devices installed on the machine are detected and
automatically configured.
The PPD file is installed in the following folders on the startup disk.
[Library] - [Printers] - [PPDs] - [Contents] - [Resources] - [en.lproj]
(1)
(2)
(4)
(3)
(1)
(2)
(4)
(3)
Содержание MX-C402SC
Страница 4: ...Reduce copy mistakes Print one set of copies for proofing ...
Страница 6: ...Make a copy on this type of paper Envelopes and other special media Transparency film ...
Страница 11: ...Conserve Print on both sides of the paper Print multiple pages on one side of the paper ...
Страница 34: ...Search for a file abc Search for a file using a keyword Search by checking the contents of files ...
Страница 35: ...Organize my files Delete a file Delete all files Periodically delete files Change the folder ...
Страница 243: ...2 86 COPIER Contents To cancel an RGB adjust setting Touch the Cancel key in the screen of step 3 ...
Страница 245: ...2 88 COPIER Contents To cancel the sharpness setting Touch the Cancel key in the screen of step 3 ...
Страница 252: ...2 95 COPIER Contents To cancel an intensity setting Touch the Cancel key in the screen of step 3 ...
Страница 295: ...3 19 PRINTER Contents 4 Click the Print button Printing begins ...