7-32
SYSTEM SETTINGS
Contents
When User Authentication is Enabled
When "
User Authentication Setting
" (page 7-50) is enabled, follow the procedure below to log in.
When user authentication is by login name and password (and e-mail
address)
When auto login is enabled, the login screen will not appear.
Administrator login is performed in the user selection screen. For more information on the login procedure when user
authentication is enabled, see "
USER AUTHENTICATION
" (page 1-17) in "1. BEFORE USING THE MACHINE".
1
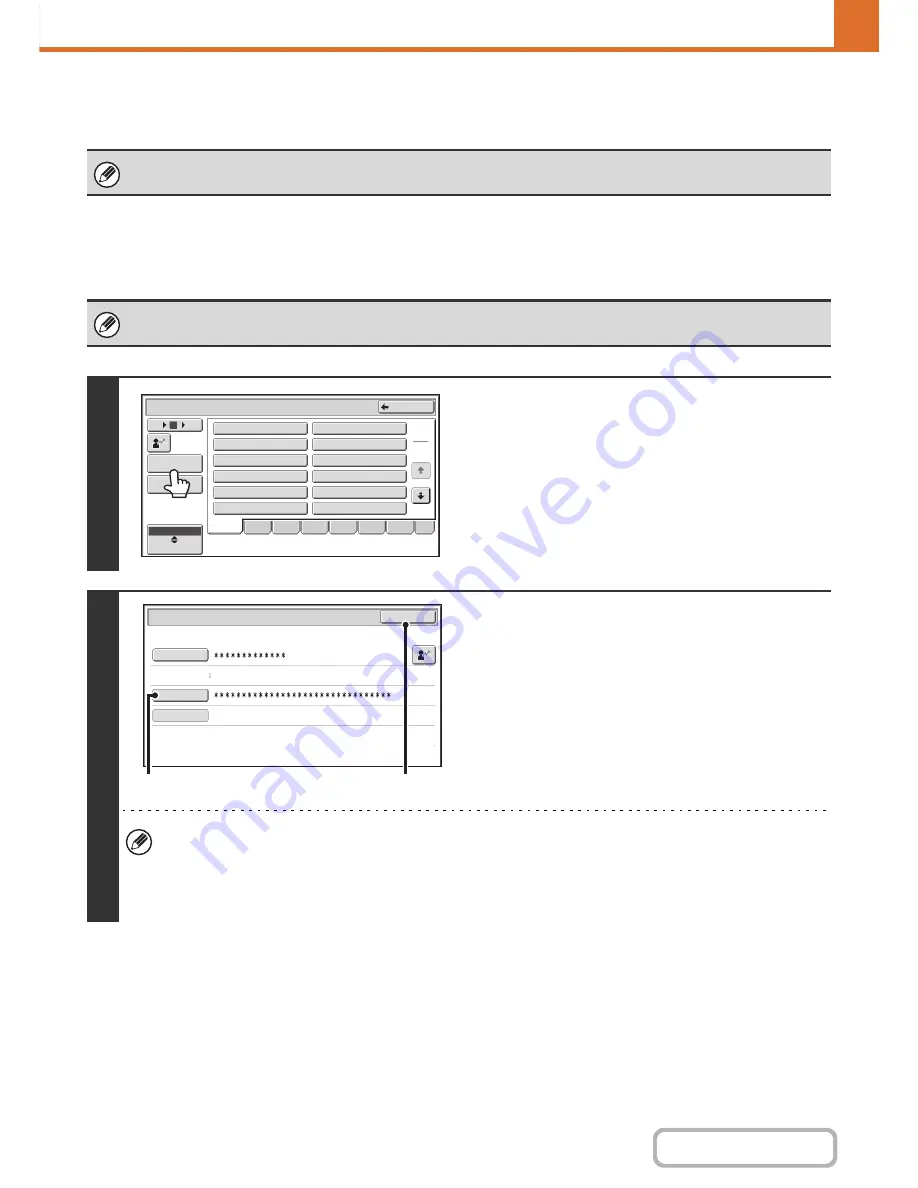
Touch the [Admin Login] key.
2
Log in.
(1) Touch the [Password] key.
Enter the administrator password in the administrator
password entry screen.
(2) Touch the [OK] key.
• If login name / password / e-mail address is selected for the authentication method, the [E-mail Address] key will
appear below the "User Name".
• For the factory default administrator password, see "TO THE ADMINISTRATOR OF THE MACHINE" in the Start
Guide.
• This completes the administrator login procedure. The system settings (administrator) can now be used.
1
2
Device Account Mode User Selection
Back
12
1
8
6
Direct Entry
User
ABC
Admin Login
1
2
Name 1
Name 2
Name 3
Name 4
Name 5
Name
6
Name 7
Name
8
Name 9
Name 10
Name 11
Name 12
All
EFGH
ABCD
IJKL
MNOP
QRSTU
VWXYZ
etc.
User Authentication
OK
Login Name
Login Locally
User Name
Administrator
Password
Auth to:
(2)
(1)
Содержание MX-C402SC
Страница 4: ...Reduce copy mistakes Print one set of copies for proofing ...
Страница 6: ...Make a copy on this type of paper Envelopes and other special media Transparency film ...
Страница 11: ...Conserve Print on both sides of the paper Print multiple pages on one side of the paper ...
Страница 34: ...Search for a file abc Search for a file using a keyword Search by checking the contents of files ...
Страница 35: ...Organize my files Delete a file Delete all files Periodically delete files Change the folder ...
Страница 243: ...2 86 COPIER Contents To cancel an RGB adjust setting Touch the Cancel key in the screen of step 3 ...
Страница 245: ...2 88 COPIER Contents To cancel the sharpness setting Touch the Cancel key in the screen of step 3 ...
Страница 252: ...2 95 COPIER Contents To cancel an intensity setting Touch the Cancel key in the screen of step 3 ...
Страница 295: ...3 19 PRINTER Contents 4 Click the Print button Printing begins ...


