


1-86
BEFORE USING THE MACHINE
Contents
4
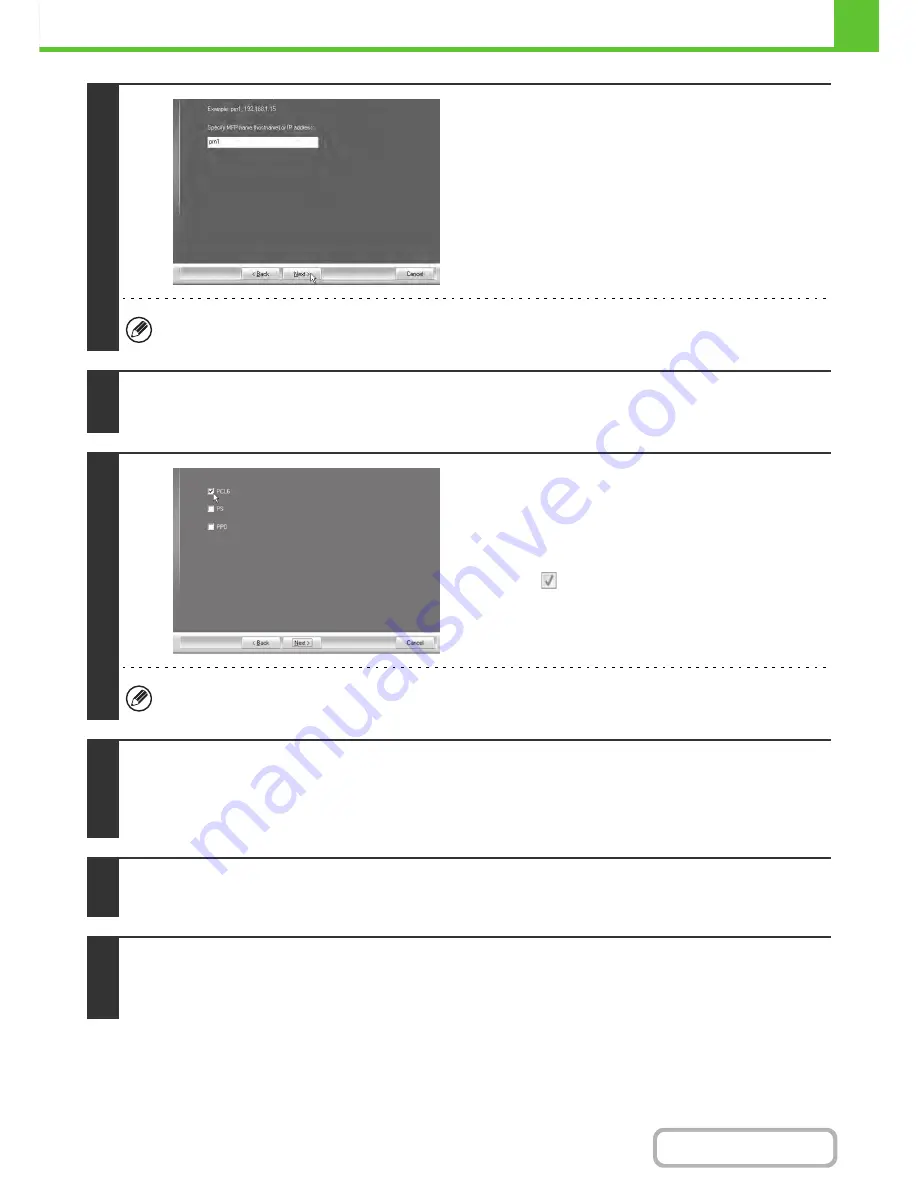
Enter the name (host name) or IP
address of the machine and click the
[Next] button.
☞
Start Guide "Checking the IP address of the machine"
If the machine is being used on an IPv6 network, enter any numbers or characters.
5
When the model selection window appears, select the model name of your
machine and click the [Next] button.
6
When the printer driver selection
window appears, select the printer driver
to be installed and click the [Next]
button.
Click the checkbox of the printer driver to be installed so that a
checkmark (
) appears.
When the PC-Fax driver is being installed, this screen does not appear. Go to the next step.
7
Select whether or not you wish the printer to be your default printer and click the
[Next] button.
If you are installing multiple drivers, select the printer driver to be used as the default printer.
If you do not wish to set one of the printer drivers as the default printer, select [No].
8
When the printer name window appears, click the [Next] button.
If you wish to change the printer name, enter the desired name and click the [Next] button.
9
When you are asked if you wish to install the display fonts, select an answer and
click the [Next] button.
When the PC-Fax driver is being installed, this screen does not appear. Go to the next step.
Содержание MX-C402SC
Страница 4: ...Reduce copy mistakes Print one set of copies for proofing ...
Страница 6: ...Make a copy on this type of paper Envelopes and other special media Transparency film ...
Страница 11: ...Conserve Print on both sides of the paper Print multiple pages on one side of the paper ...
Страница 34: ...Search for a file abc Search for a file using a keyword Search by checking the contents of files ...
Страница 35: ...Organize my files Delete a file Delete all files Periodically delete files Change the folder ...
Страница 243: ...2 86 COPIER Contents To cancel an RGB adjust setting Touch the Cancel key in the screen of step 3 ...
Страница 245: ...2 88 COPIER Contents To cancel the sharpness setting Touch the Cancel key in the screen of step 3 ...
Страница 252: ...2 95 COPIER Contents To cancel an intensity setting Touch the Cancel key in the screen of step 3 ...
Страница 295: ...3 19 PRINTER Contents 4 Click the Print button Printing begins ...