


5-54
SCANNER/INTERNET FAX
Contents
SPECIFYING THE ORIGINAL SCAN SIZE AND SEND SIZE
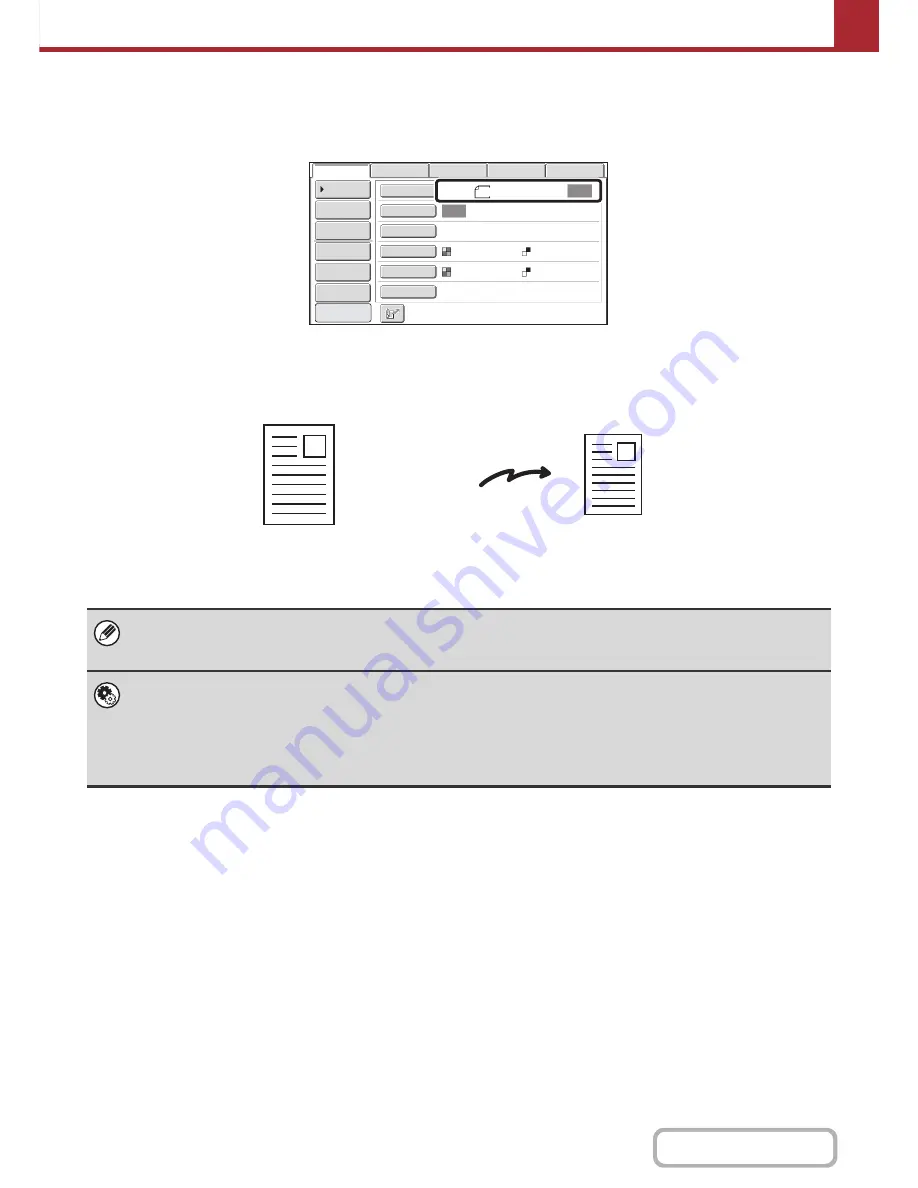
When the original is placed, the original size and the send size set in the system settings appear in the base screen as
the original size and send size.
In the above screen, the scan size (the original size) is 8-1/2" x 11" (A4) and the send size is auto. For example, if the
scan size is 8-1/2" x 11" (A4) and the send size is 5-1/2" x 8-1/2" (B5), the image will be reduced before transmission.
If the size of the placed original is different from the displayed original size, specify the original size.
☞
Specifying the original scan size (by paper size)
(page 5-55)
☞
Specifying the original scan size (by numerical values)
(page 5-56)
•
System Settings (Administrator): Default Original Size Settings
Set this if you frequently use a particular original size. The set size will appear in the [Original] key.
When this setting is configured, changing the original size can be omitted.
•
System settings (Administrator): Setting of Default Original Exit Place
When the automatic document feeder is used, the original's default output destination can be set to the upper exit or the
heavy exit. (Except when "Size Input" or "Card Size" is selected for the original size.)
Auto
Auto
File
Quick File
Address Review
Send Settings
Address Entry
Address Book
USB Mem. Scan
Fax
Internet Fax
PC Scan
Special Modes
Color Mode
File Format
Resolution
Exposure
Original
Scan:
Scan
Send:
Text
200X200dpi
Auto/Grayscale
Mono2
8
½x11
Preview
8-1/2" x 11" (A4)
The image is reduced
to 5-1/2" x 8-1/2" (B5)
before transmission
"Scan Size"
"Send Size" is set
to 5-1/2" x 8-1/2"
(B5)
Transmission
Содержание MX-C402SC
Страница 4: ...Reduce copy mistakes Print one set of copies for proofing ...
Страница 6: ...Make a copy on this type of paper Envelopes and other special media Transparency film ...
Страница 11: ...Conserve Print on both sides of the paper Print multiple pages on one side of the paper ...
Страница 34: ...Search for a file abc Search for a file using a keyword Search by checking the contents of files ...
Страница 35: ...Organize my files Delete a file Delete all files Periodically delete files Change the folder ...
Страница 243: ...2 86 COPIER Contents To cancel an RGB adjust setting Touch the Cancel key in the screen of step 3 ...
Страница 245: ...2 88 COPIER Contents To cancel the sharpness setting Touch the Cancel key in the screen of step 3 ...
Страница 252: ...2 95 COPIER Contents To cancel an intensity setting Touch the Cancel key in the screen of step 3 ...
Страница 295: ...3 19 PRINTER Contents 4 Click the Print button Printing begins ...