NETAVIS Observer 4.6 User Manual (October 2015)
Page 189 of 204
For each supported I/O device types there is a device descriptor file
server.externalIO.deviceio.DeviceTypeDescriptor.<device_type>.xml. For configuring a device you
must refer to one of the supported devices in server.externalIO.deviceio.DeviceMappings.xml.
When you are done with editing, save the file.
Please note: The sample file has to be renamed to
server.externalIO.deviceio.DeviceMappings.xml
.
20.7.3 Upload and activate the XML config files
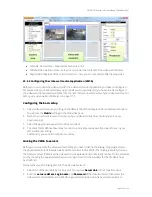
You can upload and activate the function by following these steps:
1.
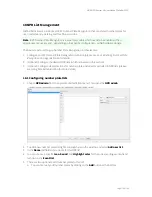
At the server's web page click on
Customizer login
to login to the Customizer area (the admin
password is needed for that).
2.
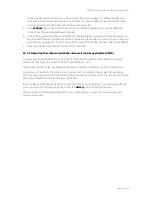
In the Customizer under the heading
Upload configuration files
click on the button
Choose
file
.
3.
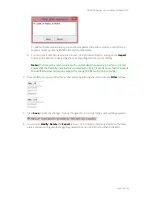
In the opened file dialog choose the file server.externalIO.deviceio.DeviceMappings.xml and
upload it to the server.
4.
Please restart Observer to activate the configuration.
Hint
: For more details on configuring I/O devices please refer to the
I/O Contacts
White Paper available
in the
documentation section
of our
website
.
20.8 AXIS T8310 Control Board configuration
Observer 4.5 added support for the AXIS T8310 Video Surveillance Control Board which consists of a
joystick, keypad, and jog dial. These input devices can be used be used individually or combined.
Note
: Joystick-support is only available in the locally installed Observer client on Microsoft Windows
platforms!
20.8.1 Installation
Follow these steps to enable AXIS T8310 Control Board support on a client:
Connect the AXIS T8310 Control Board to the system and wait for Windows to detect and install
it
Install the latest Observer client via the corresponding option from the Observer Start page
Restart the client computer to complete the installation process
20.8.2 Use
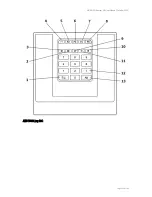
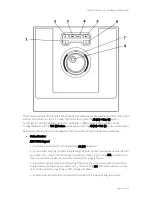
The following two figures show the controls and buttons of the AXIS T8312 keypad and AXIS T8313 jog
dial. For simplicity we have numbered the buttons for later reference.
AXIS T8312 keypad:

