NETAVIS Observer 4.6 User Manual (October 2015)
Page 168 of 204
16 I/O Device Administration
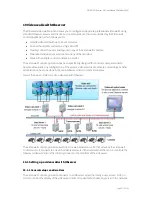
NETAVIS Observer 4.6 introduced I/O Device Administration which enables the configuration of I/O
devices within the Observer user interface. Adding I/O devices to a NETAVIS Observer system is now as
easy as selecting the model and entering its IP address, port, user, and password.
Note
: I/O devices (and their corresponding actions) configured in versions prior to NETAVISObserver
4.6 via the XML configuration file will continue to work in Observer 4.6. However if you want to use
I/O devices with new features introduced in Observer 4.6 (e.g. Rule Administration) then you will need
to remove the previous XML configuration and re-add the I/O device in the I/O Device Administration.
16.1 Configuring I/O devices
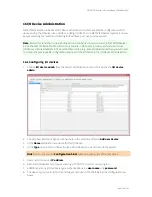
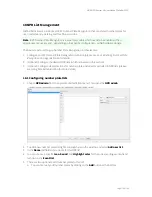
1.
Choose
I/O device admin
from the System administration menu. This opens the
I/O device
admin
:
2.
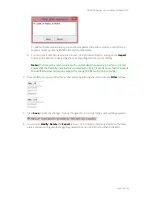
To add a new I/O device right-click anywhere in the window and select
Add new device
.
3.
In the
Name
text field enter a name for this I/O device.
4.
In the
Type
pop-up menu choose the type of I/O device you want to add to the system.
Hint
: Device-type specific
Configuration hints
are shown to the right of the text boxes.
5.
Next enter the device's
IP address
.
6.
Almost all I/O devices also require entering a TCP/HTTP port for connecting to it.
7.
Additionally many I/O devices require authentication via a
user name
and
password
.
8.
The device-type specific I/O ports and relays are shown in the table below the configuration text
boxes.


