


Chapter 6: Using the Web Interface
310
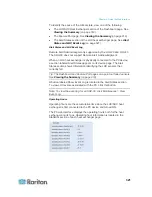
Snapshot Storage
Once a snapshot is taken using the Store Snapshot to Webcam Storage
feature, it is stored locally on the PX by default. Up to ten (10) images
can be stored on the PX at once.
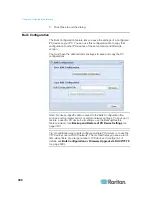
To save more than 10 snapshots, save the images on a Common
Internet File System/Samba.
Note: NFS and FTP are not supported for this release and are disabled
on the dialog.
Snapshot files are saved as JPG files. The snapshot file is named based
on the number of the snapshot starting from 1. So the first snapshot that
is taken is named 1.jpg, the second is 2.jpg and so on.
Unless snapshots are deleted manually, the oldest snapshot is
automatically deleted from the device when the number of snapshots
exceeds ten. Rebooting the PX deletes all webcam snapshots that are
saved on the device.
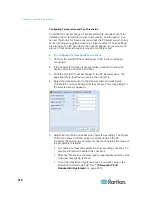
Saving Snapshots
If it is intended to keep the snapshot being displayed on the webcam,
you can manually save it onto the PX. A snapshot is saved as a JPEG
file and stored on the Snapshots page.
Warning: The snapshots stored on the PX are cleared when rebooting
the PX. Check the importance of the snapshots before performing the
reset.
To save the snapshot being displayed:
1. In the navigation tree, click on the webcam you want to take a
snapshot with. The webcam image is displayed in the right pane.
The webcam must be in snapshot mode in order to take snapshots. If
the webcam is in video mode, click Setup in the right pane above the
video image to open the Webcam Setup dialog, then select the
Snapshot radio button.
2. Once the snapshot image being taken by the selected webcam is
displayed in the right pane, click the Store Snapshot to Webcam
Storage
icon above the image to take a snapshot. Up to ten (10)
snapshots can be stored at once on the device.
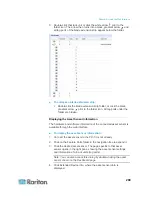
3. Click on the Snapshots icon in the navigation tree to verify that those
snapshots are successfully saved and listed on the Snapshots page.
Summary of Contents for PX3-4000 series
Page 5: ......
Page 627: ...Appendix I RADIUS Configuration Illustration 606 Note If your PX uses PAP then select PAP...
Page 632: ...Appendix I RADIUS Configuration Illustration 611 14 The new attribute is added Click OK...
Page 633: ...Appendix I RADIUS Configuration Illustration 612 15 Click Next to continue...
Page 648: ...Appendix J Integration 627 3 Click OK...
Page 661: ...Appendix J Integration 640 2 Launch dcTrack to import the spreadsheet file...


