Chapter 6: Using the Web Interface
147
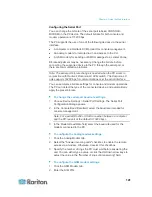
To access Slave 2 via HTTP, the IP address is:
http://192.168.84.77:50102/
To access Slave 2 via SSH, the command is:
ssh -p 50202 192.168.84.77
Setting Data Logging
The PX can store 120 measurements for each sensor in a memory buffer.
This memory buffer is known as the data log. Sensor readings in the
data log can be retrieved using SNMP.
You can configure how often measurements are written into the data log
using the Measurements Per Log Entry field. Since the PX internal
sensors are measured every second, specifying a value of 60, for
example, would cause measurements to be written to the data log once
every minute. Since there are 120 measurements of storage per sensor,
specifying a value of 60 means the log can store the last two hours of
measurements before the oldest one in the log gets overwritten.
Whenever measurements are written to the log, three values for each
sensor are written: the average, minimum and maximum values. For
example, if measurements are written every minute, the average of all
measurements that occurred during the preceding 60 seconds along with
the minimum and maximum measurement values are written to the log.
Note: The PX device's SNMP agent must be enabled for this feature to
work. See
Enabling SNMP
(on page 330) for more details. In addition,
using an NTP time server ensures accurately time-stamped
measurements.
Enabling Data Logging
By default, data logging is disabled. Only users having the
"Administrator" or "Change Pdu, Inlet, Outlet & Overcurrent Protector
Configuration" permissions can enable or disable this feature. See
Setting Up Roles
(on page 160).
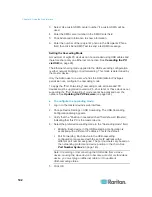
To configure the data logging feature:
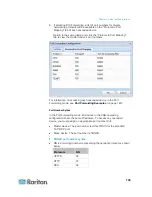
1. Choose Device Settings > Data Logging. The Data Logging Options
dialog appears.
2. To enable the data logging feature, select the "enable" checkbox in
the Enable Data Logging field.
3. Type a number in the Measurements Per Log Entry field. Valid range
is from 1 to 600. The default is 60.
4. Verify that all sensor logging is enabled. If not, click Enable All to
have all sensors selected.
5. Click OK.
Summary of Contents for PX3-4000 series
Page 5: ......
Page 627: ...Appendix I RADIUS Configuration Illustration 606 Note If your PX uses PAP then select PAP...
Page 632: ...Appendix I RADIUS Configuration Illustration 611 14 The new attribute is added Click OK...
Page 633: ...Appendix I RADIUS Configuration Illustration 612 15 Click Next to continue...
Page 648: ...Appendix J Integration 627 3 Click OK...
Page 661: ...Appendix J Integration 640 2 Launch dcTrack to import the spreadsheet file...

