NAVIS NavDP 4000. Operation Manual
Red
The data received by the filter are incorrect for a long time, or there was no data from the sensor for a long time, or
the filter has just started operation, and it takes a few second before the process has converged.
8.8.2.3
Data Indicator
The color of a single stroke provides you with the information about the corresponding piece of data.
Green
The data received from the sensor have correct structure, they satisfy the accuracy criteria, and therefore, they are
used by
NAVIS NavDP 4000
.
White
The data received from the sensor have correct structure, however, they do not satisfy the accuracy criteria, and
therefore, they are not used by
NAVIS NavDP 4000
.
Red
The data received from the sensor have incorrect structure; therefore they are not used by
NAVIS NavDP 4000
.
Ref-system Marker
At
Map
Window, at Ref-systems Plot and at Details Plots following markers are used.
The small asterisk
shows ship position estimated using this ref-system data. Color legend for this symbols is shown
in main (“All” or “Used”) view of Ref-window.
For transponders (HPR beacons, LR reflectors, TW depressors, etc) circle, rhomb and square markers are used.
If the transponder is used as Reference,
marker is shown at plot.
If the transponder is used as Target,
marker is shown at plot, and an indicator “tgt” appears instead of the marker
to the left of the Ref-system softkey.
If the transponder is used as mobile,
marker is shown at plot, and an indicator “mob” appears instead of the marker
to the left of the Ref-system softkey.
If the status of transponder data processing is not ok, the marker is dashed.
Use
Target window
for work with targets (section 10.5, page 180).
8.8.2.4
Operations with Ref-system Softkey
A sensor’s name is the title of the proper sensor softkey.
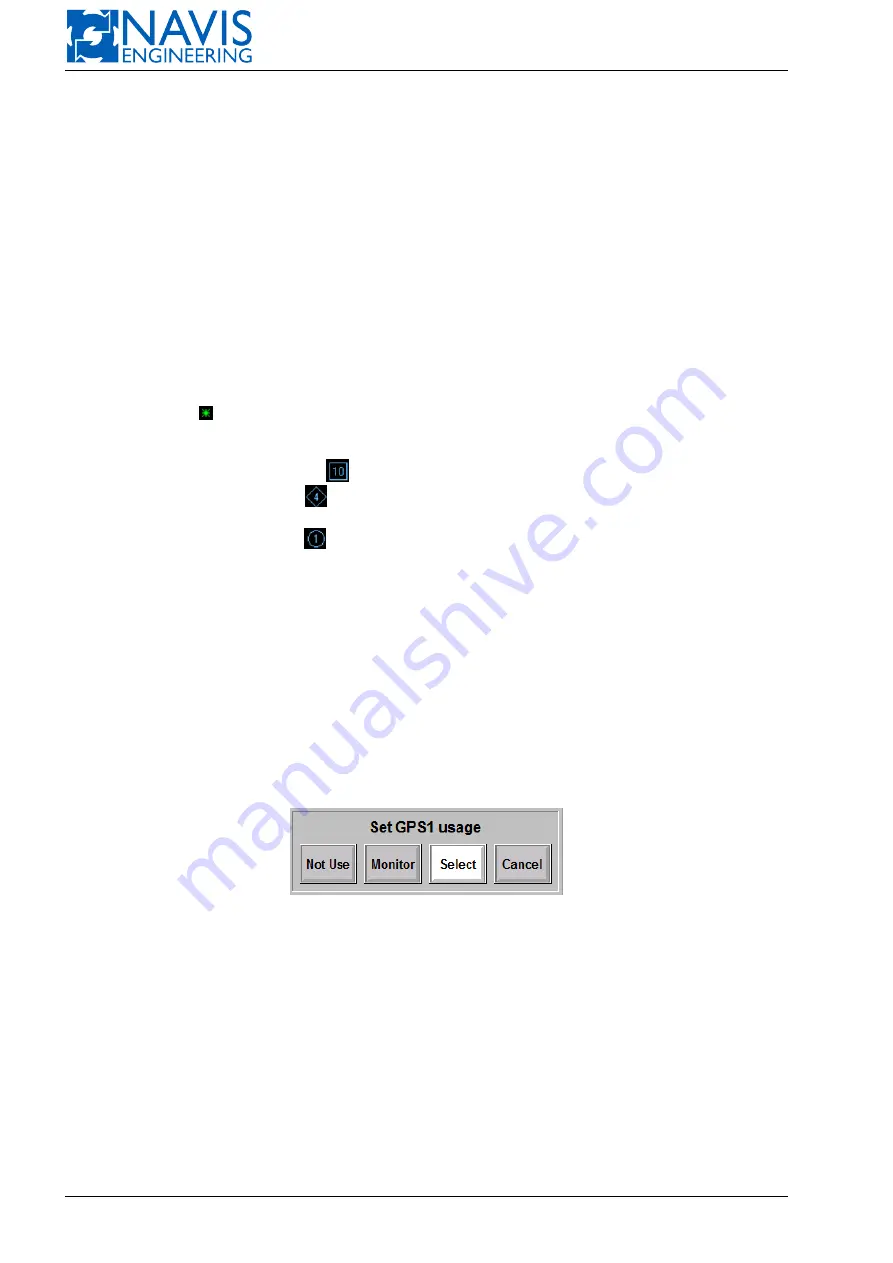
Use the sensor softkey to operate a sensor. Press a sensor softkey to get dialog box for the specified sensor. The
softkey configurations in the dialog box may vary depending on the current usage state and possibility for using the sensor
as a target.
The softkey of the current usage state is white-colored.
– Dialog box example for sensors in case they are selected or cannot be used as targets is shown in Figure 8.11. menu
for sensors
Figure 8.11: Dialog Box for the sensor in case it is Selected or cannot be used as target
Not Use
— select this item if the sensor does not work properly or is not installed yet;
Monitor
— select this item if you want to turn off the sensor temporarily;
Select
— press to select the sensor;
Cancel
— press to exit the dialog box without any changes.
– Dialog box example for sensors which can be used as targets in case they are not used at the moment (“Not Use”,
“Monitor” or “Mobile” states) is shown in Figure 8.12.
Not Use
— select this item if the sensor does not work properly or is not installed yet;
Monitor
— select this item if you want to turn off the sensor temporarily;
Select
— press to select the sensor;
147
Doc. 000.JDP-10000-OME, rev.3.3.13/“2102.$–17A-Advanced”


