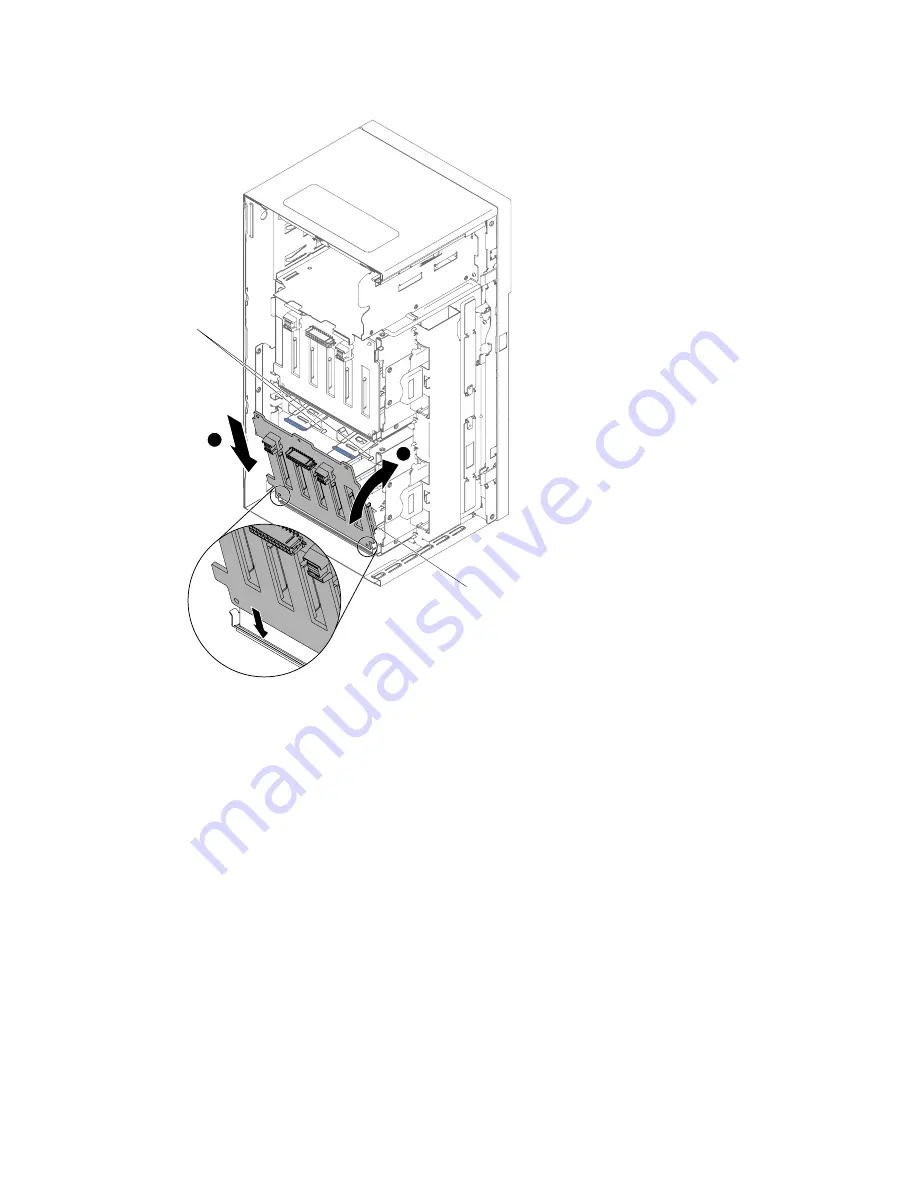
1
2
3.5-inch HDD backplane
Align pin
Figure 164. 3.5-inch HDD backplane installation
Step 7.
Rotate the backplane toward the server chassis until the backplane clicks into the place securely.
Step 8.
Reconnect the power, configuration, and signal cables to the 3.5-inch hard disk drive backplane
(see “Internal cable routing and connectors” on page 33).
Step 9.
Install the fan cage assembly (see “Installing the fan cage assembly” on page 262).
Step 10. Install the air baffle (see “Replacing the air baffle” on page 189).
Step 11. Install the 3.5-inch hot-swap hard disk drives that were removed from the hard disk drive cage (see
“Installing a 3.5-inch hot-swap hard disk drive” on page 203).
Step 12. Close the bezel.
Step 13. Install and lock the left-side cover (see “Installing the left-side cover” on page 183).
If you have replaced a server component or installed an optional device in the server, you need to reconnect
the power cords and all external cables, and turn on the server and peripheral devices.
Removing a hot-swap power supply
Use this information to remove a hot-swap power supply.
When you remove or install a hot-swap power supply, observe the following precautions.
Removing and replacing components
243
Summary of Contents for System x3500 M5 Type 5464
Page 1: ...System x3500 M5 Installation and Service Guide Machine Type 5464 ...
Page 6: ...iv System x3500 M5 Installation and Service Guide ...
Page 16: ...xiv System x3500 M5 Installation and Service Guide ...
Page 140: ...124 System x3500 M5 Installation and Service Guide ...
Page 194: ...178 System x3500 M5 Installation and Service Guide ...
Page 1056: ...1040 System x3500 M5 Installation and Service Guide ...
Page 1214: ...1198 System x3500 M5 Installation and Service Guide ...
Page 1218: ...1202 System x3500 M5 Installation and Service Guide ...
Page 1226: ...Taiwan BSMI RoHS declaration 1210 System x3500 M5 Installation and Service Guide ...
Page 1235: ......
Page 1236: ......


