


80
Hard Drive Replacement
Hard drives in the TeraStation show a blue status LED during normal operation. If a drive fails, its error LED will glow
red.
±
²
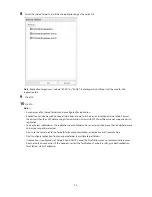
1
Error LED
Glows red if a drive has failed.
2
Status LEDs
The failed drive's status LED will be glowing a steady red. A drive with a red status LED is ready to hot-swap.
Notes:
•
Do not unplug a drive whose status LED is green instead of red. Dismount it first or shut down the TeraStation
before swapping a working drive. If you remove the drive without properly dismounting it, data may be lost
or the TeraStation may malfunction.
•
For the replacement drive, use a Buffalo OP-HDWR series drive for the TS5200DS, TS5000WR, and TS5000N
series, a OP-HDH series drive for the TS5400RH, and a OP-HDS series drive for other TS5000 series TeraStations.
The new drive should be the same size (or larger) as the replacement drive. If a larger drive is used, the extra
space will not be usable in a RAID array.
•
To avoid damaging the TeraStation with static electricity, ground yourself by touching something made of
metal before handling any sensitive electronic parts.
•
After a drive is replaced, it will take about 30 minutes before normal file reading and writing are restored.
Settings may not be accessible during this period.
Summary of Contents for TeraStation WSS 5000
Page 10: ...9 Chapter 1 Installation Diagrams TS5800D TS5800DN TS5800DWR µ µ µ µ TS5600D TS5600DN µ µ µ µ ...
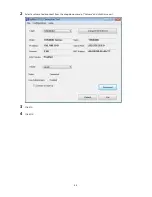
Page 60: ...59 6 Click Edit under NAS Volume 7 Click Create Volume ...
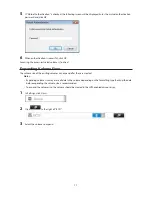
Page 88: ...87 2 Click to the right of Backup 3 Click List of LinkStations and TeraStations ...
Page 90: ...89 3 Click Create New Job Note Up to 8 backup jobs can be configured ...
Page 104: ...103 18Click Time Machine ...
Page 105: ...104 19Click Select Backup Disk 20Select the TeraStation then click Use Disk ...
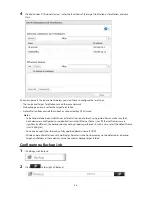
Page 116: ...115 3 Click Create New Job ...
Page 131: ...130 9 Click Open Squeezebox The Squeezebox s settings will open ...
Page 136: ...135 4 Open the License tab then click Activate Free License To deactivate the license click ...
Page 138: ...137 3 Click Next 4 Click Find Cameras ...
Page 144: ...143 2 Select the search criteria on the left side of the search screen then click Search ...
Page 145: ...144 3 The search results are displayed Click a thumbnail to start the media viewer ...