


118
•
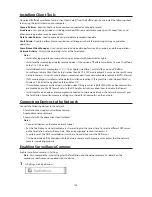
If using the cloud storage through a proxy server, click
Proxy Settings
. In the displayed page, enter the proxy
server name, port number, username, and password. Ask your network administrator for detailed proxy
server settings.
•
To use after the network was temporarily disconnected, click
Reconnect
.
•
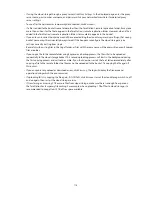
If a file is added to the bucket from a folder other than the TeraStation's remote replication folder, it may take
more than an hour for the file to appear in the TeraStation's remote replication folder. However, when a file is
added to the TeraStation's remote replication folder, it immediately appears in the bucket.
•
If you enter an incorrect bucket name and then cancel editing the cloud storage service settings, that wrong
bucket name may still accidentally be registered. If this happens, reconfigure the cloud storage service
settings correctly starting from step 4.
•
Be careful with existing files in the target folder, as files with the same name will be overwritten even if copied
files are older.
•
If you copy a file to the remote folder using Explorer or a backup process, the file will also be uploaded
sequentially to the cloud storage bucket. This second uploading process will start in the background during
the first copying process and will not be visible. If you shut down or restart the TeraStation immediately after
copying a file to the remote folder, the file may not be uploaded to the bucket. Try copying the file again if
this occurs.
•
If you encounter any upload or download errors, click
Error Log
. The log will display the filename and
operation during which the error occurred.
•
If uploading fails, try copying the file again. If it still fails, click
Reconnect
or set the cloud storage switch to off
and on again, then restart the cloud storage service.
•
If transferring or accessing 1 TB or more files from cloud storage, make sure there is enough free space on
the TeraStation for temporary file caching. For example, when uploading 1 TB of files to cloud storage, it is
recommended to keep at least 2 TB of free space available.
Summary of Contents for TeraStation WSS 5000
Page 10: ...9 Chapter 1 Installation Diagrams TS5800D TS5800DN TS5800DWR µ µ µ µ TS5600D TS5600DN µ µ µ µ ...
Page 60: ...59 6 Click Edit under NAS Volume 7 Click Create Volume ...
Page 88: ...87 2 Click to the right of Backup 3 Click List of LinkStations and TeraStations ...
Page 90: ...89 3 Click Create New Job Note Up to 8 backup jobs can be configured ...
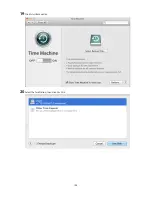
Page 104: ...103 18Click Time Machine ...
Page 105: ...104 19Click Select Backup Disk 20Select the TeraStation then click Use Disk ...
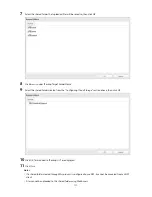
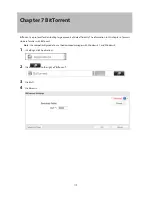
Page 116: ...115 3 Click Create New Job ...
Page 131: ...130 9 Click Open Squeezebox The Squeezebox s settings will open ...
Page 136: ...135 4 Open the License tab then click Activate Free License To deactivate the license click ...
Page 138: ...137 3 Click Next 4 Click Find Cameras ...
Page 144: ...143 2 Select the search criteria on the left side of the search screen then click Search ...
Page 145: ...144 3 The search results are displayed Click a thumbnail to start the media viewer ...