132
Installing Client Tools
Download "Buffalo Surveillance Camera Client Tools Setup" from the Buffalo website and install the following client
tools using the install wizard on your computer.
Camera Policies
- Registers that a network camera is connected and ready to record.
Live Viewer
- Lets you view video as it is being recorded. With some network cameras, pan, tilt, zoom, focus, and
other remote operations may be unavailable.
Data Service Policies
- Used to move, back up, and delete recorded video data.
Vault Admin
- Used to perform license registration, self-diagnosis, check the remaining disk space, and other
operations.
Surveillance Video Manager
- Used to view recorded video data, perform searches, export, and other operations.
Network Activity
- Displays the operating status of the TeraStation.
Notes:
•
Install after logging into your computer using an account with administrator rights.
•
Install another media player to play recorded videos if the version of "Buffalo Surveillance Camera Client Tools
Setup" is 5.7.3.2 or later.
•
Install VideoLAN VLC media player 1.11–1.13, or Apple QuickTime 7 or later if the version of "Buffalo
Surveillance Camera Client Tools Setup" is older than 5.6.19.3. VLC media player 2.0.x may not work with some
network cameras. Using VLC media player is recommended if your network camera records in MPEG-4 format.
•
If VLC media player is installed, use the default installation location (C:\Program Files (x86)\VideoLAN\VLC in
Windows 7 64-bit or the Application folder in Mac OS).
•
If surveillance cameras or client tools installed under C:\Program Files (x86)\BUFFALO\SurveillanceServer\Bin
are blocked due to the OS firewall, refer to the OS help for instructions about how to disable the firewall.
•
Install client tools on one or more computers connected to the same network as the network camera(s) and
the TeraStation. Surveillance camera settings are shared for all computers on the network.
Connecting Devices to the Network
Connect the following devices to the network.
•
A TeraStation that supports surveillance cameras
•
A compatible network camera
•
A computer with the above client tools installed
Notes:
•
Connect all devices on the same network subnet.
•
Set the TeraStation's and network camera's time settings to the correct time. To select a different NTP server
on the TeraStation, refer to "Name, Date, Time, and Language" section in chapter 10.
In certain cases, the DNS server address must be set in order to access the NTP server.
•
Use the dedicated utility provided with the network camera or other program to confirm that the network
camera is operating properly.
Enabling Surveillance Cameras
Enable surveillance cameras in Settings.
Note:
First, complete the initial settings for the TeraStation and the network camera. For details on the
procedure, see the manual supplied with the device.
1
In Settings, click
Applications
.
Summary of Contents for TeraStation WSS 5000
Page 10: ...9 Chapter 1 Installation Diagrams TS5800D TS5800DN TS5800DWR µ µ µ µ TS5600D TS5600DN µ µ µ µ ...
Page 60: ...59 6 Click Edit under NAS Volume 7 Click Create Volume ...
Page 88: ...87 2 Click to the right of Backup 3 Click List of LinkStations and TeraStations ...
Page 90: ...89 3 Click Create New Job Note Up to 8 backup jobs can be configured ...
Page 104: ...103 18Click Time Machine ...
Page 105: ...104 19Click Select Backup Disk 20Select the TeraStation then click Use Disk ...
Page 116: ...115 3 Click Create New Job ...
Page 131: ...130 9 Click Open Squeezebox The Squeezebox s settings will open ...
Page 136: ...135 4 Open the License tab then click Activate Free License To deactivate the license click ...
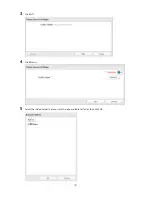
Page 138: ...137 3 Click Next 4 Click Find Cameras ...
Page 144: ...143 2 Select the search criteria on the left side of the search screen then click Search ...
Page 145: ...144 3 The search results are displayed Click a thumbnail to start the media viewer ...

