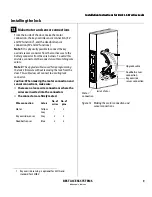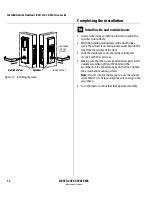
Installation Instructions for B.A.S.I.S. Mortise Locks
BEST ACCESS SYSTEMS
Indianapolis, Indiana
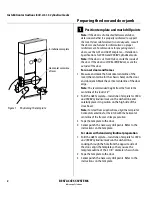
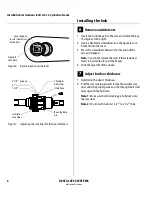
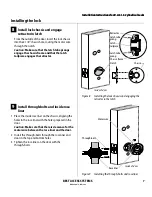
Completing the installation
14
19
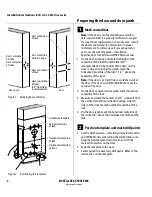
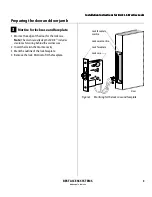
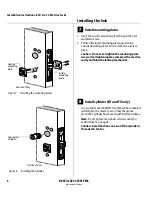
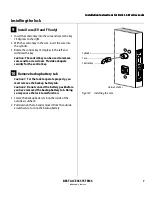
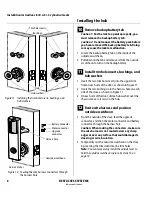
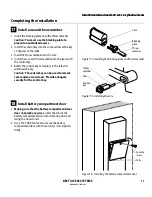
Install strike box and strike plate
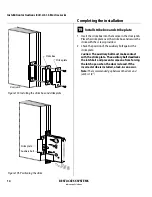
1 Insert the strike box into the mortise in the door jamb.
Place the strike plate over the strike box and secure the
strike with the screws provided.
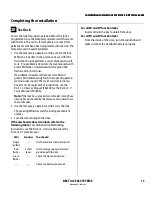
2 Check the position of the auxiliary bolt against the
strike plate.
Caution:
The auxiliary bolt must make contact
with the strike plate. The auxiliary bolt deadlocks
the latchbolt and prevents someone from forcing
the latch open when the door is closed. If the
incorrect strike is installed, a lock-in can occur.
Note:
The recommended gap between the door and
jamb is 1/8
″ .
Figure 19a Installing the strike box and strike plate
Strike box
Strike plate
Door jamb
Figure 19b Positioning the strike
Auxiliary bolt
Strike plate
Summary of Contents for B.A.S.I.S. V
Page 1: ...SERVICE MANUAL SERVICE MANUAL ...
Page 16: ...Figures xvi B A S I S V Service Manual ...
Page 48: ...Standard Functions and Parts 2 24 B A S I S V Service Manual ...
Page 66: ...Exit Hardware Trim Functions and Parts 3 18 B A S I S V Service Manual ...
Page 78: ...Shared Standard and Exit Hardware Trim Parts 4 12 B A S I S V Service Manual ...
Page 114: ...Servicing Standard Mortise Case Parts 6 20 B A S I S V Service Manual ...
Page 206: ...Servicing Exit Hardware Trim Escutcheon Parts 10 32 B A S I S V Service Manual ...
Page 238: ...Troubleshooting 12 12 B A S I S V Service Manual ...
Page 242: ...Lock History Event Types A 4 B A S I S V Service Manual ...
Page 244: ...Installation Instructions B 2 B A S I S V Service Manual ...


