Installation Instructions for B.A.S.I.S. EX Series Exit Hardware Trim
BEST ACCESS SYSTEMS
Indianapolis, Indiana
12
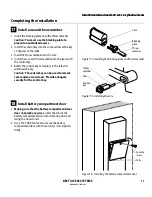
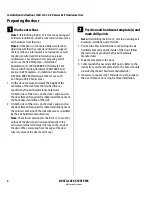
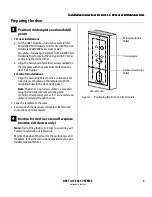
Completing the installation
19
Test lock
To test the lock for proper operation before the lock is
programmed, use the temporary operator card that came
with the lock. This card is for temporary use only. After
permanent cards have been programmed for the lock, the
temporary card should be deleted.
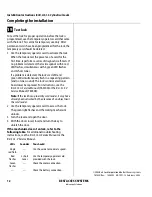
1
Use the temporary operator card to activate the lock.
When the lock detects the presence of a card for the
first time, the lock performs a series of diagnostic self-
tests. If no problem is detected, the lock responds with
4 red LED flashes, simultaneous with 4 green LED
flashes and 4 short tones.
If a problem is detected, the lock’s red LED and
green LED simultaneously flash in a repeating pattern
(and no tones sound). The lock’s control electronics
board must be replaced. For instructions, see the
B.A.S.I.S. G Service Manual
(T63300) or the
B.A.S.I.S. V
Service Manual
(T61805).
Note:
If the lock has a proximity card reader, it may have
already been activated by the presence of an object near
the card reader.
2
Use the temporary operator card to access the lock.
The green light flashes and the locking mechanism
unlocks.
3
Turn the lever and open the door.
If the mechanism doesn’t unlock, refer to the
following table.
For additional troubleshooting
instructions, see the
B.A.S.I.S. G Service Manual
or the
B.A.S.I.S. V Service Manual.
For EV function locks
Insert and turn the key to unlatch the door.
LEDs
Sounder
You should
Single
red flash
—
Use the card at a moderate speed.
Red
flashes
3 short
tones
Use the temporary operator card
provided with the lock.
—
—
Check the battery connection.
Important:
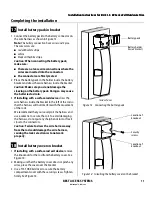
When the trim and exit hardware
installation is complete, perform all testing specified
by the exit hardware manufacturer.
© 2001–2002 Best Lock Corporation dba Best Access Systems.
T61828/Rev A 1844200 ER-7991-12 July 2002
Summary of Contents for B.A.S.I.S. V
Page 1: ...SERVICE MANUAL SERVICE MANUAL ...
Page 16: ...Figures xvi B A S I S V Service Manual ...
Page 48: ...Standard Functions and Parts 2 24 B A S I S V Service Manual ...
Page 66: ...Exit Hardware Trim Functions and Parts 3 18 B A S I S V Service Manual ...
Page 78: ...Shared Standard and Exit Hardware Trim Parts 4 12 B A S I S V Service Manual ...
Page 114: ...Servicing Standard Mortise Case Parts 6 20 B A S I S V Service Manual ...
Page 206: ...Servicing Exit Hardware Trim Escutcheon Parts 10 32 B A S I S V Service Manual ...
Page 238: ...Troubleshooting 12 12 B A S I S V Service Manual ...
Page 242: ...Lock History Event Types A 4 B A S I S V Service Manual ...
Page 244: ...Installation Instructions B 2 B A S I S V Service Manual ...


