Servicing Standard Mortise Case Parts
B.A.S.I.S. V Service Manual
6–7
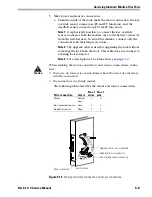
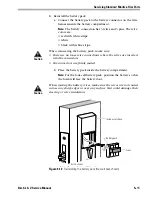
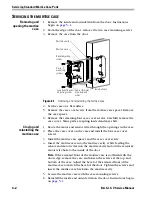
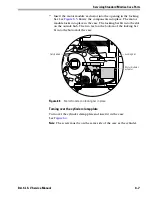
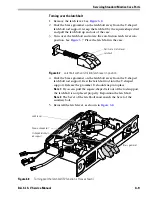
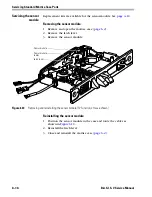
7. Insert the motor module’s actuator into the opening in the locking
bar. See
Figure 6.5
. Rotate the components into place. The motor
module locks into place in the case. The locking bar fits into the slot
on the outside hub. The two feet on the bottom of the locking bar
fit into the bottom of the case.
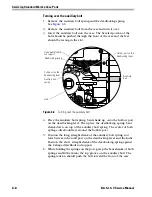
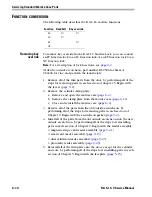
Turning over the cylinder clamp plate
Turn over the cylinder clamp plate and insert it in the case.
See
Figure 6.4
.
Note:
The screw must be on the same side of the case as the cylinder.
Figure 6.5
Motor module and locking bar in place
Outside hub
Locking bar
Motor module’s
actuator
Summary of Contents for B.A.S.I.S. V
Page 1: ...SERVICE MANUAL SERVICE MANUAL ...
Page 16: ...Figures xvi B A S I S V Service Manual ...
Page 48: ...Standard Functions and Parts 2 24 B A S I S V Service Manual ...
Page 66: ...Exit Hardware Trim Functions and Parts 3 18 B A S I S V Service Manual ...
Page 78: ...Shared Standard and Exit Hardware Trim Parts 4 12 B A S I S V Service Manual ...
Page 114: ...Servicing Standard Mortise Case Parts 6 20 B A S I S V Service Manual ...
Page 206: ...Servicing Exit Hardware Trim Escutcheon Parts 10 32 B A S I S V Service Manual ...
Page 238: ...Troubleshooting 12 12 B A S I S V Service Manual ...
Page 242: ...Lock History Event Types A 4 B A S I S V Service Manual ...
Page 244: ...Installation Instructions B 2 B A S I S V Service Manual ...

