


77
4
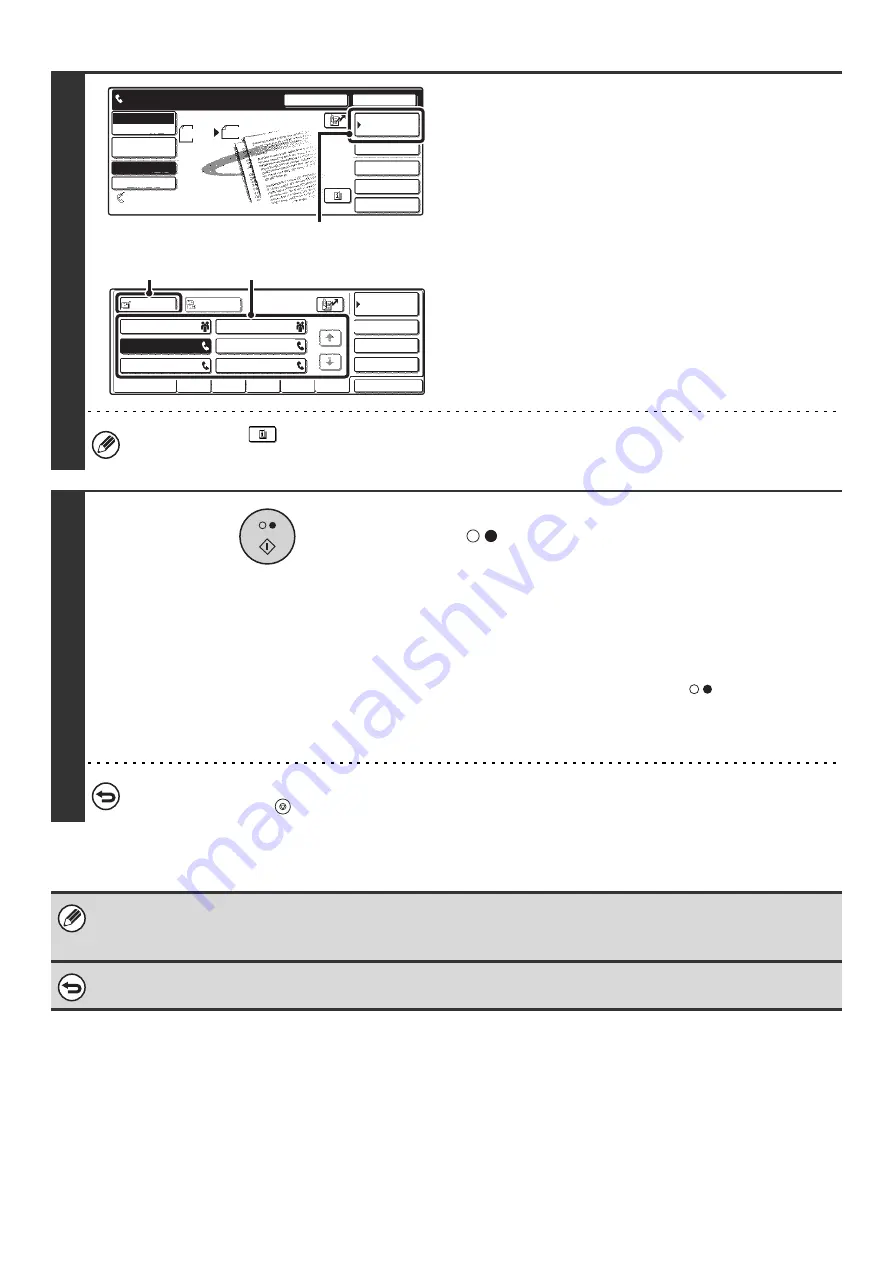
Enter the destination fax number.
(1) Touch the [Address Book] key.
(2) Touch the one-touch key of the desired
destination.
(3) Touch the [To] key.
☞
CALLING UP A FAX NUMBER FROM THE ADDRESS
BOOK
(page 36)
If the fax number of the transmitting machine is not stored in the
Address Book, enter the fax number with the numeric keys.
☞
ENTERING A FAX NUMBER WITH THE NUMERIC KEYS
(page 35)
You can touch the
key to display a list of the selected special mode settings or two-sided scanning. To return to
the previous screen after checking the settings, touch the [OK] key.
5
Press the [BLACK & WHITE START] key
(
).
Scanning begins.
• If you inserted the original pages in the document feeder
tray, all pages are scanned.
A beep will sound to indicate that scanning is finished.
• If you are scanning the original on the document glass, scan
each page one page at a time.
When scanning finishes, place the next original and press
the [BLACK & WHITE START] key (
). Repeat until all
pages have been scanned and then press the [Read-End]
key.
A beep will sound to indicate that scanning is finished.
To cancel scanning...
Press the [STOP] key (
).
• The 2in1 function cannot be used when the original is other than 8-1/2" x 11" (A4) or 5-1/2" x 8-1/2" (B5 or A5) size.
• This function cannot be used in combination with the following functions:
Dual Page Scan, Card Shot, Mixed Size Original
To cancel 2in1...
Touch the [2in1] key in the screen of step 3.
Speaker
Resend
Scan
Send
Auto
Quick File
File
Special Modes
Sub Address
Address Book
Fax
Mode Switch
Image
Settings
Direct TX
Memory TX
Auto Reception
Fax Memory:100%
8 x11
1
/
2
Ready to send.
(1)
Sub Address
Global
AAA AAA
EEE EEE
CCC CCC
DDD DDD
BBB BBB
FFF FFF
ABCD
EFGHI
JKLMN
OPQRST
UVWXYZ
1/1
Frequent Use
Condition
Settings
Address Review
Cc
To
Sort Address
(2)
(3)
Содержание MX-2300N Guide
Страница 1: ...User s Guide MX 2300N MX 2700N MODEL ...
Страница 67: ...System Settings Guide MX 2300N MX 2700N MODEL ...
Страница 192: ...Copier Guide MX 2300N MX 2700N MODEL ...
Страница 361: ...Printer Guide MX 2300N MX 2700N MODEL ...
Страница 376: ...15 2 Select 2 sided printing 1 Select 2 Sided Book or 2 Sided Tablet 2 Click the OK button 3 Start printing 2 1 ...
Страница 421: ...Scanner Guide MX 2300N MX 2700N MODEL ...
Страница 552: ...Facsimile Guide MX FXX1 MODEL ...
Страница 741: ...Document Filing Guide MX 2300N MX 2700N MODEL ...