


128
6
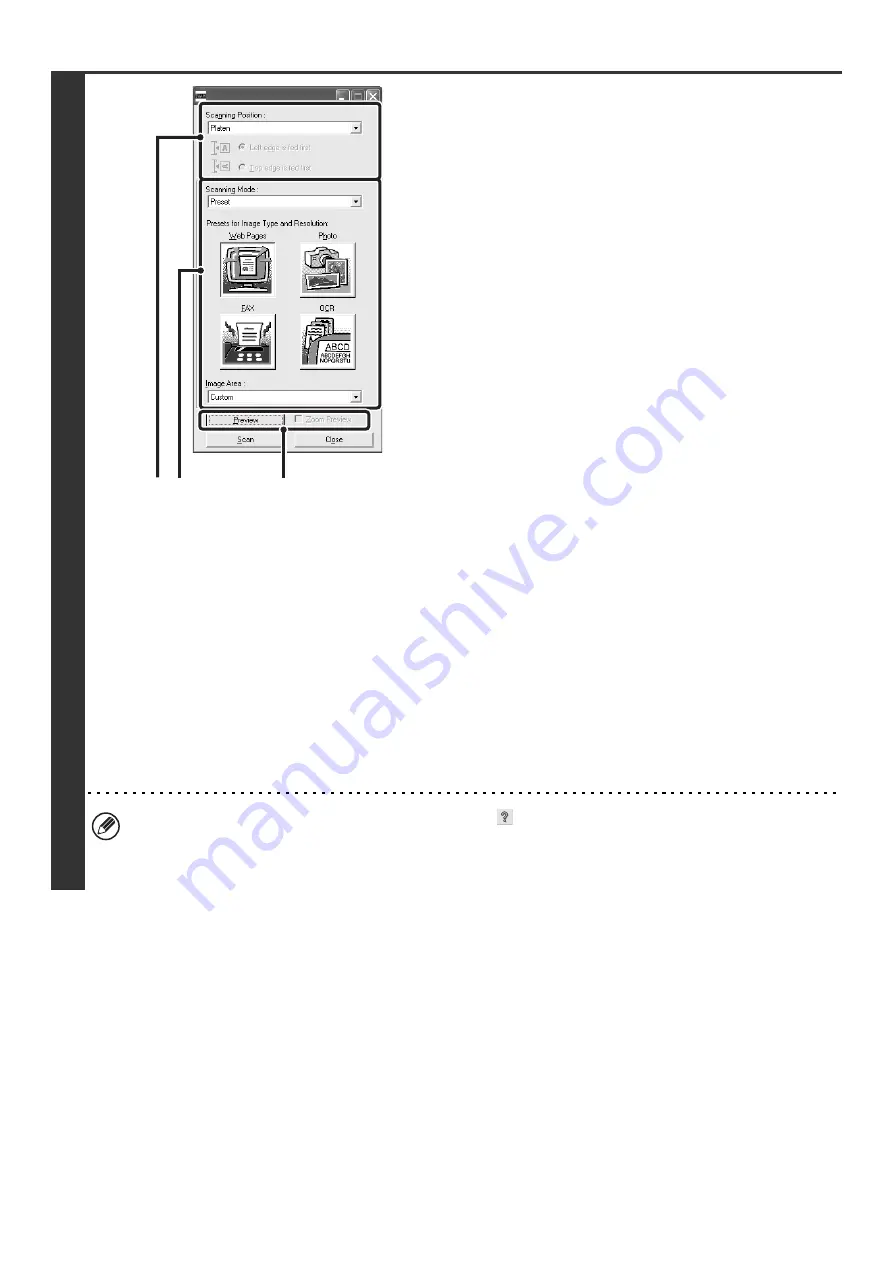
Preview the image.
(1) Select the location where the original is
placed.
"Scanning Position" menu:
• If the original is a one-sided original and is placed in the
document feeder tray, select [SPF(Simplex)].
• If the original is a two-sided original and is placed in the
document feeder tray, select [SPF(Duplex - Book)] or
[SPF(Duplex - Tablet)] depending on whether the
original is a book-style or tablet-style original. In
addition, select [Left edge is fed first] or [Top edge is
fed first] depending on the orientation of the original.
(2) Select scan settings.
"Scanning Mode" menu:
Switch between the "Preset" screen and the "Custom
Settings". In the "Preset" screen, select "Web Pages",
"Photo", "FAX" or "OCR" depending on the original type
and your scanning purpose.
If you wish to change the initial settings of any of the four
buttons or select the resolution or other advanced
settings, change to the "Custom Settings" screen.
"Image Area" menu:
Select the scan area. If "Auto" is selected, the original size
detected by the machine will be scanned. You can also
set the scanning area in the preview window with your
mouse.
(3) Click the [Preview] button.
The preview image will appear in the scanner driver.
If you are not satisfied with the preview image, repeat (2)
and (3).
If the [Zoom Preview] checkbox is selected before the
[Preview] button is clicked, the selected area will be
enlarged in the preview window. If the checkmark is
removed, the preview image will return to normal. Note
that if SPF is selected in the "Scanning Position" menu,
the [Zoom Preview] function cannot be used.
•
For further information on the scan settings, click the
button in the preview image screen in step 7 to
open scanner driver Help.
• If the [Preview] button is clicked when scanning from the document feeder tray, only one original page will be
scanned for the preview image. If you wish to include that original in the scan, return it to the document feeder tray.
(1)
(3)
(2)
Содержание MX-2300N Guide
Страница 1: ...User s Guide MX 2300N MX 2700N MODEL ...
Страница 67: ...System Settings Guide MX 2300N MX 2700N MODEL ...
Страница 192: ...Copier Guide MX 2300N MX 2700N MODEL ...
Страница 361: ...Printer Guide MX 2300N MX 2700N MODEL ...
Страница 376: ...15 2 Select 2 sided printing 1 Select 2 Sided Book or 2 Sided Tablet 2 Click the OK button 3 Start printing 2 1 ...
Страница 421: ...Scanner Guide MX 2300N MX 2700N MODEL ...
Страница 552: ...Facsimile Guide MX FXX1 MODEL ...
Страница 741: ...Document Filing Guide MX 2300N MX 2700N MODEL ...