


40
6
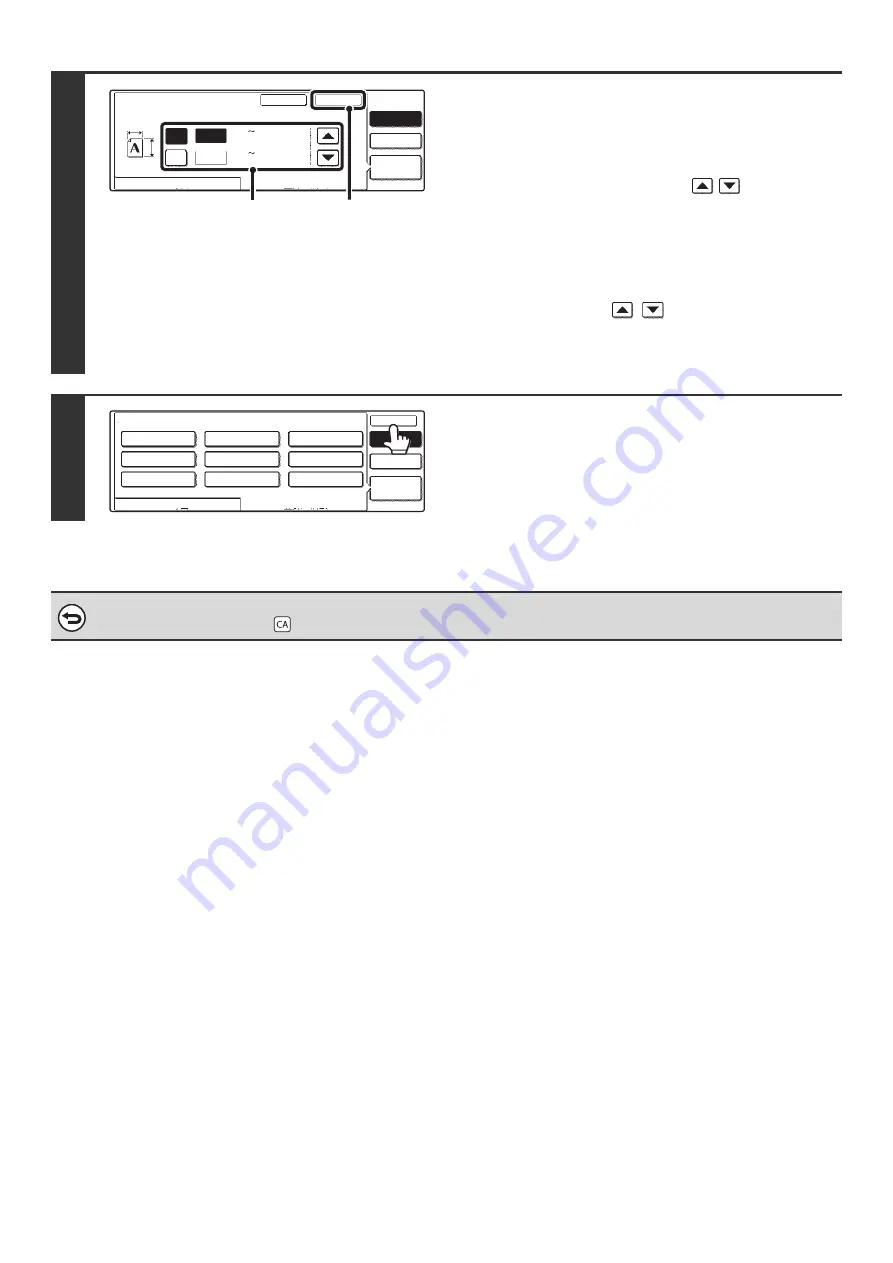
Change the original size.
(1) Enter the X (horizontal) dimension of the
original.
With the [X] key highlighted, enter the X (horizontal)
dimension of the original with the
keys. A
dimension from 2-1/2" to 17" (64 mm to 432 mm) can be
entered.
(2) Enter the Y (vertical) dimension of the
original.
Touch the [Y] key and enter the Y (vertical) dimension of
the original with the
keys. A dimension from
2-1/2" to 11-5/8" (64 mm to 297 mm) can be entered.
(3) Touch the [OK] key.
7
Touch the [OK] key.
To cancel the operation...
Press the [CLEAR ALL] key (
).
Original
Manual
Custom
Size
Auto
OK
Cancel
Recall
Store/Delete
(2 17)
17
11
inch
inch
Y
X
X
Y
1
/
2
(2 11 )
1
/
2
5
/
8
(1), (2)
(3)
Manual
Custom
Size
Auto
OK
OK
Recall
Store/Delete
X17 Y11inch
Original
Содержание MX-2300N Guide
Страница 1: ...User s Guide MX 2300N MX 2700N MODEL ...
Страница 67: ...System Settings Guide MX 2300N MX 2700N MODEL ...
Страница 192: ...Copier Guide MX 2300N MX 2700N MODEL ...
Страница 361: ...Printer Guide MX 2300N MX 2700N MODEL ...
Страница 376: ...15 2 Select 2 sided printing 1 Select 2 Sided Book or 2 Sided Tablet 2 Click the OK button 3 Start printing 2 1 ...
Страница 421: ...Scanner Guide MX 2300N MX 2700N MODEL ...
Страница 552: ...Facsimile Guide MX FXX1 MODEL ...
Страница 741: ...Document Filing Guide MX 2300N MX 2700N MODEL ...