


55
4
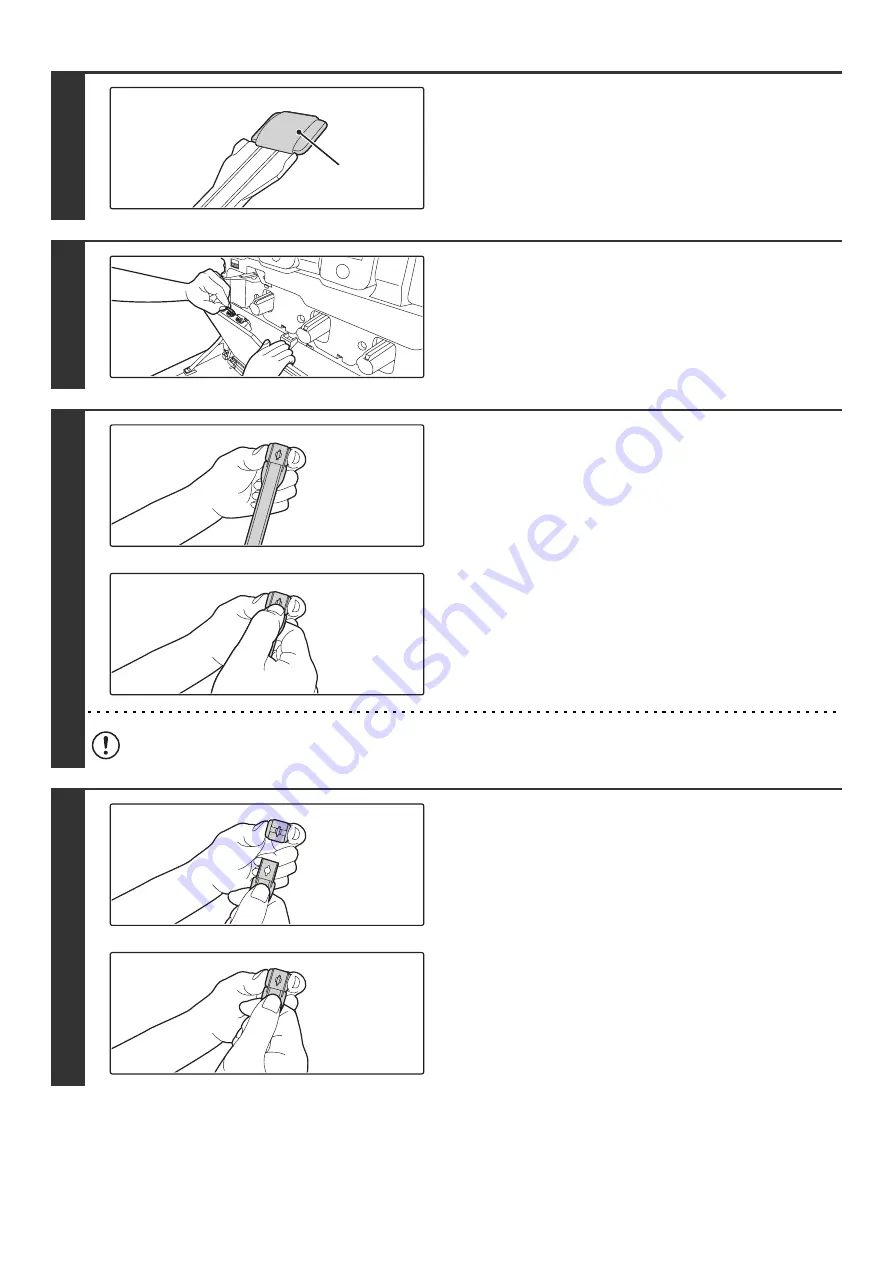
Make sure that the cleaner at the tip of
the cleaning tool is not dirty.
If the cleaner is dirty, remove the cleaner and replace it with a
clean one. For the procedure for replacing the cleaner, see
steps 5 through 7. If the cleaner is not dirty, go to step 8.
5
Pull the replacement cleaner out of the
waste toner box.
The replacement cleaner is stored at the top of the waste toner
box.
Grasp the end of the cleaner and pull it out of the waste toner
box.
6
Remove the dirty cleaner from the tip of
the cleaning tool.
(1) Firmly grasp the tool close to where the
cleaner is attached.
(2) Use your other hand to press down on the
hook that secures the cleaner and remove
the cleaner.
Do not return the removed cleaner to the top of the waste toner box.
7
Attach the new cleaner to the cleaning
tool.
(1) Align the cleaner hook with the attachment
hole in the cleaning tool.
(2) Hold the cleaner firmly and push the
cleaning tool in.
Cleaner
Содержание MX-2300N Guide
Страница 1: ...User s Guide MX 2300N MX 2700N MODEL ...
Страница 67: ...System Settings Guide MX 2300N MX 2700N MODEL ...
Страница 192: ...Copier Guide MX 2300N MX 2700N MODEL ...
Страница 361: ...Printer Guide MX 2300N MX 2700N MODEL ...
Страница 376: ...15 2 Select 2 sided printing 1 Select 2 Sided Book or 2 Sided Tablet 2 Click the OK button 3 Start printing 2 1 ...
Страница 421: ...Scanner Guide MX 2300N MX 2700N MODEL ...
Страница 552: ...Facsimile Guide MX FXX1 MODEL ...
Страница 741: ...Document Filing Guide MX 2300N MX 2700N MODEL ...