4. Tracked Target (TT) Operation
4-6
4.6.2
Manually acquiring a target
From the control unit w/keyboard
1. Use the trackball to place the cursor on the target you want to acquire.
2. Push
the
ACQ
key.
By trackball
1. With the cursor inside the effective display area, spin the scrollwheel to show "Tgt Acquire" in the guidance
area.
2. Use the trackball to place the cursor on the target you want to acquire.
3. Push the left button to acquire the target.
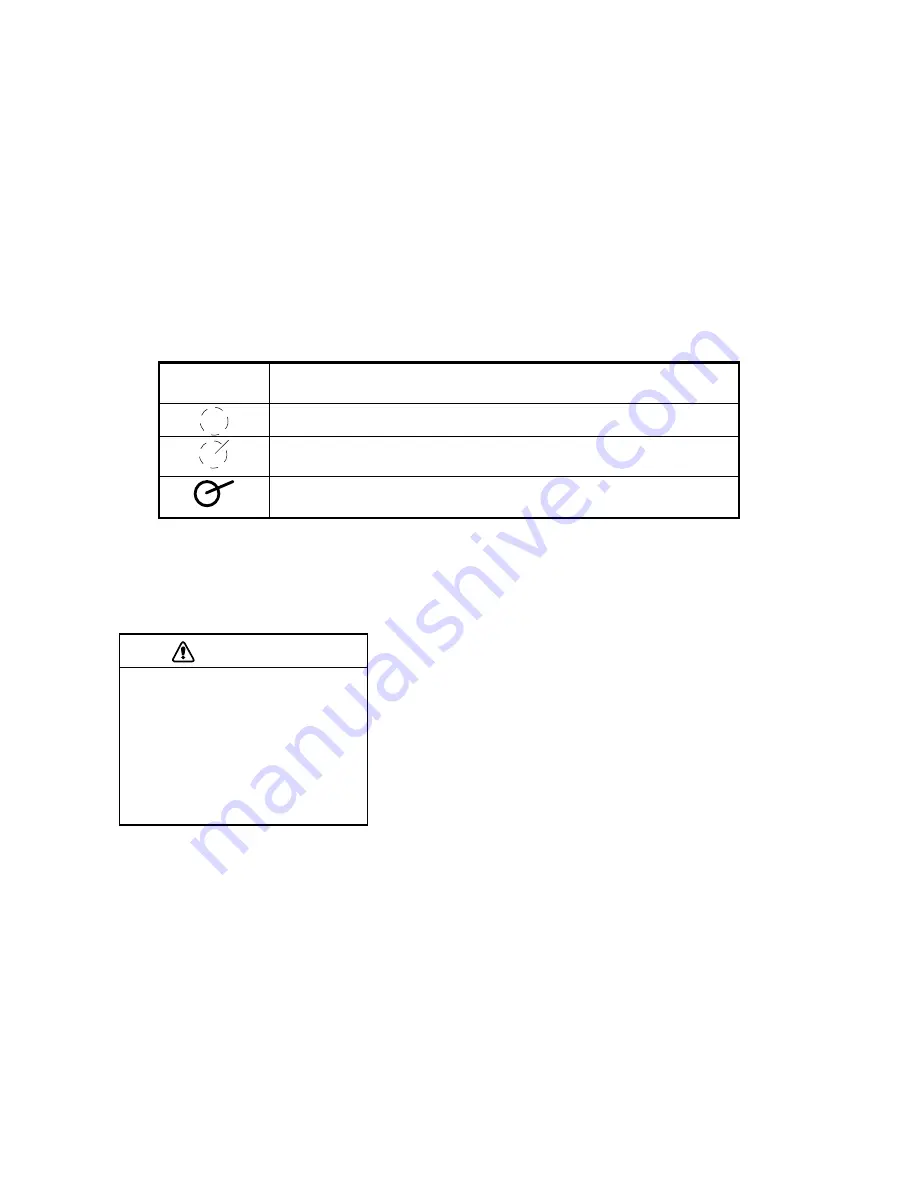
The plotting symbol is drawn by broken lines during the initial acquisition stage. A vector appears in about one
minute after acquisition indicating the target's motion trend. If the target is consistently detected for three minutes,
the plotting symbol changes to a solid circle. If acquisition fails, the target symbol blinks and disappears shortly.
TT
Symbol
Meaning
Immediately after acquisition, this plotting symbol is shown in broken lines.
Within one minute after acquisition, a vector appears to show a trend of
movement.
Within three minutes after acquisition, the plotting symbol changes to a small
circle, indicating steady-state tracking condition.
Note 1:
For successful acquisition, the target to be acquired should be within 0.2 to 24 nm (or 32 nm, depending on
initial setting) from own ship and not obscured by sea or rain clutter.
Note 2:
When the capacity for manual acquisition is reached, the message "TT Man acq full" is displayed at the
screen bottom. Cancel tracking of non-threatening targets if you wish to acquire additional targets manually.
CAUTION
Target Swap
When a target being tracked nears another
target being tracked, the targets may be
"swapped". When two targets acquired
either automatically or manually come close
to each other, one of the two may become
a Lost Target. Should this happen, manual
re-acquisition of the Lost Target may be
required after the two have separated.
Summary of Contents for FCR-2107 series
Page 42: ...1 Operational Overview 1 20 This page intentionally left blank...
Page 154: ...5 AIS Operation 5 28 This page intentionally left blank...
Page 255: ...7 Vector Chart Material 7 83 Recommended track defined by two beacons...
Page 256: ...7 Vector Chart Material 7 84 Recommended track defined by a building and a beacon...
Page 257: ...7 Vector Chart Material 7 85 Measurement mile tails tails...
Page 298: ...9 Chart Alerts 9 14 This page intentionally left blank...
Page 322: ...10 Route Planning 10 24 This page intentionally left blank...
Page 368: ...14 Backup Operations 14 6 This page intentionally left blank...
Page 404: ...16 Recording Functions 16 16 This page intentionally left blank...
Page 406: ...17 NAVTEX Messages 17 2 This page intentionally left blank...
Page 416: ...19 Parameters Setup 19 8 This page intentionally left blank...
Page 457: ...Appendix 2 IHO ECDIS Chart 1 AP 5 Nature and Man made features Port features...
Page 458: ...Appendix 2 IHO ECDIS Chart 1 AP 6 Depths Currents etc Seabed Obstructions Pipelines etc...
Page 459: ...Appendix 2 IHO ECDIS Chart 1 AP 7 Traffic routes Special areas...
Page 460: ...Appendix 2 IHO ECDIS Chart 1 AP 8 Aids and Services Buoys and Beacons...
Page 461: ...Appendix 2 IHO ECDIS Chart 1 AP 9 Topmarks Color test diagram...
Page 462: ...Appendix 2 IHO ECDIS Chart 1 AP 10 Mariners navigational symbols...
Page 469: ...Appendix 3 Interpreting S57 Charts AP 17 Fog signals Radars Services...
Page 476: ...Appendix 3 Interpreting S57 Charts AP 24 This page intentionally left blank...
Page 511: ...Appendix 5 Digital Interface AP 59 NRX NAVTEX received data...
Page 544: ...Appendix 6 Parts List and Parts Location AP 92 This page intentionally left blank...
Page 550: ...This page is intentionally left blank...
Page 556: ......


