378
A Appendix
9.
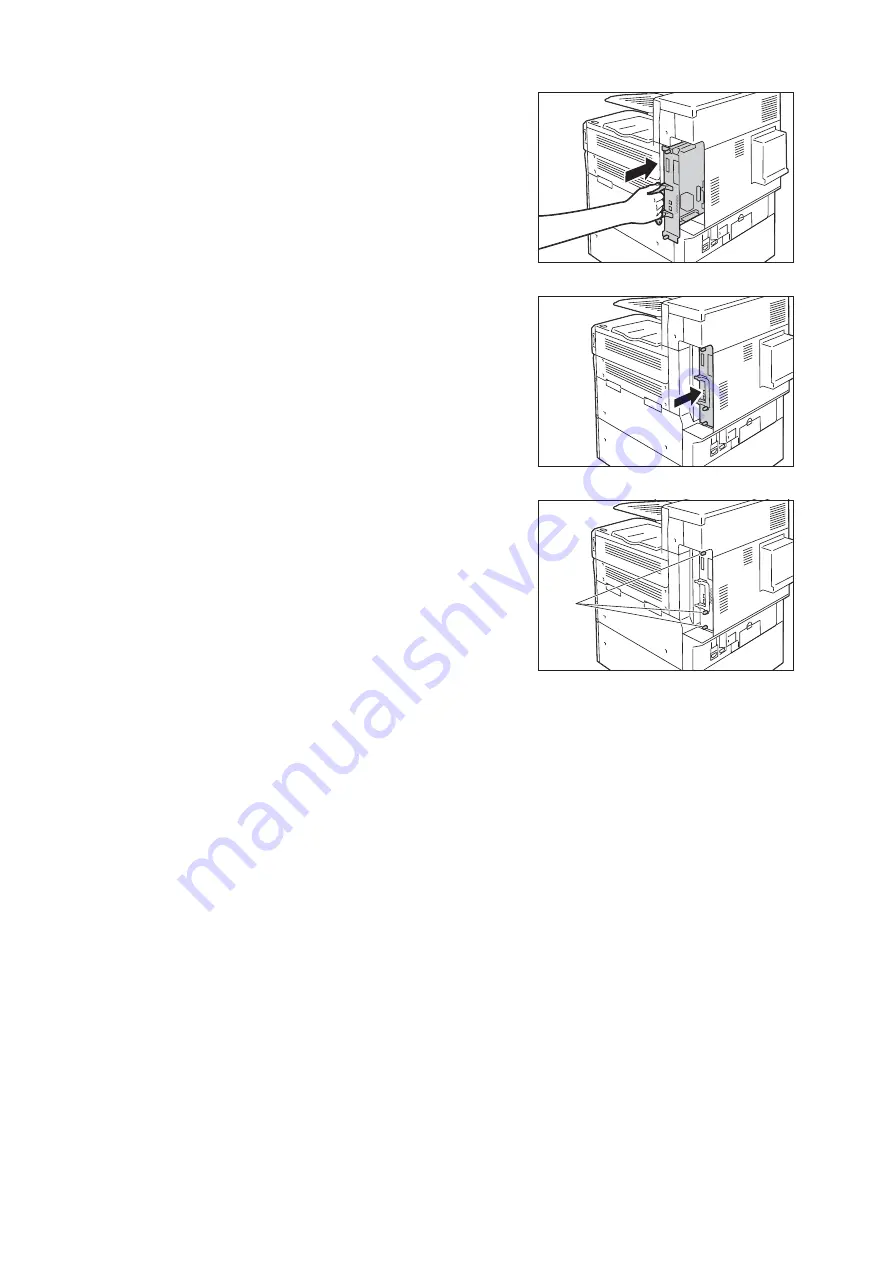
Reinsert the control board back into the
printer. Holding its handle, slide the control
board back into the printer.
Important
• Be sure to hold the handle when inserting the control
board. The control board may be damaged if you insert it
with the handle being folded.
10. Press the control board in as far as it will go.
11. Tighten the screws to secure the control board
in place.
12. Connect the power cord to the printer.
Turn on the printer’s main power switch and power switch.
13. Print the [Configuration Report] and confirm that [Hard Disk] is included for the [Machine
Configuration] item in the [System Settings] section.
Refer to
• List printing procedure: "Printing Reports/Lists" (P. 310)
Hard disk installation is now complete.
Note
• After installing the HDD Extension Kit (optional), use the properties dialog box of the print driver to change the
printer configuration. For details, refer to the online help for the print driver.
screws
Summary of Contents for DocuPrint 5105 d
Page 1: ...DocuPrint 5105 d User Guide...
Page 75: ...3 3 Printing on Custom Size Paper 75 2 Click the Device Settings tab 3 Click Custom Paper Size...
Page 78: ...78 3 Printing 6 Click Print on the Print dialog box to start printing...
Page 94: ...94 3 Printing 8 Press the Print Menu button to return to the Ready to print screen...
Page 418: ...418 Control Panel Menu Tree...


