4. MECHANICAL SYSTEM
4-106
COPYRIGHT © 2001 CANON INC. CANON CLC1000/1000S/3100 REV.2 MAY 2001 PRINTED IN JAPAN (IMPRIME AU JAPON)
2. Removing the Oil Applying Roller
Blade
1)
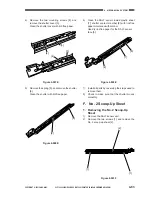
Remove the oil applying roller blade unit.
2)
Remove the four screws [1], and remove the
oil applying roller blade [2].
Figure 4-1002D
3. Removing the Oil Applying Roller
1)
Remove the oil applying roller blade unit.
2)
Remove the two E-rings (one each from front
and rear) [1].
3)
Remove the gear* [2], and remove the two
bushings (one each from front and rear) [3].
*Pay attention to the parallel pin inside.
4)
Remove the oil applying roller.
Figure 4-1003D
4. Opening the Oil Applying Roller
Assembly
When servicing the scoop-up roller assembly
found at the bottom of the oil applying roller,
work as follows:
1)
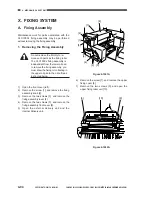
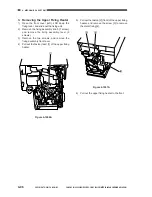
Open the upper fixing roller unit.
2)
Remove the screw [1] from the rear of the oil
applying roller assembly.
Figure 4-1004D
3)
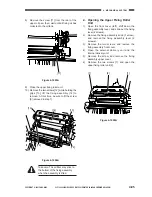
Loosen the screw [2] on the oil applying roller
assembly (front), and remove the screw [3].
4)
Open the oil applying roller assembly [4] in the
direction of the arrow, and tighten the screw
[2] to fix in position.
Figure 4-1005D
[1]
[2]
[1]
[1]
[2]
[3]
[3]
[1]
[1]
[2]
[3]
[4]
Summary of Contents for Vizcam 1000
Page 12: ......
Page 30: ......
Page 44: ......
Page 86: ......
Page 254: ......
Page 372: ......
Page 374: ......
Page 418: ......
Page 438: ......
Page 442: ......
Page 754: ......
Page 764: ......
Page 766: ......
Page 840: ...0501GR PRINTED IN JAPAN IMPRIME AU JAPON This publication is printed on 100 reprocessed paper...


