


COPYRIGHT © 2001 CANON INC. CLC1000/1000S/3100 REV.2 MAY 2001 PRINTED IN JAPAN (IMPRIME AU JAPON)
4-49
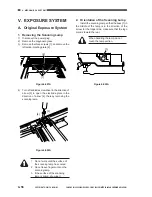
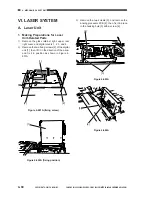
4. MECHANICAL SYSTEM
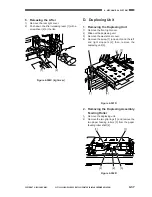
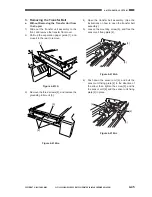
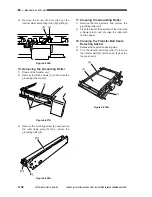
4. Installing the Transfer Belt
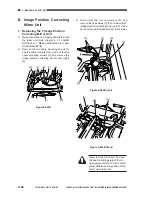
1)
As a rule, install the transfer belt by reversing
the steps used to remove it with the following
in mind:
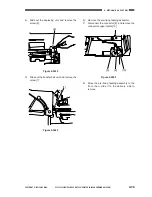
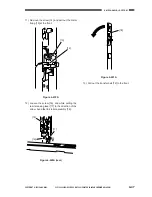
2)
After installing the transfer belt, turn the drive
roller [1] of the transfer belt (four to five
lengths) to move the transfer belt [2] over a
short distance.
Figure 4-427A
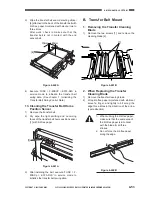
1. The transfer belt has its own ori
entation. Make sure that the
seam detecting sticker (over the
seam on the back of the transfer
belt) is toward the rear.
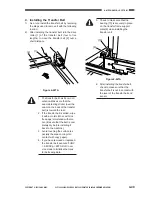
2. If the transfer belt is soiled, wipe
it with a moist cloth or with lint-
free paper moistened with alco
hol. (Be sure that the belt is com
pletely dry before installing it
back to the machine.)
3. Avoid touching the surface (es
pecially the area coming into
contact with copy paper).
4. If you have removed or replaced
the transfer belt, execute ‘FUNC
> F-MISCp > E075-RLS’ in ser
vice mode to initialize the trans
fer belt swing data.
[1]
[2]
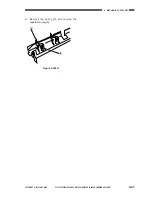
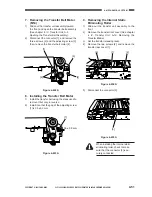
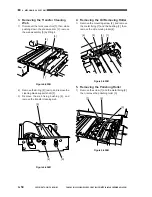
5. Check to make sure that the
bearing [10] is securely in place
on the transfer frame support
plate [9] when installing the
transfer unit.
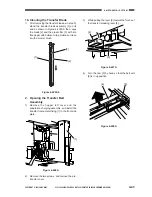
6. After installing the transfer belt,
check to make sure that the
transfer belt is not in contact with
the lever of the transfer belt end
sensor.
[10]
[9]
Figure 4-427A
Summary of Contents for Vizcam 1000
Page 12: ......
Page 30: ......
Page 44: ......
Page 86: ......
Page 254: ......
Page 372: ......
Page 374: ......
Page 418: ......
Page 438: ......
Page 442: ......
Page 754: ......
Page 764: ......
Page 766: ......
Page 840: ...0501GR PRINTED IN JAPAN IMPRIME AU JAPON This publication is printed on 100 reprocessed paper...


