


SIEPYEUOQ2A01G AC Drive Q2A Technical Manual
139
◆
Write Backed-up Parameters to the Drive
You can back up parameters on the keypad and write them to different drives.
Note:
•
Always stop the drive before you start to restore the parameter backups.
•
The drive rejects Run commands while it is restoring parameters.
1.
Push
(
) to show the HOME screen.
Note:
• [
] appears in the upper right hand corner of the screen when in HOME mode.
• If [
] is not shown on
, push
(
) to show [
] on
.
2.
Push
( ).
3.
Push
or
to select [Configuration], then push
.
4.
Push
or
to select [Parameter Backup/Restore], then push
.
5.
Push
or
to select the item to restore, then push
.
6.
Push
or
to select [Res (OPE → Drive)], then push
.
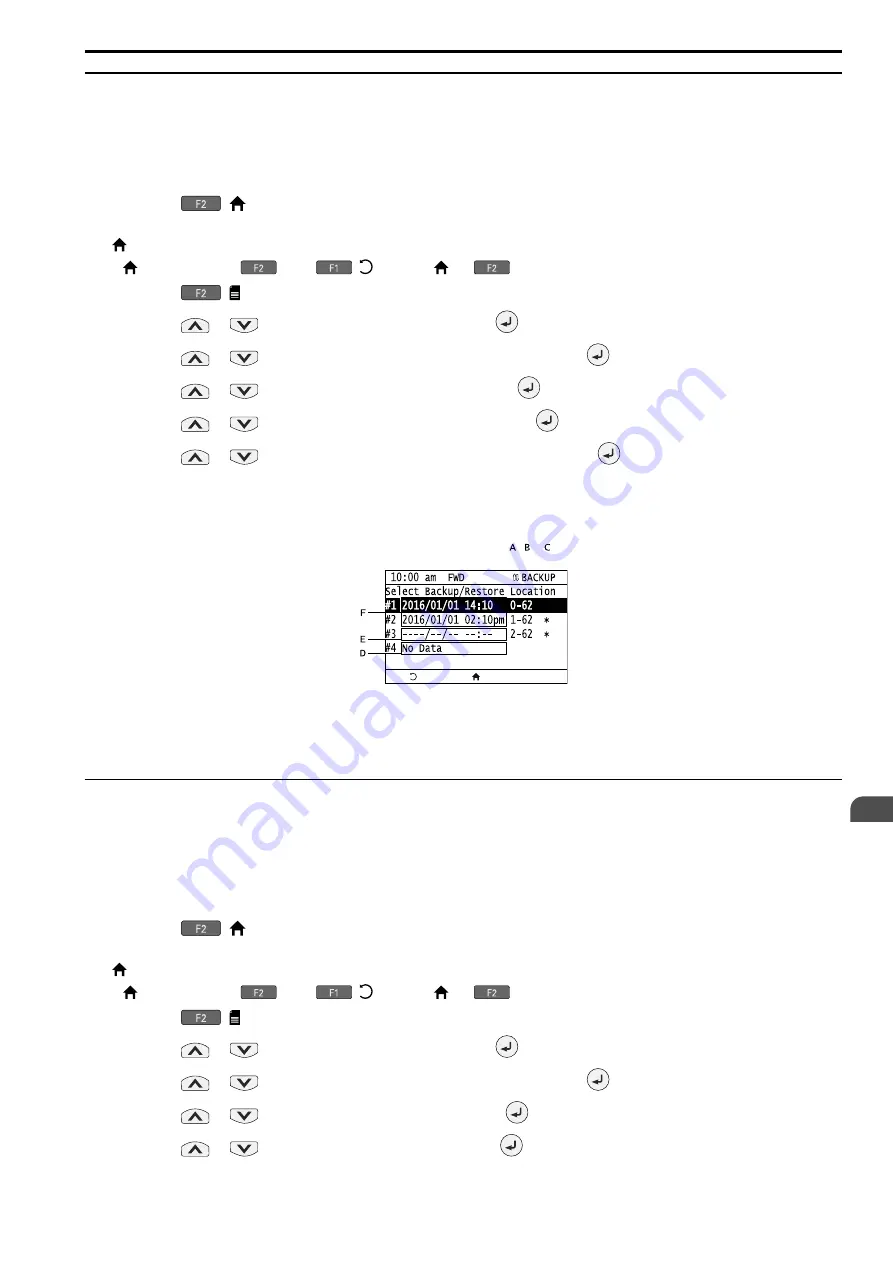
7.
Push
or
to select the backed-up parameter data, then push
.
The keypad will show the "End" message when the write process is complete.
Note:
Different settings and conditions will change the keypad display.
A -
A1-02 [Control Method]
settings
B -
o2-04 [Drive KVA Selection]
settings (2 or 3
digits)
C - Presence of Q2pack parameter backup
D - Parameter backup data is not registered
E - Backup data does not contain the date
information
F - Backup date
◆
Verify Keypad Parameters and Drive Parameters
This procedure verifies that the parameter setting values that were backed up in the keypad agree with the
parameter setting values in the drive.
Note:
•
Always stop the drive before you start to verify the parameters.
•
The drive does not accept Run commands while restoring parameters.
1.
Push
(
) to show the HOME screen.
Note:
• [
] appears in the upper right hand corner of the screen when in HOME mode.
• If [
] is not shown on
, push
(
) to show [
] on
.
2.
Push
( ).
3.
Push
or
to select [Configuration], then push
.
4.
Push
or
to select [Parameter Backup/Restore], then push
.
5.
Push
or
to select the item to verify, then push
.
6.
Push
or
to select [Verify (Check)], then push
.
Содержание Q2A
Страница 2: ...This Page Intentionally Blank 2 SIEPYEUOQ2A01G AC Drive Q2A Technical Manual...
Страница 12: ...12 SIEPYEUOQ2A01G AC Drive Q2A Technical Manual...
Страница 18: ...i 2 Legal Information 18 SIEPYEUOQ2A01G AC Drive Q2A Technical Manual...
Страница 28: ...1 2 Features and Advantages of Control Methods 28 SIEPYEUOQ2A01G AC Drive Q2A Technical Manual...
Страница 64: ...2 9 Installation Methods 64 SIEPYEUOQ2A01G AC Drive Q2A Technical Manual...
Страница 166: ...4 9 Test Run Checklist 166 SIEPYEUOQ2A01G AC Drive Q2A Technical Manual...
Страница 172: ...5 2 European Standards 172 SIEPYEUOQ2A01G AC Drive Q2A Technical Manual...
Страница 173: ...Standards Compliance 5 5 2 European Standards SIEPYEUOQ2A01G AC Drive Q2A Technical Manual 173...
Страница 174: ...5 2 European Standards 174 SIEPYEUOQ2A01G AC Drive Q2A Technical Manual...
Страница 175: ...Standards Compliance 5 5 2 European Standards SIEPYEUOQ2A01G AC Drive Q2A Technical Manual 175...
Страница 176: ...5 2 European Standards 176 SIEPYEUOQ2A01G AC Drive Q2A Technical Manual...
Страница 258: ...6 2 Modbus Communications 258 SIEPYEUOQ2A01G AC Drive Q2A Technical Manual...
Страница 356: ...8 7 Storage Guidelines 356 SIEPYEUOQ2A01G AC Drive Q2A Technical Manual...
Страница 357: ...SIEPYEUOQ2A01G AC Drive Q2A Technical Manual 357 9 Disposal 9 1 Safety Precautions 358 9 2 Disposal Instructions 359...
Страница 360: ...9 2 Disposal Instructions 360 SIEPYEUOQ2A01G AC Drive Q2A Technical Manual...
Страница 526: ...11 20 Parameters Changed by PM Motor Code Selection 526 SIEPYEUOQ2A01G AC Drive Q2A Technical Manual...


