SmartPAC 2 with WPC Integration
1126800
SmartPAC 2 Run Mode
Chapter 6
page 327
How to Use Hot Keys
Descriptive labels
for Hot keys
CAMBIE
AL ESPANOL
USE THE CURSOR KEYS
ENABLE SENSORS
TO MAKE SELECTIONS.
COUNTERS
PRESS ENTER TO
CAM SWITCH
ACCESS SELECTION.
BRAKE MONITOR
TONNAGE/WAVEFORM
PROCESS MONITOR
FEED CONTROL
PM MONITOR
TOOL INFORMATION
SHUTHGT/CNTRBAL
ERROR LOG
LOAD NEW TOOL
DIALOG MENU
TOGGLE HOT KEYS 1
270
VIEW SENSOR
SUMMARY
VIEW GLOBAL
CAM SUMMARY
ADJ SENSOR
PART EJECTION
ADJUST CAM
SPRAY LUBE
TONNAGE
PLAN VIEW
DISPLAY
SHUT HEIGHT
F1
F2
F3
F4
F5
F6
F7
F8
Use F1 - F8 as Hot keys
If you have the Bilingual Option,
F1 is reserved for changing
language and cannot be used
as a Hot key.
ADJUST
SETPOINTS
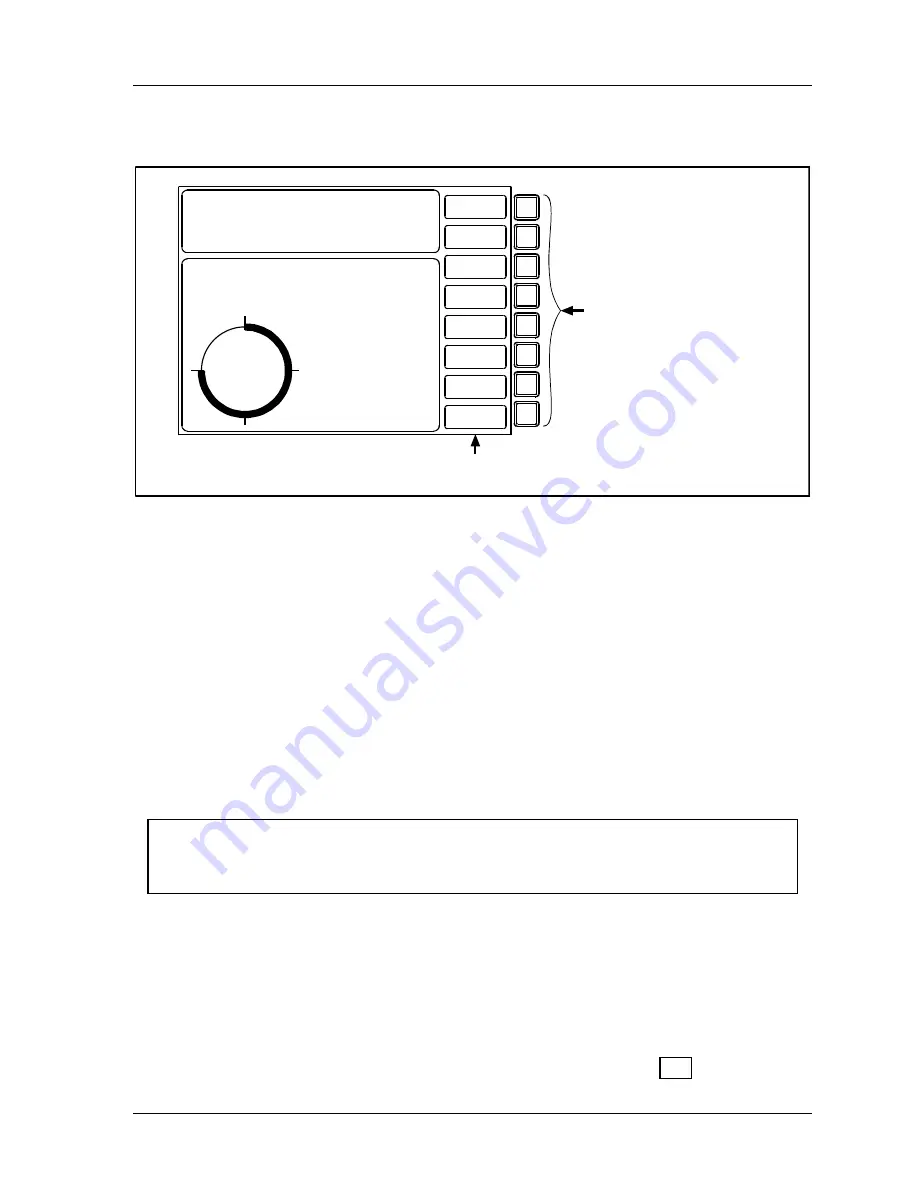
Figure 6 - 5. Run Main Menu, Showing Hot Keys Programmed
In Run mode, Hot keys are function keys that are specially programmed to take you directly
to the screens you want. After you have programmed Hot keys, you can simply press the
F
key next to the label describing the screen, and SmartPAC 2 goes to that screen.
Example
You frequently need to adjust the timing for the cam channel that controls part blowoff. For
convenience, you set up a Hot key to take you directly to the cam channel’s adjust screen from
the main Run menu.
You can use all the function keys,
F1
through
F8
as Hot keys, unless you have the bilingual
option, which uses
F1
to change languages. You can recognize Hot keys in the main Run
screen by the red frame around their descriptive labels. You can have two sets of Hot keys
(see next section), for a total of sixteen if you do not have the bilingual option.
NOTICE
If you add or remove an option, previously set Hot keys will not navigate correctly. If this
happens, delete and re-program the Hot key or keys that are not working correctly.
Toggle Hot Keys
In the main Run menu, shown in the figure above, the last menu item says “TOGGLE HOT
KEYS 1.” When this menu item shows, you can see the first set of Hot keys labels at the
right side of the display, if any are programmed. To access the other set of Hot keys, use the
cursor keys to highlight “TOGGLE HOT KEYS 1.” “TOGGLE HOT KEYS 2” appears and
the second set of Hot keys labels also appears. This menu item determines which set of Hot
keys you see. For more information, see “TOGGLE HOT KEYS,” page 363.
Содержание SmartPAC 2
Страница 192: ...1126800 SmartPAC 2 with WPC Integration Page 170 Chapter 2 Installing SmartPAC 2 and WPC ...
Страница 222: ...1126800 SmartPAC 2 with WPC Integration Page 200 Chapter 3 SmartPAC 2 Keyboard Displays and Operating Modes ...
Страница 294: ...1126800 SmartPAC 2 with WPC Integration Page 272 Chapter 4 SmartPAC 2 Initialization Mode ...
Страница 342: ...1126800 SmartPAC 2 with WPC Integration page 320 Chapter 5 SmartPAC 2 Program Mode ...
Страница 404: ...1126800 SmartPAC 2 with WPC Integration Page 382 Chapter 6 SmartPAC 2 Run Mode ...
Страница 448: ...1126800 SmartPAC 2 with WPC Integration Page 426 Chapter 7 SmartPAC 2 Fault Messages ...
Страница 476: ...1126800 SmartPAC 2 with WPC Integration page 454 Appendix C Updating SmartPAC 2 Firmware ...
Страница 478: ...1126800 SmartPAC 2 with WPC Integration page 456 Appendix D SmartView Remote Viewing and E mail Setup ...
Страница 480: ...1126800 SmartPAC 2 with WPC Integration page 458 Appendix E Upgrade from Original SmartPAC to SmartPAC 2 ...
Страница 482: ...1126800 SmartPAC 2 with WPC Integration page 460 Appendix F Replacing SmartPAC 2 PC Board ...
Страница 492: ...1126800 SmartPAC 2 with WPC Integration page 470 Glossary ...


