


SmartPAC 2 with WPC Integration
1126800
SmartPAC 2 Program Mode
Chapter 5
page 297
To set stop type for red, yellow, green, green quick check, and green constant, select the
setting you want for the sensor—emergency stop, top stop, or Smart Stop.
After you make the stop type settings for red and yellow sensors, you are done. Green
sensors, however, need additional settings to be made. SmartPAC 2 brings you back to the
display listing the remaining sensors. You can set another sensor. Go to the section, "Setting
the other sensors for the tool.”
When you highlight "Smart Stop" and press ENTER, a display immediately appears which
asks you to set "critical angle.”
Critical angle
is the last angle position in the crankshaft
rotation to signal an emergency stop so that the ram can be stopped before the punches make
contact with the material. The critical angle affects all the sensors that are set for Smart Stop,
and only needs to be set
once
for the tool.
If you need to modify the critical angle at a later time, you can access the "Set the critical
Angle" display by pressing
F5
from the "Setting stop type" display (Figure 5-16).
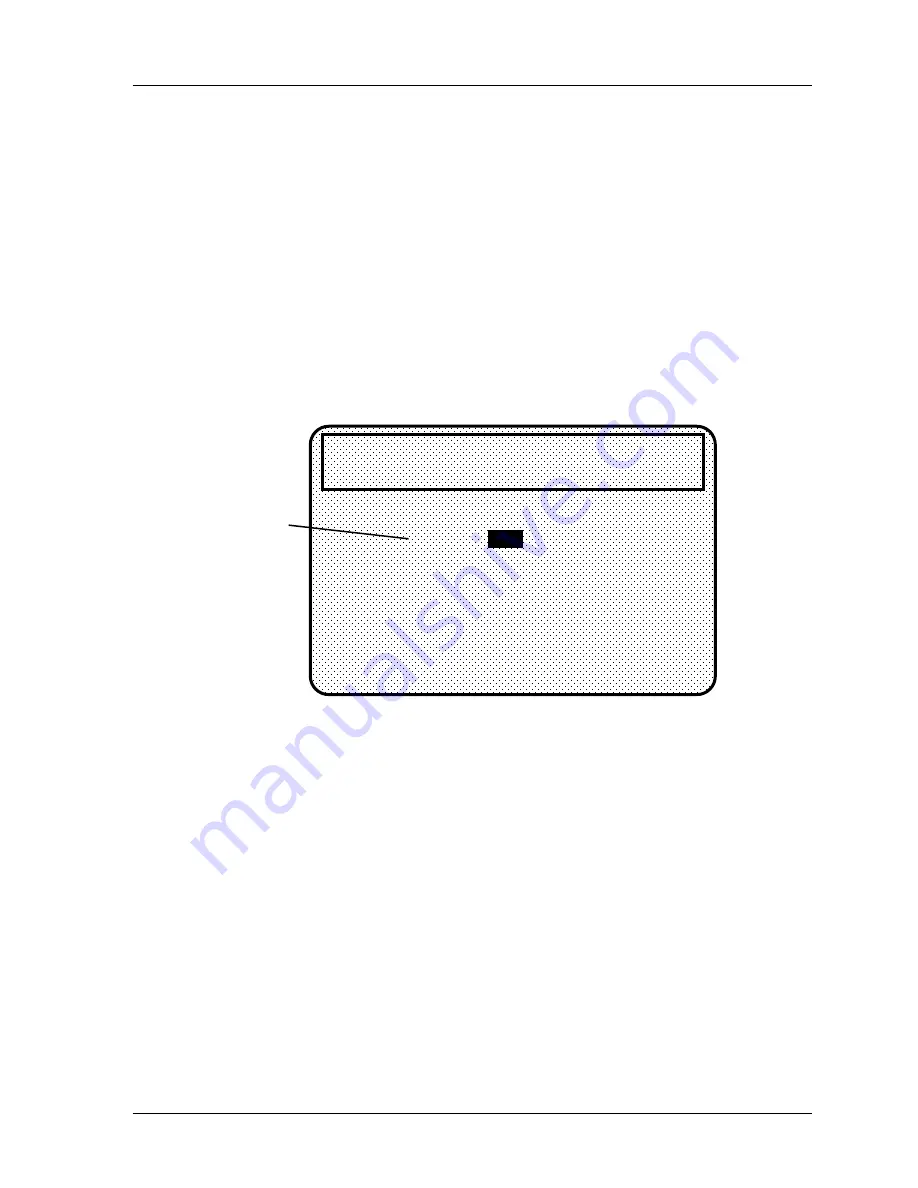
critical
angle
setting
for all
sensors
in the
tool set
for
variable
stop
CRITICAL ANGLE FOR THIS TOOL
DEGREES
THIS AFFECTS ALL SENSORS SET FOR
VARIABLE STOP FOR THIS TOOL. USE THE
CURSOR KEYS TO CHANGE THE ANGLE. PRESS
THE ENTER KEY WHEN DONE. PRESS THE
RESET KEY TO CANCEL.
IS
TOOL NUMBER 1234567
CHAIR BRACKET
CRITICAL ANGLE 59
59
SENSOR 2
TRANSFER
GREEN SMART
Figure 5 - 23. Setting critical angle for variable-stop sensors
Use cursor keys to change the angle value. Then press ENTER when done (see Chapter 3 for
help in using cursor keys). You will be able to continue setting up the sensor.
Next we explain how to set the ready signal for green, green quick check, and green constant
sensors and the counter for green special sensors.
Setting the Ready Signal for a Green Sensor
After selecting stop type for a green sensor, you will see the display in which you set the
ready signal the "ready on" angle and "ready off" angle (the "ready signal"). The ready signal
is the timing window during which the sensor must actuate or SmartPAC 2 sends the stop
signal to the press.
You .set the ready signal; so that it is a little longer than the sensor's actuation time for green
and green quick check sensors. For green constant sensors, you set it so that it is a little
shorter than the sensor's actuation time. See Chapter 1 for an explanation of the different
types of green sensors.
Содержание SmartPAC 2
Страница 192: ...1126800 SmartPAC 2 with WPC Integration Page 170 Chapter 2 Installing SmartPAC 2 and WPC ...
Страница 222: ...1126800 SmartPAC 2 with WPC Integration Page 200 Chapter 3 SmartPAC 2 Keyboard Displays and Operating Modes ...
Страница 294: ...1126800 SmartPAC 2 with WPC Integration Page 272 Chapter 4 SmartPAC 2 Initialization Mode ...
Страница 342: ...1126800 SmartPAC 2 with WPC Integration page 320 Chapter 5 SmartPAC 2 Program Mode ...
Страница 404: ...1126800 SmartPAC 2 with WPC Integration Page 382 Chapter 6 SmartPAC 2 Run Mode ...
Страница 448: ...1126800 SmartPAC 2 with WPC Integration Page 426 Chapter 7 SmartPAC 2 Fault Messages ...
Страница 476: ...1126800 SmartPAC 2 with WPC Integration page 454 Appendix C Updating SmartPAC 2 Firmware ...
Страница 478: ...1126800 SmartPAC 2 with WPC Integration page 456 Appendix D SmartView Remote Viewing and E mail Setup ...
Страница 480: ...1126800 SmartPAC 2 with WPC Integration page 458 Appendix E Upgrade from Original SmartPAC to SmartPAC 2 ...
Страница 482: ...1126800 SmartPAC 2 with WPC Integration page 460 Appendix F Replacing SmartPAC 2 PC Board ...
Страница 492: ...1126800 SmartPAC 2 with WPC Integration page 470 Glossary ...