


SmartPAC 2 with WPC Integration
1126800
SmartPAC 2 Program Mode
Chapter 5
page 299
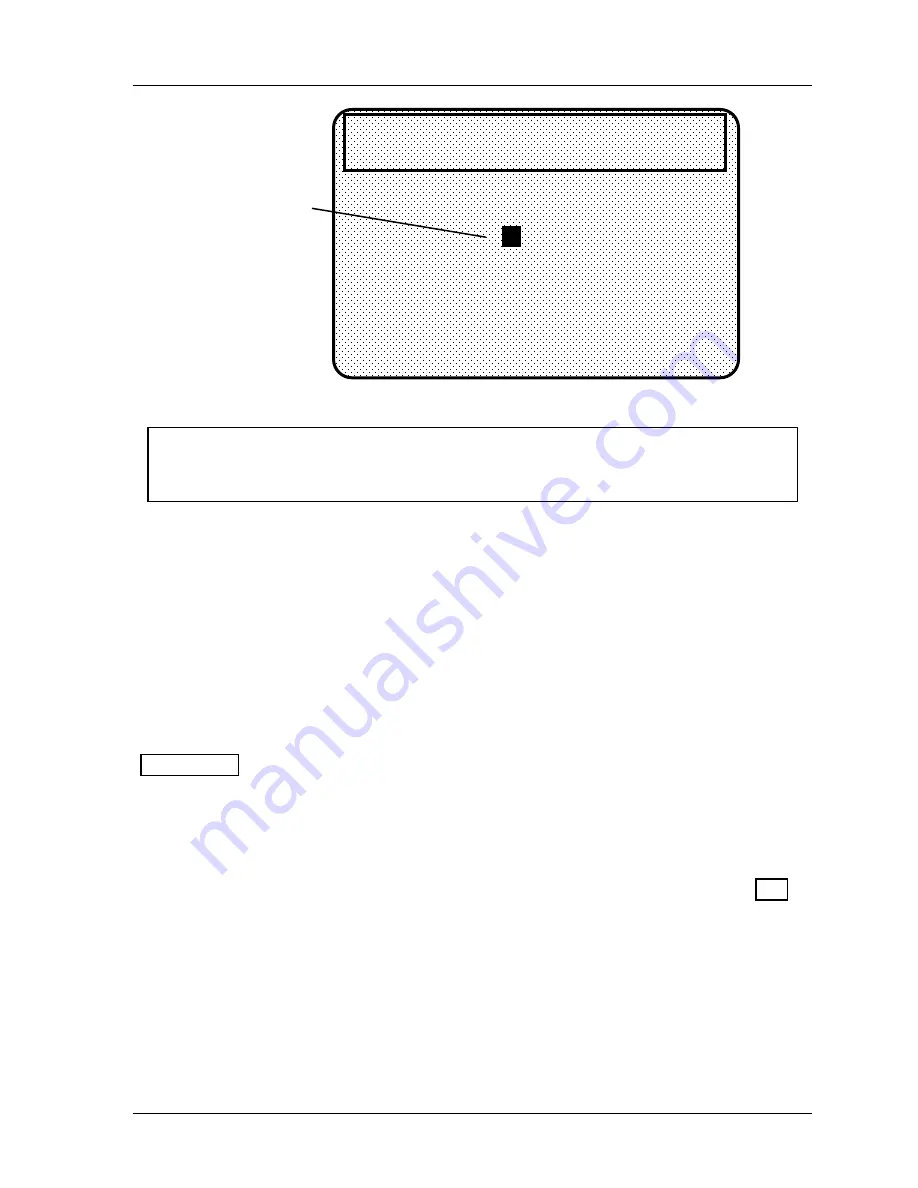
number of
strokes to set
for green
special sensor
can be from 1
to 99
11
THIS SENSOR MUST TURN ON
AT LEAST ONCE EVERY
STROKES
USE CURSOR KEYS TO CHANGE # OF STROKES
PRESS THE RESET KEY WHEN YOU ARE DONE
TOOL NUMBER 1234567
CHAIR BRACKET
CRITICAL ANGLE 0
SENSOR 1
PART EJECTION
GREEN ESTOP
Figure 5 - 25. Setting "green special" sensor
NOTICE
For more information, refer to the section "Understanding Sensor Technology" in Chapter 1
for a detailed description of the green special sensor and other types of sensors.
Setting the Other Sensors for the Tool
After you make the last setting for the sensor, you will again see this display (Figure 5-10). The
name of your sensor will appear in the display. The next sensor is automatically highlighted.
To set more sensors, select the next sensor from the list and make settings for the sensor.
Make settings in the same way for the rest of the sensors you are using.
Going Back to the Main Programming Menu
When you are done making settings for all sensors and have the list of sensors on your
display, press RESET once more. You will again see the main Tool Program menu
(Figure 5 - 11). You can select tool name, counters, or cam timing and make those settings
for the tool. You can also select "Die Protection" again to display the list of sensors for the
tool and check or change settings.
1.
After you change settings for the tool, and the Tool Program menu is on the display, you
can do one of the following:
•
Press
F4
-“Load this Tool” to load the tool (see “Load an Existing Tool,” page 278)
or
•
Press RESET. One of the following occurs:
•
If you press RESET after you edited the tool that is currently loaded, go to the
next step.
•
If you press RESET after you edited an existing tool that was not currently
loaded, the Program Mode Main menu appears.
Содержание SmartPAC 2
Страница 192: ...1126800 SmartPAC 2 with WPC Integration Page 170 Chapter 2 Installing SmartPAC 2 and WPC ...
Страница 222: ...1126800 SmartPAC 2 with WPC Integration Page 200 Chapter 3 SmartPAC 2 Keyboard Displays and Operating Modes ...
Страница 294: ...1126800 SmartPAC 2 with WPC Integration Page 272 Chapter 4 SmartPAC 2 Initialization Mode ...
Страница 342: ...1126800 SmartPAC 2 with WPC Integration page 320 Chapter 5 SmartPAC 2 Program Mode ...
Страница 404: ...1126800 SmartPAC 2 with WPC Integration Page 382 Chapter 6 SmartPAC 2 Run Mode ...
Страница 448: ...1126800 SmartPAC 2 with WPC Integration Page 426 Chapter 7 SmartPAC 2 Fault Messages ...
Страница 476: ...1126800 SmartPAC 2 with WPC Integration page 454 Appendix C Updating SmartPAC 2 Firmware ...
Страница 478: ...1126800 SmartPAC 2 with WPC Integration page 456 Appendix D SmartView Remote Viewing and E mail Setup ...
Страница 480: ...1126800 SmartPAC 2 with WPC Integration page 458 Appendix E Upgrade from Original SmartPAC to SmartPAC 2 ...
Страница 482: ...1126800 SmartPAC 2 with WPC Integration page 460 Appendix F Replacing SmartPAC 2 PC Board ...
Страница 492: ...1126800 SmartPAC 2 with WPC Integration page 470 Glossary ...