


1126800
SmartPAC 2 with WPC Integration
page 286
Chapter 5
SmartPAC 2 Program Mode
TOOL NAME or TOOL ID
(PROGRAM – GO TO THE TOOL MANAGER – SELECT TOOL – TOOL NAME OR TOOL ID)
NOTICE
If your SmartPAC 2 is in numeric tool number mode, this choice will be “TOOL NAME.” If in
alpha-numeric mode, this choice will be “TOOL ID.” See Chapter 4, page for details about
numeric and alpha-numeric modes.
In Program mode, select, copy or create a new tool Select TOOL NAME.
1. Select "Tool name" or “Tool ID” in the Tool Programming menu (see previous figure).
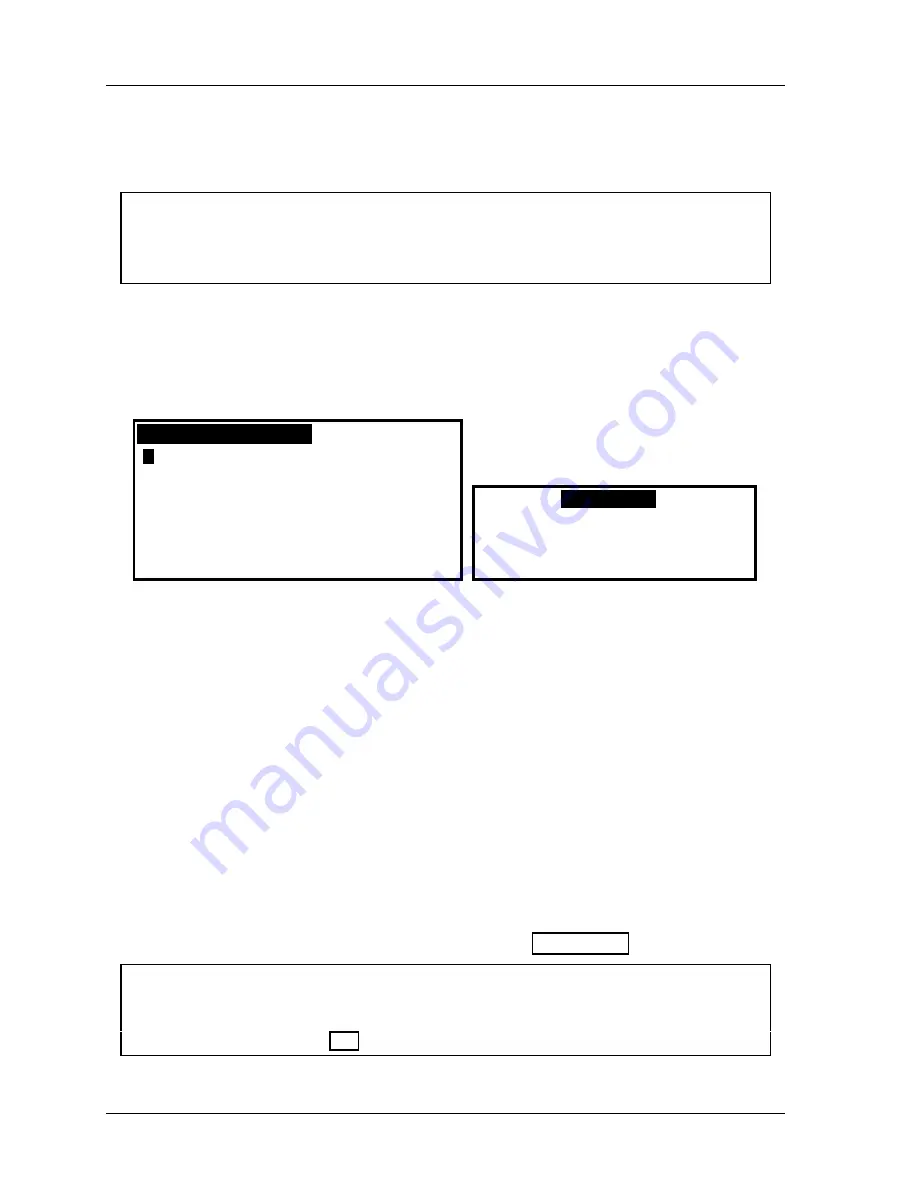
2. You will then see this display superimposed over the screen:
F
L
R
X
.
A
G
M
S
Y
(
B
H
N
T
Z
)
C
I
O
U
,
*
D
J
P
V
-
/
E
K
Q
W
#
&
PRESS CLEAR TO CLEAR
TEXT. USE THE KEYPAD
TO ENTER NUMBERS. USE
CURSORS TO SELECT THE
LETTERS. PRESS ENTER
TO ENTER THE LETTERS.
PRESS F6 WHEN DONE.
PRESS RESET TO CANCEL.
USE THE KEYPAD TO ENTER NUMBERS.
USE THE UP/DOWN CURSOR KEYS TO
INCREMENT/DECREMENT. PRESS ENTER
WHEN DONE. PRESS RESET TO CANCEL.
0
Figure 5 - 12. Tool Name Entry Box (left); Tool Number Entry Box (right)
3. Follow the instructions in the box to enter the Tool Name or Tool ID. (See Chapter 3 for
assistance.) Press
F6
to accept the Tool Name. Press ENTER to accept the Tool ID.
4. When you are completely done naming your tool, press RESET to return to the Program
mode menu choices.
COUNTERS
(PROGRAM – GO TO THE TOOL MANAGER – select tool – COUNTERS)
To set up the Counters, you need to:
• Switch SmartPAC 2 to Program mode
• Select either a new or existing tool number (see the beginning of this chapter)
• Select "Counters" and bring up the counters display for the tool
1. Select "Counters" from the Tool Programming menu (Figure 5 - 11):
ARE YOU 'LOCKED OUT"?
If you cannot change items in this display, the ability to make these changes may be locked
out or limited to password access . To check the security access setting, see
“Security
Access” in Chapter 4, page 251.
Содержание SmartPAC 2
Страница 192: ...1126800 SmartPAC 2 with WPC Integration Page 170 Chapter 2 Installing SmartPAC 2 and WPC ...
Страница 222: ...1126800 SmartPAC 2 with WPC Integration Page 200 Chapter 3 SmartPAC 2 Keyboard Displays and Operating Modes ...
Страница 294: ...1126800 SmartPAC 2 with WPC Integration Page 272 Chapter 4 SmartPAC 2 Initialization Mode ...
Страница 342: ...1126800 SmartPAC 2 with WPC Integration page 320 Chapter 5 SmartPAC 2 Program Mode ...
Страница 404: ...1126800 SmartPAC 2 with WPC Integration Page 382 Chapter 6 SmartPAC 2 Run Mode ...
Страница 448: ...1126800 SmartPAC 2 with WPC Integration Page 426 Chapter 7 SmartPAC 2 Fault Messages ...
Страница 476: ...1126800 SmartPAC 2 with WPC Integration page 454 Appendix C Updating SmartPAC 2 Firmware ...
Страница 478: ...1126800 SmartPAC 2 with WPC Integration page 456 Appendix D SmartView Remote Viewing and E mail Setup ...
Страница 480: ...1126800 SmartPAC 2 with WPC Integration page 458 Appendix E Upgrade from Original SmartPAC to SmartPAC 2 ...
Страница 482: ...1126800 SmartPAC 2 with WPC Integration page 460 Appendix F Replacing SmartPAC 2 PC Board ...
Страница 492: ...1126800 SmartPAC 2 with WPC Integration page 470 Glossary ...