152
USING PHOTOSHOP LIGHTROOM 2
Printing photos
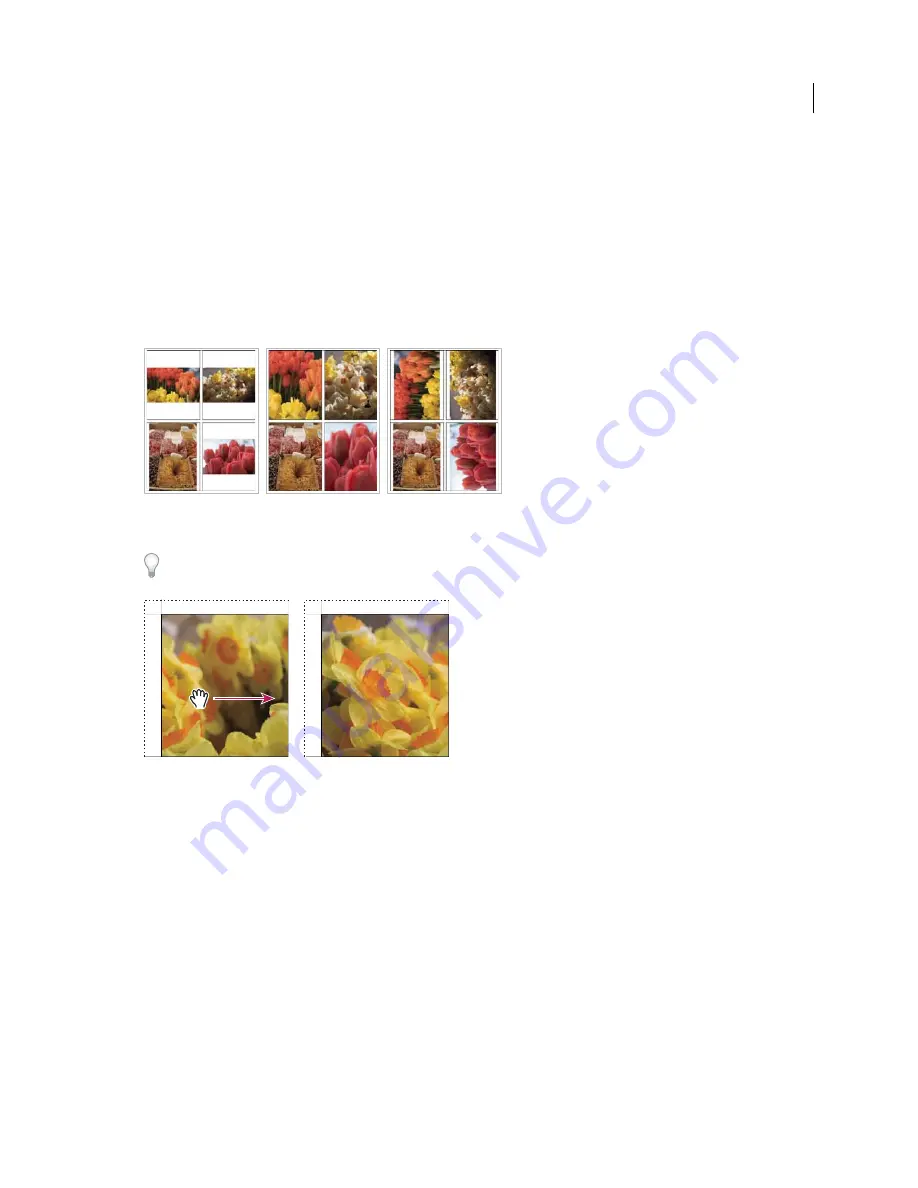
Specify how photos fill an image cell
You can specify photos to scale and rotate so that their entire image fits within an image cell. Blank spaces fill the areas
where the aspect ratio of the photos and the image cells don’t match. You can also set an option so that photos
completely fill the space within an image cell. When this option is selected, portions of the photos (especially vertical
images) might be cropped to fill the aspect ratio of the image cells.
❖
In the Image Settings panel of the Print module, select any of the following options:
Zoom To Fill
Fills the entire image cell with a photo, cropping the edges of the image as necessary.
Rotate To Fit
Rotates images if necessary to produce the largest image that fits in each image cell.
Image settings
Left
Photos with no image settings applied
Center
Zoom To Fill
Right
Rotate To Fit
If an image cell doesn’t display the portion of a photo you want, drag the photo in the cell to reposition it. In a Picture
Package layout, Ctrl-drag (Windows) or Command-drag (Mac OS).
Dragging a photo in an image cell to reposition it.
Repeat One Photo Per Page
(grid layouts) Repeats the selected in every image cell on the page in a Grid template
layout.
Show or hide rulers and page guides
1
In the Guides panel of the Print module, select or deselect Show Guides.
2
Select the specific options to show or hide rulers, page bleed guides, margins and gutters, and image cells.
Modify page margins and cell size
❖
In the Guides panel, make sure that Show Guides is selected and do any of the following:
•
Drag a guide in the work area to modify a cell or margin.
•
Use the sliders or enter values in the Layout panel.
•
Select Keep Square to make the cell shape of the image square.
Updated 03 September 2009


