100
USING PHOTOSHOP LIGHTROOM 2
Developing photos
Tools in the tool strip
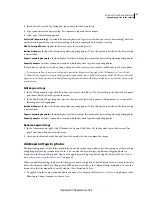
Tools for performing local edits to specific areas of a photo are located in the tool strip under the Histogram panel.
Select any tool to display its options in the tool drawer. Deselect the tool to close the drawer and revert to the Hand or
Zoom tool.
Crop Overlay
Includes the Crop Overlay tool, Crop Frame tool, Aspect Ratio Lock button and options, Straighten tool,
and Straighten slider.
Spot Removal
Includes Clone or Heal options and the Size slider. Click Reset to clear the changes to the photo.
Red Eye Correction
Includes Pupil Size and Darken sliders. Click Reset to clear the changes to the photo.
Graduated Filter
Includes options for making tonal adjustments across a region of a photo.
Adjustment Brush
Includes options for brushing Exposure, Clarity, Brightness, and other tonal adjustments on
specific areas of a photo.
Additional Develop module buttons and tools
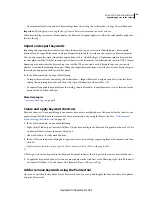
Hand/Zoom tool
When you hold the pointer over the photo, R, G, and B color values display under the Histogram.
The tool that appears changes depending on your view. The Zoom tool is selected if the magnification is Fit. The Hand
tool is selected if the magnification is Fill, 1:1, or higher. Click the photo to toggle between Fit and 1:1.
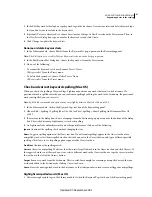
White Balance Selector
Click this tool in the Basic panel, choose it from the View menu, or press W to select it.
Options appear in the toolbar.
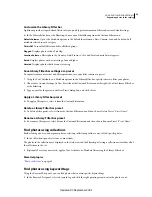
Targeted Adjustment
Lets you adjust certain color and tone sliders by dragging the tool in the photo. Select it in the
Tone Curve or HSL/Color/Grayscale panels, or choose it from the View menu. Once the tool is selected, you can
choose different targets from the Target Group pop-up menu in the toolbar.
Loupe View
Although this single-photo view is available in both the Develop and Library modules, the keyboard
shortcut for Loupe view in the Develop module (the D key) is different from the keyboard shortcut in the Library
module (the E key). The Loupe View button, located in the toolbar, lets you quickly switch to Loupe view in each
module.
Copy and Paste
These buttons at the bottom of the left panels let you copy or paste the current settings to a selected
photo.
Previous, Sync, and Auto Sync
These buttons at the bottom of the right panels toggle according to whether you have
one or more photos selected in the Filmstrip. If only one photo is selected, the Previous button lets you copy and paste
all of the settings of the previously selected photo to the currently selected photo on the Filmstrip. If multiple files are
selected, the Sync button lets you choose which of the current settings to paste from the currently selected photo onto
the other selected photos. Auto Sync adjusts other selected photos automatically after each slider is moved. Ctrl-click
(Windows) or Command-click (Mac
OS) the Sync button to turn it into the Auto Sync button.
Before and After views
The Before And After Views button in the toolbar offers four choices. You can arrange two
photo views side by side or top to bottom, display the whole photo in both views, or split the photo in two. Click the
Loupe View button to turn off Before and After views.
Copy settings
These three buttons let you copy and paste the current settings from the After view to the Before view,
from the Before view to the After view, or swap between the views. They appear in the toolbar when you have selected
the Before and After view in the Develop module.
Select tools and options
❖
Click the tool or choose it from the View menu. To deselect a tool, click it or a different tool.
Updated 03 September 2009


