10-7
IM 701210-06E
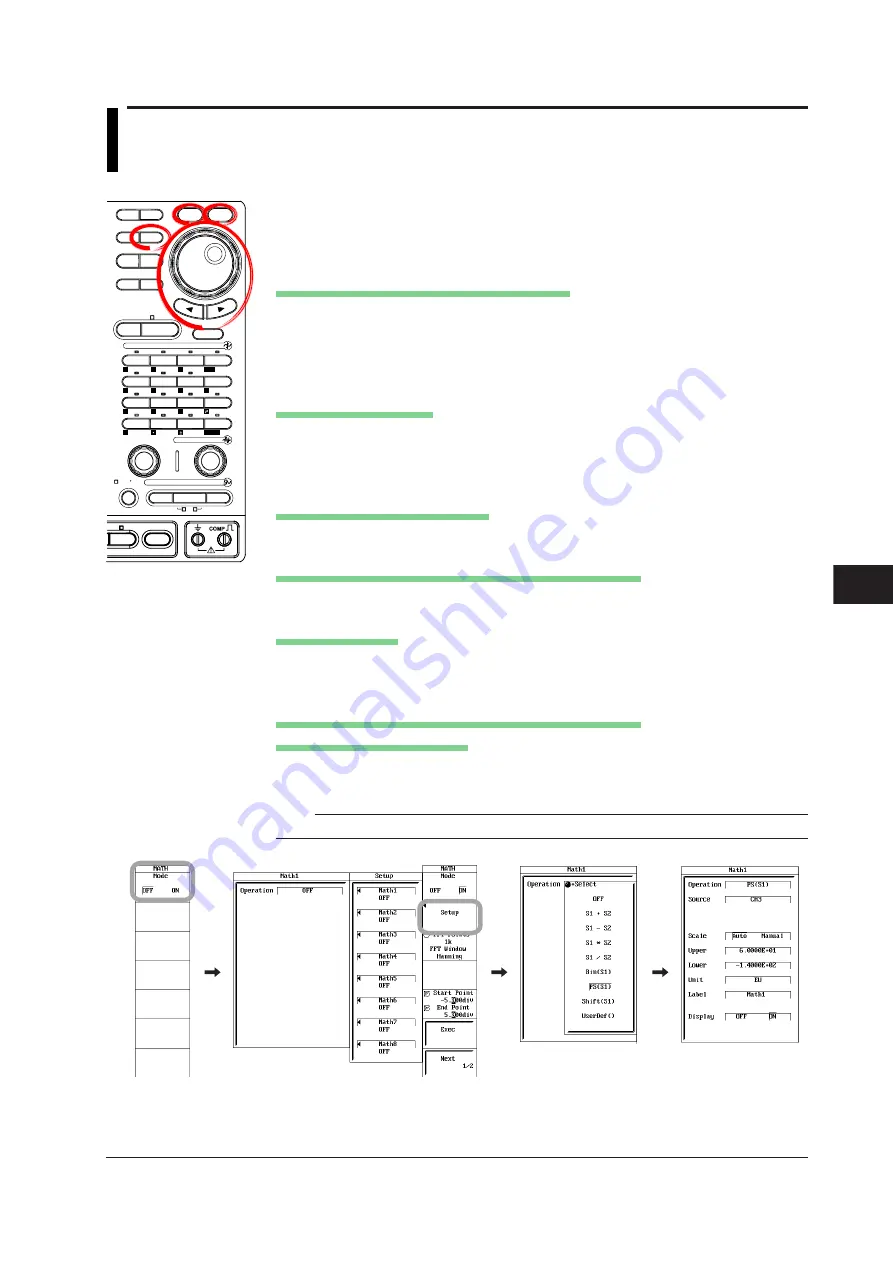
Waveform Computation
10
10.3 Performing Power Spectrum Computation (FFT)
<For a description of this function, refer to page 2-47.>
Procedure
MEASURE CURSOR
RESET
SELECT
CH
ALL CH
MODE
POSITION
SIMPLE/ENHANCED
ACQ
START/STOP
SETUP
DISPLAY
ZOOM
DUAL
CAPTURE
HISTORY
MATH
1
CH
2
CH
3
CH
4
CH
5
CH
6
CH
7
CH
8
CH
9
CH
10
CH
11
CH
12
CH
13
CH
14
CH
15
CH
16
DELAY
MANUAL TRIG
V/DIV
TIME/DIV
TRIGGER
TRIG D
VERTICAL
HORIZONTAL
CAL
X-Y
SEARCH
7
DSP 1
8
9
DSP 2
6
5
4
1
0
2
3
ENTER
m
DSP 6
DSP 5
LOGIC A
LOGIC B
EVENT
DSP 3
DSP 4
EXP
GO/NO-GO
ACTION
FILE
SHIFT
1.
Press
MATH
.
2.
Press the
Mode
soft key and select ON to display Math waveforms, OFF to not
display them. If you select ON, proceed to step 3.
Setting the Computation Start and End Points
3.
Press the
Start Point/End Point
soft key to set the jog shuttle control to Start
Point.
4.
Turn the
jog shuttle
to set the computation start point.
5.
Likewise, set the End Point.
Setting the Computation
6.
Press the
Setup
soft key. The Math1 to Math8 setup dialog boxes appear.
7.
Use the
jog shuttle
and
SELECT
to select the Math waveform you wish to set.
A MathX setup dialog box opens.
Setting the Computing Operation
8.
Use the
jog shuttle
and
SELECT
to set Operation to PS(S1).
Selecting the Channel on Which to Perform Computation
9.
Use the
jog shuttle
and
SELECT
to select Source.
Setting the Scaling
10.
Use the
jog shuttle
and
SELECT
to set Scale to Auto or Manual.
If you select Manual, proceed to step 11; if you select Auto, proceed to step 13.
Setting the Upper and Lower Limits of Waveform Display
(When Scale Is Set to Manual)
11.
Use the
jog shuttle
and
SELECT
to set Upper.
12.
Likewise, set Lower.
Note
If you select Auto, you cannot set Upper and Lower.
*1
*2
*3
*4
Above is the menu when the user-defined computation option is installed.
The menu on models without the option is as follows:*1: Phase Shift, *2: Threshold, *3: Start Point/End Point, *4: Exec


