3.4 Parameters setting
41
3.4 Parameters setting
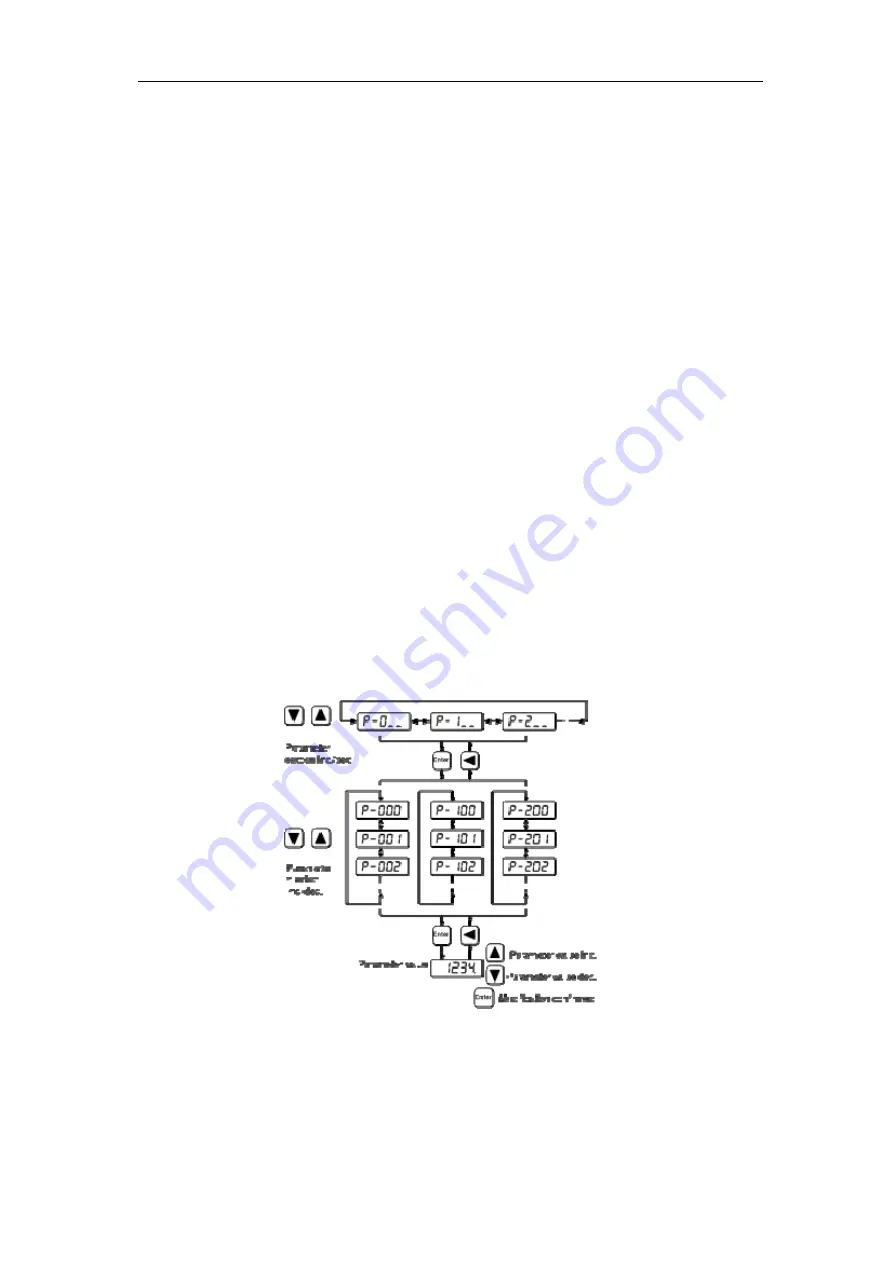
The parameter number expression uses a parameter section name combined with a parameter
name. The three figures are the section name and two figures and one figure are the parameter
name. Take P102 parameter as an example, '
1
' is the section name and '
02
' the parameter name.
"
P-102
" displays on the front panel LED.
Choose the parameter mode under the main menu "
P-
". Pressing the
5
button enters the
parameter-setting mode. First use
8
or
2
button to select the parameter section name and then
pressing
5
button enters the parameter name selection. Again, use
8
or
2
button to select the
parameter name and then pressing '5' button shows the parameter value.
Use
8
or
2
button to alter a parameter value. Pressing
8
or
2
button once to increase
(decrease) the parameter value by one. Pressing down and hold the
8
or
2
button, the
parameter value can increase (decrease) continuously. When the parameter value is modified, the
decimal point on the most right sides LED is lit. Press
5
button to confirm the parameter value
to be effective, meanwhile the decimal point turns off. The modified parameter value is
immediately active to influence on the control action (but some parameters needs to preserve
firstly and then turn off and on the power supply). Hereafter pressing
4
button returns to the
parameter number selection and can continue to modify a parameter. If the value is not satisfied,
do not press the
5
button and can press
4
button to cancel it for resuming the original
parameter value.
The modified parameter did not preserve in EEPROM. For permanent preservation, please
refer to the parameter writing operation in the parameter management (3.5 sections). The
parameter section name and the parameter name are not necessarily continual, but the parameter
section name and the parameter name that are not in use will be jumped over and cannot be
chosen.
Summary of Contents for EP3 AC Series
Page 1: ...Wuhan Maxsine Electric Co Ltd...
Page 12: ...Chapter 1 Product inspection and installment 2 1 2 Product nameplate...
Page 16: ...Chapter 1 Product inspection and installment 6...
Page 40: ...Chapter 2 Wiring 30 2 5 2 Wiring diagram for speed or torque control...
Page 57: ...3 7 Resume the parameter default values 47 Remarks...
Page 124: ...Chapter 4 Running 114 Remarks...
Page 221: ...198 Chapter 8 Specifications 8 1 Types of servo driver...
Page 231: ...8 5 Types of servo motor 8 5 Types of servo motor...


