8.
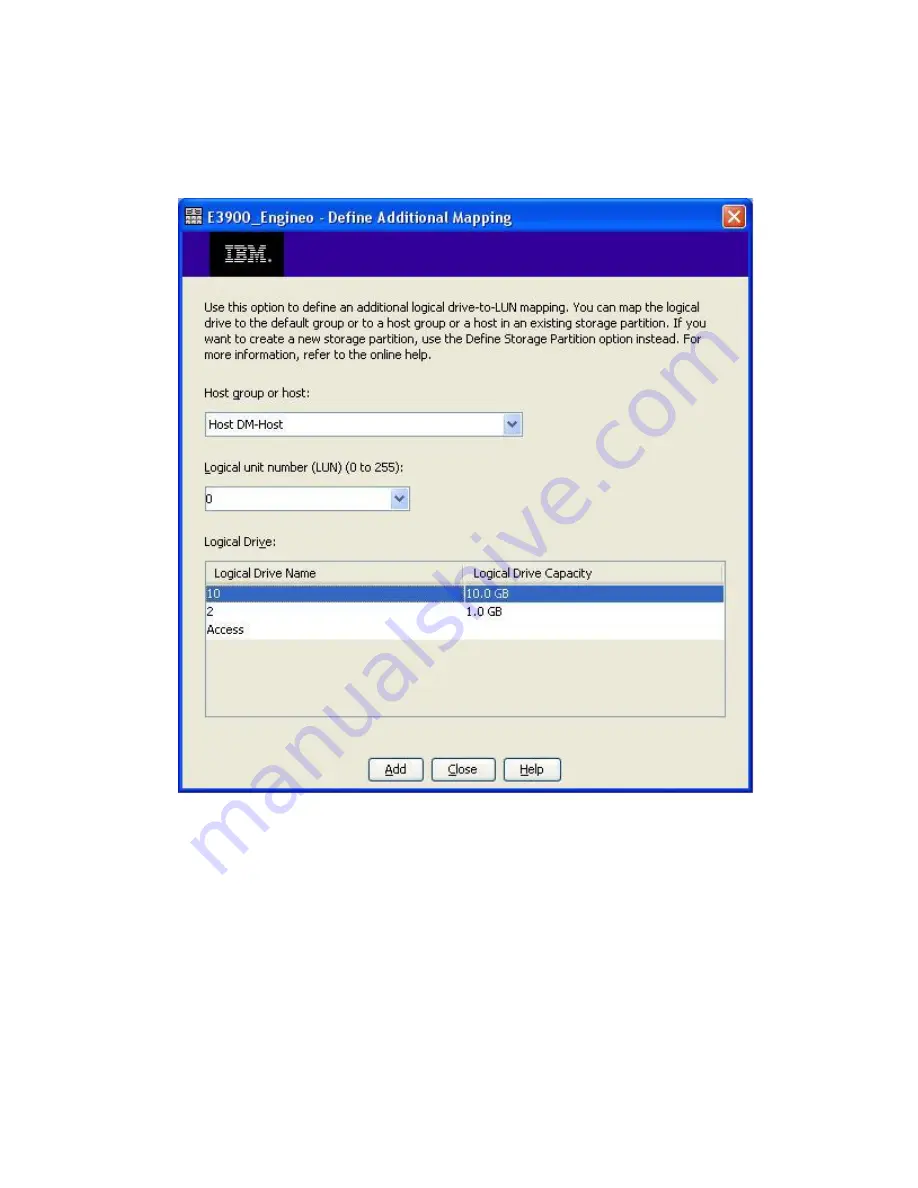
Complete the Define Additional Mapping dialog box as follows (see
Figure 140
):
a.
In the
Host group or host
box, click
DM-Host
.
b.
In the
Logical unit number (LUN) (0 to 255)
box, click the previously planned LUN number.
c.
Under
Logical Drive
, click the appropriate logical drive.
d.
To accept and save the LUN assignment, click
Add
.
Figure 140 Defining additional mapping
.
9.
Refresh the data migration user interface to see if the LUN assignment is reflected properly and
that the appropriate array entity appears under
FC Array
. (You may need to click the
Refresh
button several times to correctly reflect the changes.)
MPX200 Multifunction Router
393
Summary of Contents for Storageworks 8100 - enterprise virtual array
Page 20: ...20 ...
Page 30: ...MPX200 Multifunction Router overview 30 ...
Page 47: ...Figure 27 iSCSI controller options Remove controller MPX200 Multifunction Router 47 ...
Page 48: ...Managing the MPX200 using HP Command View EVA 48 ...
Page 59: ...Figure 32 Virtual disk properties Figure 33 Host details MPX200 Multifunction Router 59 ...
Page 112: ...MPX200 iSCSI configuration rules and guidelines 112 ...
Page 219: ...Load Balancing Enabled Array License Not Applied MPX200 Multifunction Router 219 ...
Page 248: ...Offline Data Migration 248 ...
Page 258: ...Diagnostics and troubleshooting 258 ...
Page 306: ...Command referencecommand reference 306 ...
Page 330: ... Blade number 1 or 2 Simple Network Management Protocol setup 330 ...
Page 368: ...Saving and restoring the MPX200 configuration 368 ...
Page 402: ...Data migration best practices 402 ...
Page 408: ...408 ...


