82
CMS-DH Central Management Software
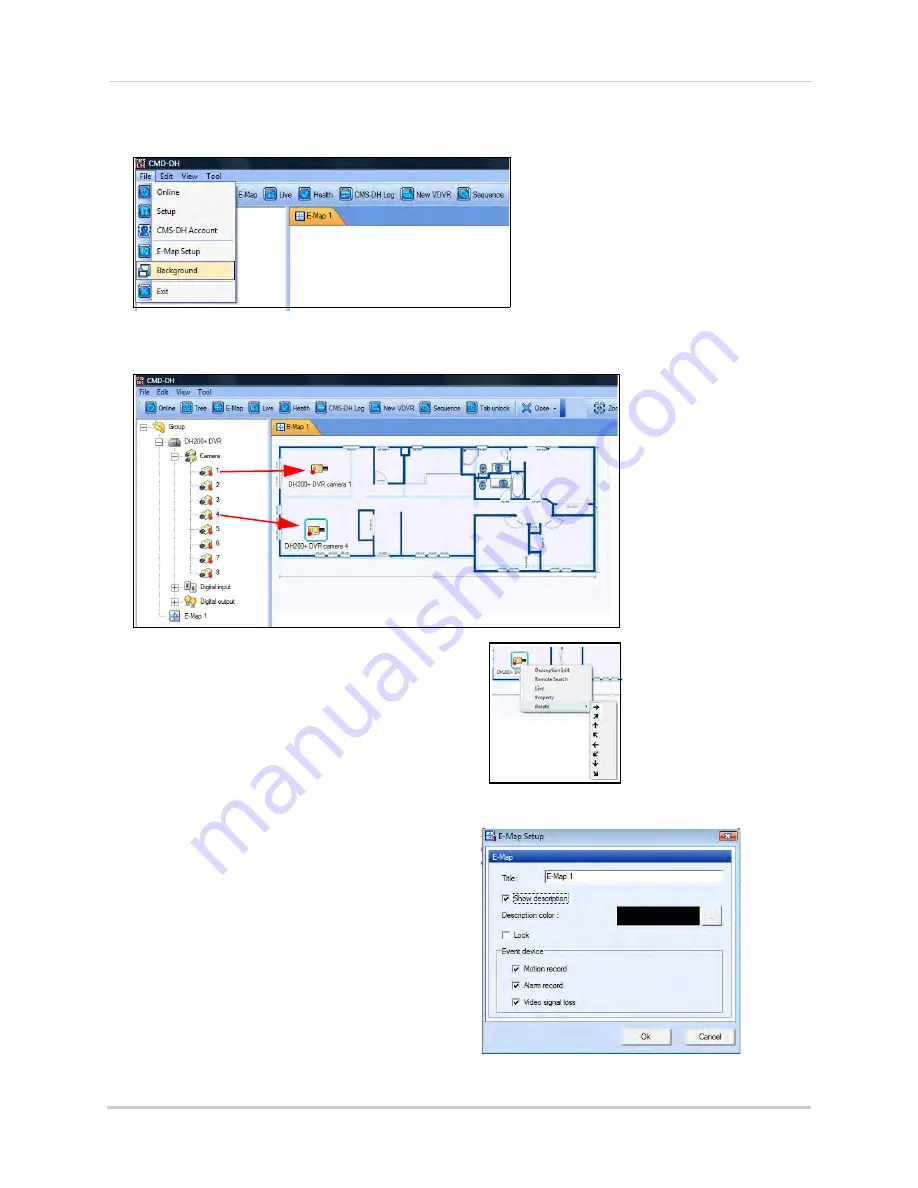
2. Click
File>Background
. Locate the file you wish to import, and then click
Open
.
3. Drag the desired cameras from the camera list, over the image.
TIP:
Drag
Drag
Tip:
To rotate the camera, right-click on the
camera, and click Rotate.
Click the desired turning position to rotate the
camera icon.
You can also drag the DVR icon and E-MAP icon over the image.
E-Map Setup
To configure the E-Map setup menu:
1. Click
File>E-Map Setup
.
2. Configure the following:
•
Title:
Change the camera title.
•
Show Description:
Show/hide camera name.
•
Lock:
Locks the camera position.
•
Description color:
Change e-map font color.
3. Click
Ok
to save your settings.
Summary of Contents for DH200+R Series
Page 12: ...xii...
Page 119: ...107 iSMS Client Remote Viewing on the Mac PTZ Controls cont d...
Page 174: ......
Page 175: ......


